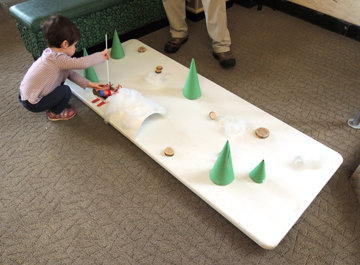
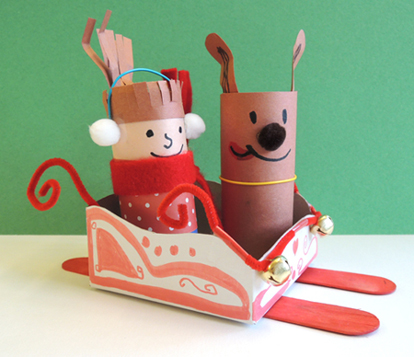
 Who doesn’t enjoy a good sled run? Especially when you get to ride in a comfy customized sled with a charming canine companion!
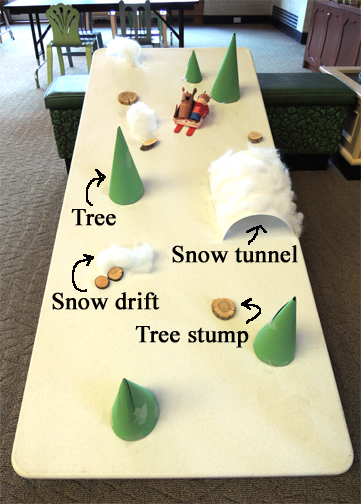
 And behold a white plastic folding table transformed into a delightful sled run, complete with wintry obstacles!
 We read Snow on Snow on Snow by Cheryl Chapman, illustrations by Synthia Saint James (Dial Books for Young Reader, 1994). One snowy, wintery day, a boy and his dog go sledding. But when Clancy the dog gets lost, everyone joins in the the search. Luckily, Clancy is found, and all is well. The story is simple, but the repetitive sentences read like poetry and make it a fantastic read-aloud for kids.
You’ll need:
- 1 box (mine was 2” x 4” x 4”)
- 2 jumbo craft sticks (mine was 7.75″)
- 2 pipe cleaners
- 2 small jingle bells
- 2 toilet paper tubes
- A selection of multicultural construction paper
- A selection of construction paper for hair, dog’s body, ears, and snow pants
- A selection of patterned paper (optional)
- 2 pieces of twisteez wire (pipe cleaners work too)
- 3 mini pom-poms (mine were 1/2″ in diameter)
- A 1″ x 12″ piece of felt
- 1 sled run (more on that later!)
- Scissors and tape for construction
- Markers for decorating
- Hot glue
Begin by cutting any lids or tabs off the top of your box. You want the top to be nice and open.
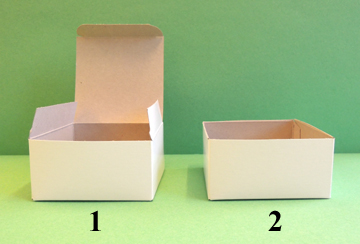 Then cut curvy “sled” lines in the top of the box. Make sure the back of the sled is taller that the front. Otherwise, your riders will tumble out!
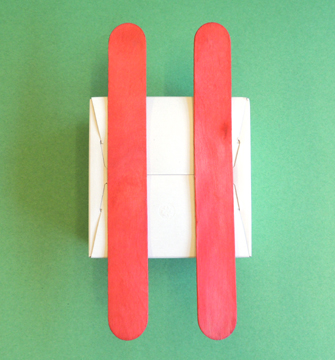
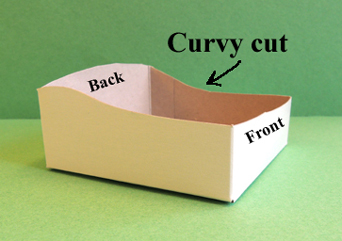 Use markers to decorate the outside of the sled, and then hot glue two jumbo craft sticks to the bottom of the box as runners.
 Next, thread two jingle bells onto a pipe cleaner, and bend and curl the ends like so:
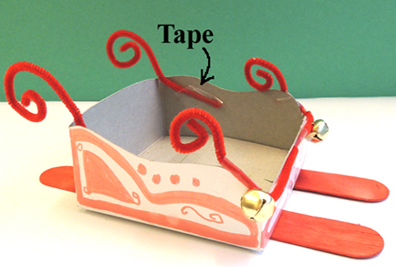
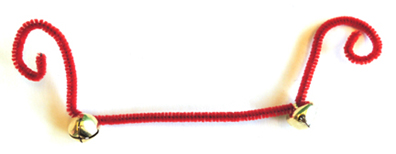 Tape the center of the jingle bell pipe cleaner to the front of the sled, and then fold the rest around the edge of the sled and secure with tape.
 Cut the second pipe cleaner in half, curl both pieces, and tape to the inside back of the sled.
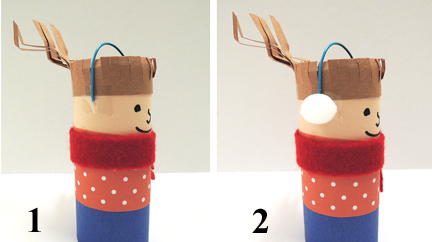
 Now for your riders! To make the human rider, wrap a 2″ x 6″ pieces of multicultural construction paper around the top of a toilet paper tube to create the face. Then wrap a 2.25″ x 6″ piece of construction paper around the bottom of the tube for pants.
Wrap a 2.5″ x 5.5″ piece of patterned paper around the middle of the tube for the jacket. Draw facial features with markers, and then fringe and tape some construction paper on top of the tube for hair. Finish by knotting a 1″ x 12″ piece of felt around the neck as a scarf (I fringed the ends of the scarf too).
If you’d like earmuffs, cut and tape a piece of twisteez wire (or pipe cleaner) on either side of the tube, then hot glue two mini pom-poms on top of the wire.
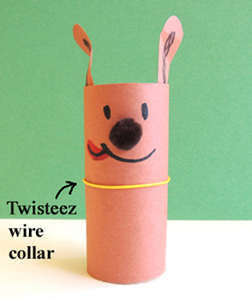
 To make the dog, wrap a 5.5″ x 6″ piece of construction paper around a toilet paper tube. Cut and tape ears to the top of the tube. Draw facial features with markers. Attach a pom-pom nose with hot glue. Then twist a piece of twisteez wire (or pipe cleaner) around the neck for the collar. Tape securely.
 Your amazing duo is done! To prepare them for their exciting ride, tilt them back in the sled like so:
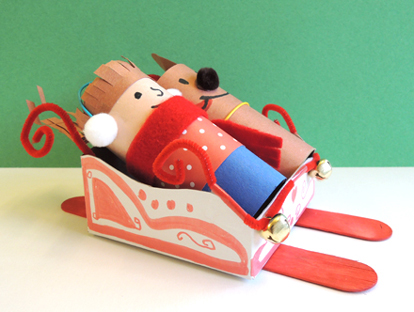 Time to hit the slopes! I had two plastic folding tables on hand, so I created two sled runs for kids to master.
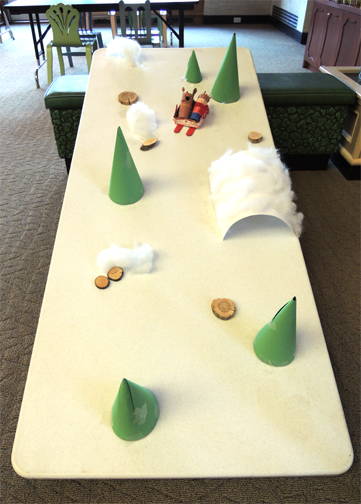 For the sledding obstacle course, you’ll need:
- One 6′ plastic folding table. A table with a white plastic top is best
- Clear packing tape
- A piece of 10.75″ x 13.5″ white poster board for snow tunnel
- Several handfuls of polyester fill
- Several 11″ x 14″ pieces of green poster board for trees
- Several wood rounds
- 1 balloon stick or wooden dowel
- Scissors
- Hot glue
The snow tunnel is the largest obstacle, so attach it first. Use packing tape to secure both ends (scotch tape isn’t strong enough) then hot glue the polyester fill to the outside of the poster board. Run the sled & riders through the tunnel to make sure the height and width works.
To make trees, curl the green poster board into a cone, secure the cone with packing tape, and then trim the bottom of the cone to make it relatively flat. Attach to the table with packing tape.
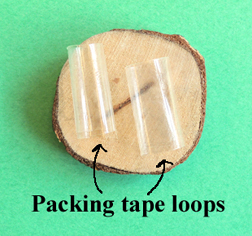
 To make tree stumps, attach packing tape loops to the back of the wood rounds, then press firmly to the table top.
 For snow drifts, grab a hunk of polyester fill, elongate it slightly, and then slap a big piece of packing tape over both ends to attach it to the table. Tape loops just don’t work!
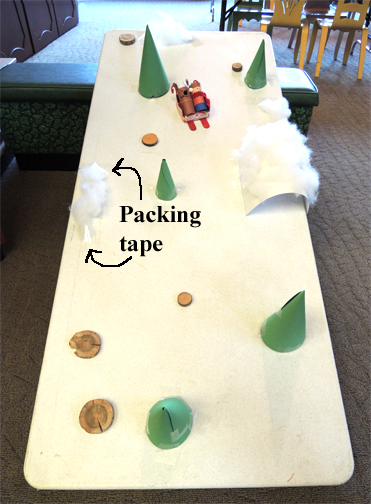 Prop the table up on a chair, bench, or box. We have some short cushioned benches that, in addition to the textured carpet on the floor, kept the table really secure. You’ll have to experiment with this a bit in your story time space.
To assist with steering down the hill, I gave the kids a balloon stick (a wooden dowel would work as well).
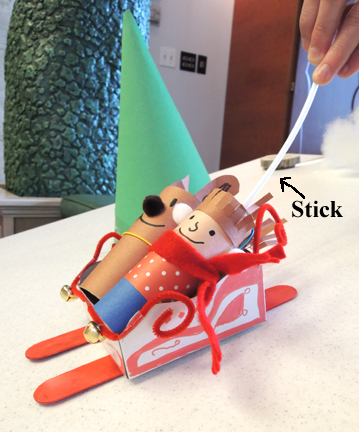 Some kids kept the stick in the back of the sled and walked their sleds down the hill. Others positioned their sleds at the top of the hill, lifted the stick out, and let it fly. One determined lad used the stick to push his sled uphill!
 I learned a few lessons about kids and plastic table top sledding hills during this story time. If I was to do this program again, I would:
- Not include as many obstacles, or have one table completely free of obstacles for sleds to whiz down.
- Have the tunnel be the “starting gate” at the top of the hill instead of making the kids maneuver over to it.
- Test different materials for steering the sleds (like wooden dowels, craft sticks, unsharpened pencils, a twig from the backyard) to see which one gives kids the best control.
- If you have very young children at story time, lay the sled hill flat on the ground so they can simply push the sled through the obstacle course like this:

