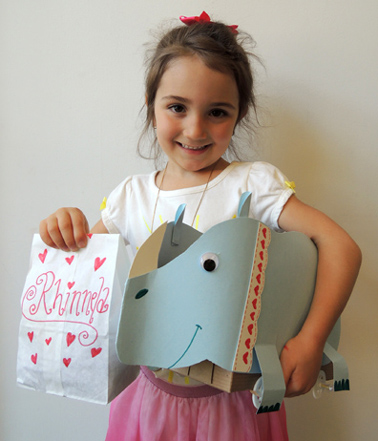
 Want a pet rhino? Of course you do! But pet ownership is a tremendous responsibility. Get prepared with a customized accessory bag that contains a water dish, rhino snacks, and a cozy fleece blanket.
We read Rita’s Rhino by Tony Ross (Andersen Press, 2014). Rita wants a pet, but her mom insists on something small. Like a flea. Or a tadpole. Unimpressed, Rita heads to the zoo and invites a rhinoceros home. She’s thrilled, but there are some problems. Like coaxing the rhino into the elevator, cramming him into her family’s small apartment, paying for heaps of specialized rhino food, and dealing with the enormous piles of poop that must be hidden in the park every day. Rita’s rhino is a good sport about his new, cramped life. Until he’s mistaken for a bouncy castle during a visit to Rita’s school. That does it. The rhino heads back to the zoo. But Rita and the rhino miss each other. So they agree to meet up, every summer, for a little beach vacation.
You’ll need:
- 1 large box (mine was 4.5” X 4.5” x 9” – a large tissue box works too)
- Light blue poster board
- A rhino body template, printed on 11 x 17 paper
- White poster board
- 1 small rectangle of tagboard or poster board (approximately 1.75″ x 3″)
- 1 piece of yarn (approximately 29″ in length)
- A pair of wiggle eyes
- 1 paper bag
- A rectangle of felt or fleece (approximately 11 x 15.5″)
- 1 paper cup
- A rectangle of blue cellophane (approximately 4″ x 5″)
- 1 small drawstring bag (or a small paper bag)
- A bit of paper crinkle
- Scissors and tape for construction
- Markers for decorating
- Hot glue
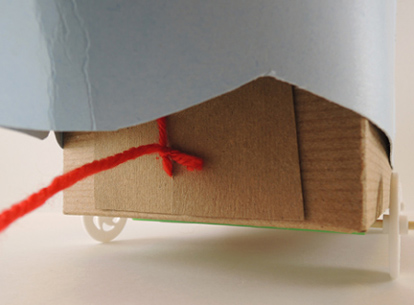
The rhino basically is a pull string toy, and we wanted it to glide effortlessly across the floor on its leash. So we attached wheels to the bottom of our boxes. We used the same plastic wheels assemblies from this crêpe cart project (and if you’re interested in purchasing the wheels, you’ll find info in this post). Tape shortened drinking straws to the bottom of the box, thread some bamboo skewer axles through the straws, then stick the plastic wheels on the ends of the skewers.
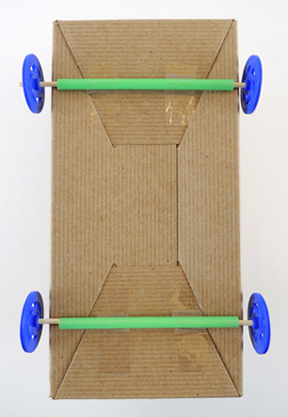 You can also use cardboard wheels or skip the wheels entirely and simply slide the box across the floor. Now for the rest of the rhino! Fold a large, 7.5″ x 28″ piece of light blue poster board in half. Cut the rhino body from the template, then place the nose of the rhino template against the fold in the poster board. Cut the template out of the poster board, leaving the nose fold intact.
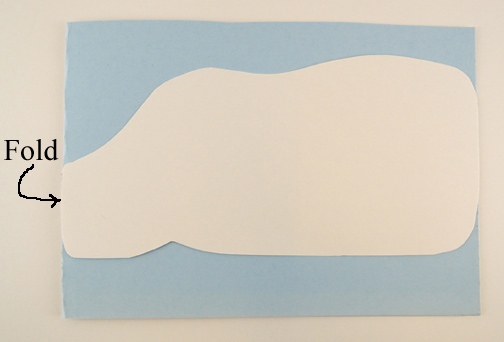 Cut a rhino horn out of white poster board and hot glue it inside the fold. Hot glue 1″ of the entire front of the fold together as well. This gives your rhino the appropriate muzzle shape. Tape or glue the rhino body to the box, making sure the leave about 1″ of space between the rhino body and the bottom of the box.
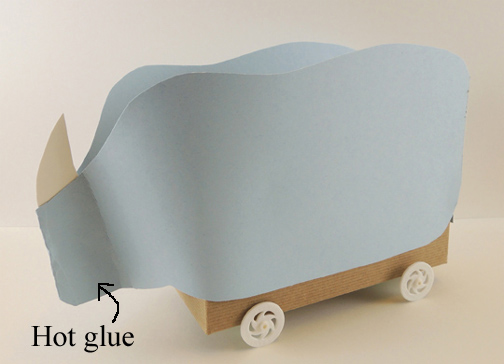 Cut a piece of light blue poster board to fit the back section of the box. Round the top of it and tape or hot glue it to the box. This is your rhino’s rump. Again, leave about 1″ of space between the rhino body and the bottom of the box. And don’t forget to add a tail!
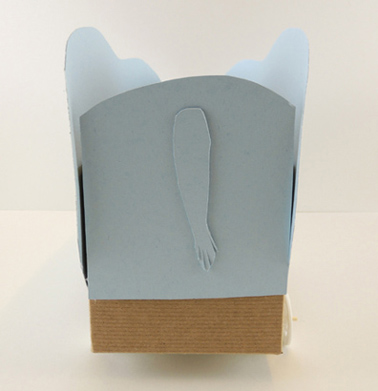
Attach a pair of ears, a pair of wiggle eyes, and 4 legs. Our legs were 2″ x 3.5″. We bent them slightly so they wouldn’t drag on the ground or rub against the wheels. Use markers to add nostrils, a smile, and toenails. Decorate two strips of white poster board (ours were 1″ x 6″) and attach to either side of the neck to create a collar.
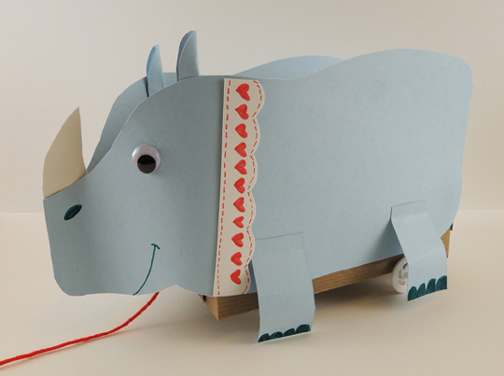
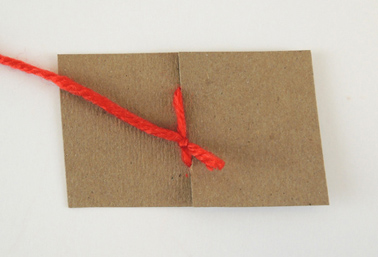
Did you notice the red yarn leash in the above photo? To make a leash, cut notches in a 1.75″ x 3″ piece of tagboard or poster board, then knot a 29″ piece of yarn around it.
 Attach the leash assembly to the front of the box (under the rhino’s the “chin”). Keep the assembly towards the bottom of the box. If it’s up too high, your rhino will keep tipping over.
 That’s it for the rhino, now for your accessories! Our paper accessory bags held a water dish, a bag of African grass, and a fleece blanket (we offered a choice of pink, blue, or purple).
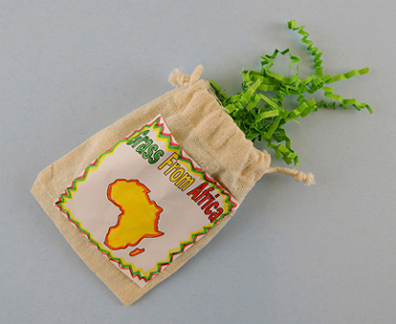
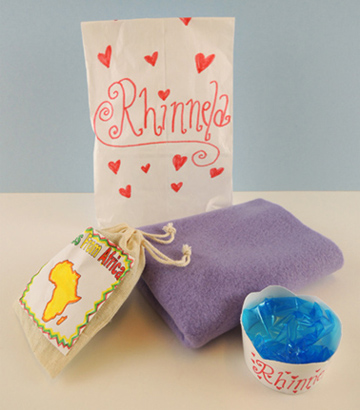 The water dish was a shortened paper cup with blue cellophane taped to it. In the book, Rita’s rhino eats African grass, so we hot glued labels to the front of a small drawstring bag (left over from this Viking event). The kids colored in the labels and stuffed the bags with a green paper crinkle.
You’ll notice the paper bag and the water dish have the rhino’s name emblazoned on them. You can write directly on the paper bag, but we used address labels for the water dish. I loved this part of the project. The names were so creative! A few of my favorites? Bluebell, Giga, Bubba, Trix, Tany, Twinkle, and Baki. You gotta love Twinkle the rhino.
