 This is an extremely simple project that, with a little prepping beforehand, a staff person can run by his or herself. And the results are fantastic!
We read Edna’s Tail by Lisze Bechtold (Houghton Mills, 2001). Edna is a cat with the biggest, fluffiest tail in the neighborhood. She spends all her time making a show of it and is only lured out of her window with the promise of a feline party in the woods. As she progresses through the woods, she gets the feeling that something is following her. Actually, it’s debris getting stuck in her fluffy tail, resulting in a display so horrifying that Edna is convinced she’s being chased by a monster. She attacks, only to discover it’s her own tail! Luckily, the other cats at the party are good-natured about the mistake, and she make a lovely new friend.
If you’re worried about how this project will go over with boys, have no fear. I gave them the option of creating a “scary monster face” like the one in the book!
You’ll need:
- 1 strip of white poster board for headband (approximately 22 long x 2.5″ wide)
- 2 triangular pieces of poster board for cat ears
- 2 triangular pieces of self-adhesive foam for the ears (I offered a pink or yellow option, but you can also use markers)
- 1/2 sheets of white poster board (approximately 22″ long x 13.5″ wide)
- Hole punch
- Hot glue
- 1 long piece of curling ribbon for belt
- Stapler, scissors, tape, and glue stick for construction
- Supplies for decorating! In addition to items from the Bling Bin, we offered assorted pipe cleaners, crepe paper streamers, tissue paper sheets, construction paper, pom-poms, poster board strips…
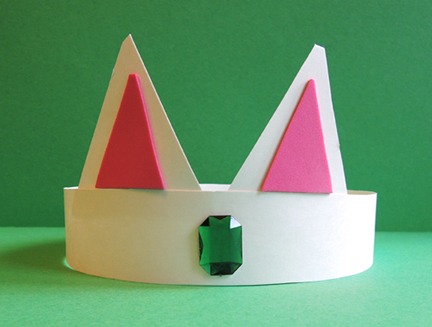
For the headband, wrap the strip of poster board around the kid’s head, then remove and staple. Staple ears in the front of the headband above eyebrows. I offered a choice of pink or yellow self-adhesive foam to create some texture inside the ears, but you can also use markers.
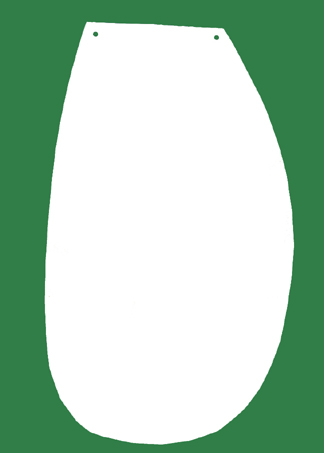
 I also offered to hot glue a large gemstone on the front of the headband. Oo-la-la! For the tail template, take 1/2 sheet of poster board, and cut it in this shape:
 Yes, it does look like a lopsided, elongated lid of a potty seat. But we won’t go there.
Punch two holes at the top BEFORE decorating begins, and instruct the kids not to cover the holes while they’re decorating (otherwise, you run the risk of the curling ribbon belt not going through). Then, turn them loose on the art supplies!
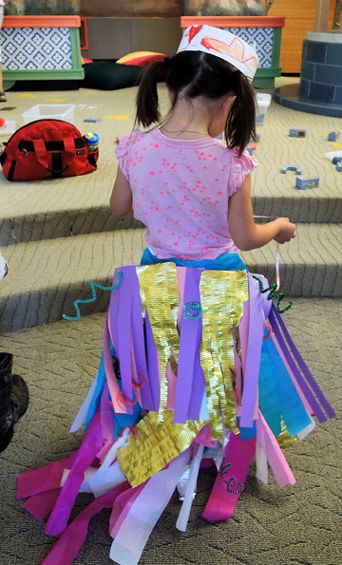
We found it helpful to staple multicolored poster board and construction paper strips to the top and sides first, and then added lots of little stuff on top. You can add bulk to the tail by crumbling up tissue paper and sticking it under the poster board and construction paper strips. We also had great results with sheets of tissue paper fringed and hung below and off the sides. I had my hot glue gun ready and waiting in case there was something that needed extra reinforcement.
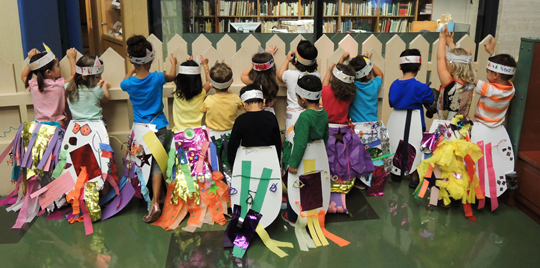
When the tail is finished, run the curling ribbon through the two holes and then tie it around the waist! Just look at these amazing creations!
 If you don’t have a plethora of art supplies, don’t worry. The tail can be decorated with plain old crayons, markers, or even paint. Kids will have fun no matter what!
