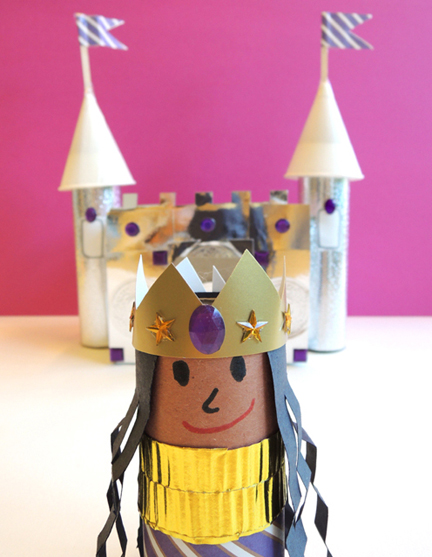
 A princess or prince to pal around with? Check! Gleaming castle with banners flying? Check! Bejeweled crown to wear upon thy head?
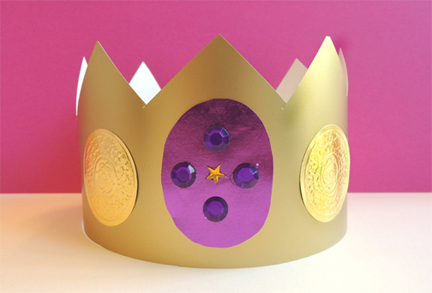 Check! You’re ready to run with the royals!
We read Princess Me, written by Karma Wilson and illustrated by Christa Unzner (Margaret K. McElderry Books, 2007). This sweet rhyming book describes all the qualities of “Princess Me,” a kind, gentle, mannerly, and just princess who benevolently reigns over her land of toys and dolls. The twist comes at the end, after the princess is tucked into bed with a kiss from the king and queen. That’s when we learn that Princess Me is, in fact, Princess You!
You’ll need:
- 1 box (mine was 4 ½” X 4 ½” x 6”)
- A box cutter
- 1 rectangle of tagboard for drawbridge door
- 2 paper towel tubes
- 2 wooden coffee stirrers
- A selection of patterned paper
- 2 cone water cups
- A selection of castle & crown decorating materials – embossed foil paper, mirror board, aluminum foil, construction paper, embossed foil seals, etc.
- 1 toilet paper tube
- 1 rectangle of multicultural construction paper (approximately 2″ x 6″)
- 1-2 rectangles of construction paper for hair (approximately 2.75″ x 4.25″)
- A small rectangle of gold metallic poster board (1.25″ x 6.25″)
- A large rectangle of gold metallic poster board (4.5″ x 22″)
- A selection of small gemstones (optional)
- Scissors, tape, glue stick, and stapler for construction
- Markers for decorating
- Hot glue
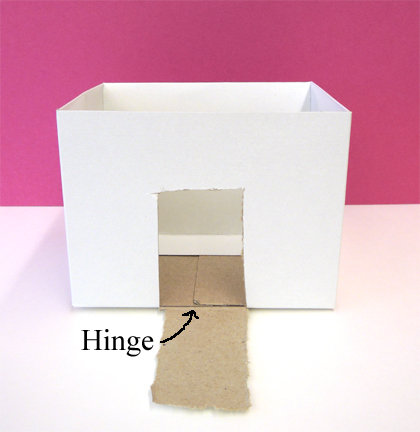
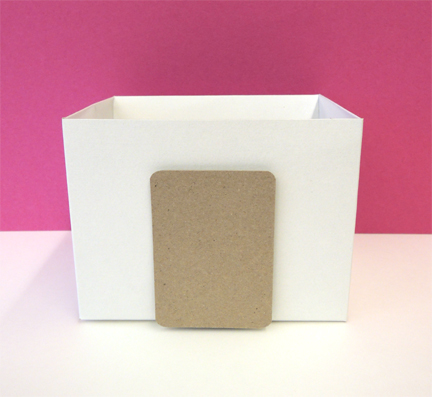
First, use the box cutter to cut a drawbridge out of the front of the box. Make sure, however, that the door’s “hinge” remains attached to the bottom of the box.
 Next, hot glue a rectangle of tagboard to the outside of the door.
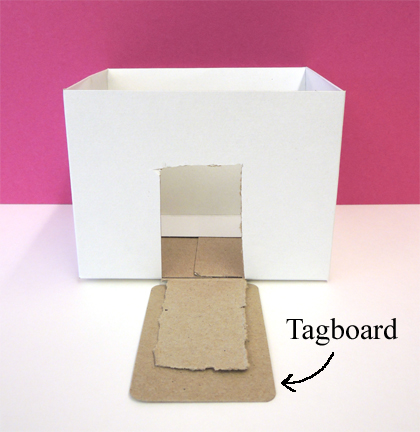 The tagboard will give the drawbridge some some heft and weight as it opens and shuts.
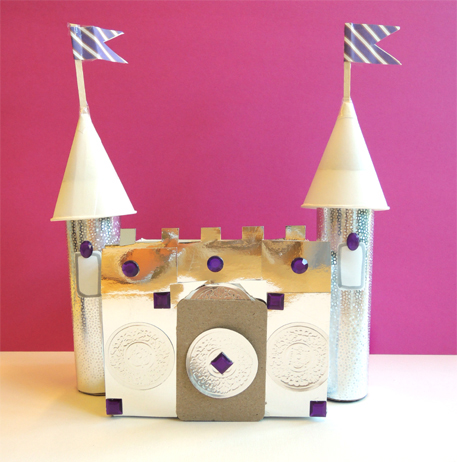
 Use scissors to cut the paper towel tube “towers” to the desired height for your castle (my tubes were 7″ tall). Now decorate the tubes and your castle with metallic paper, construction paper, aluminum foil, mirror board, foil seals – whatever you like! When you’re finished decorating, hot glue the towers to the sides of the castle.
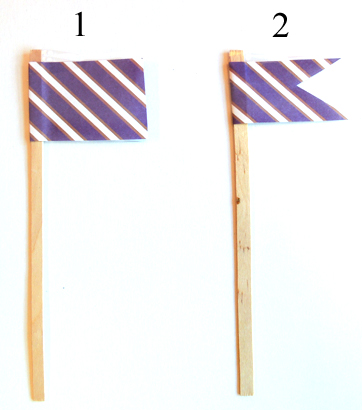
Wrap a piece of patterned paper around the top of each coffee stirrer, then secure with glue or tape. Trim one edge to create a banner-style flag.
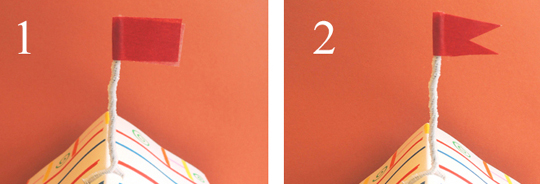
 If you’re looking for an easier flag to assemble, use color masking tape to make a banner flag (as seen from this mini circus tent project).
 To make “turrets” for your castle towers, snip the top off a cone water cup like so:
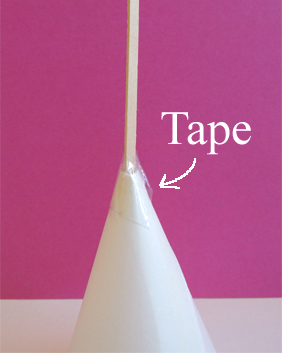
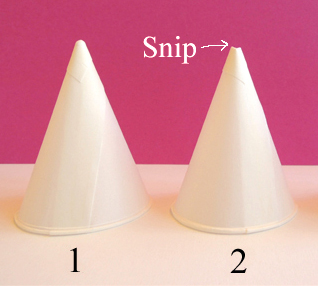 Then drop the flag’s pole into the top of the cup. Center it, then wrap it with tape to attach it to the cone cup. Repeat with the other cup and flag.
 Hot glue the turrets to the tops of the castle towers. Ta da! Your castle is complete!
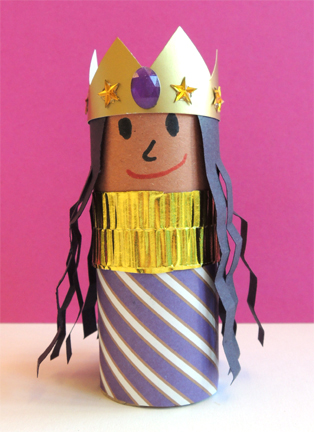
 To make your princess or prince, wrap the top of a toilet paper tube with multicultural construction paper, then use markers to draw a face. Wrap the remainder of the tube with a piece of patterned paper and add a fancy collar if you like. Attach construction paper hair and a gold poster board crown. This project definitely cried out for gemstones, which we attached to the crown (and castle) with hot glue.
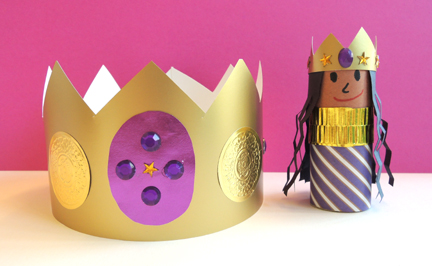
 Now it’s time for your crown! Cut a crown pattern out of a large rectangle of gold poster board, wrap around your head, remove, then staple. Decorate your crown with the remaining art supplies on the table. We encouraged kids to have their crowns somewhat match their tube counterparts. Finished!
 Need a little entertainment at your castle? Perhaps this post would be of some assistance!
