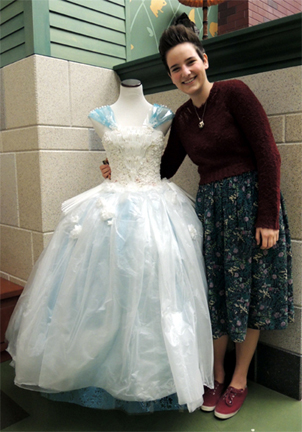
 This winter, I posted a sneak peek of a Cinderella dress created by local high school junior, Vicky Gebert. The dress was constructed of bubble wrap, trashcan liners, drinking straws, t-shirt bags, forks, blue cellophane lace, Styrofoam, and chicken wire. It looked utterly amazing.
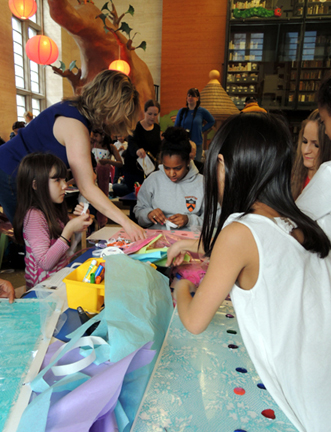
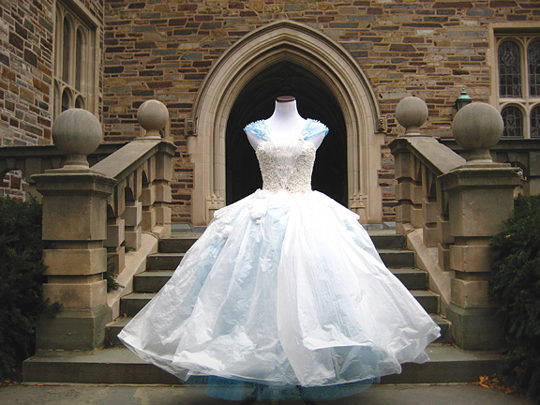 Vicky’s dress was the centerpiece of a Cinderella Story: Make a Princess Dress program our library hosted last weekend. Kids were invited to channel their inner godmothers and create a dress out of art supplies (including supplies you might not immediately consider when planning a grand night out).
If you can’t wait to see some of the creative dresses, scroll past the instructions and let the fashion show begin. Otherwise, here are instructions for building your own princess dress!
For the dress base, you’ll need:
- A 11″ x 28″ piece of poster board for the bodice
- A 4″ x 28″ pieces of poster board for the skirt sash
- 4′ piece of ribbon for the bodice
- 2′ piece of ribbon for the skirt sash
- 2, 20″ pieces of tulle ribbon for shoulder straps
- Scissors
- Hole punch
I used black poster board to make the example dress (it shows up better in photos), but for the actual program, the bodice and skirt sash were made of white poster board. Definitely use the thicker variety of poster board (i.e. 6-ply) because it’ll hold up to all the art supplies you’ll be adding later. I also used 3/8″ white ribbon. It was easier to lace that particular width of ribbon through the punched holes without tearing the poster board. The tulle ribbon I used was 3″ wide to allow easier threading as well.
The Nearly New Shop, a local thrift and consignment store, was kind enough to loan us a dress mannequin for the program. It really helped to have the dress base on display so grown-ups could see what the final product should look like.
OK, ready to get started? First, wrap the largest piece of poster board around your upper body until both ends almost touch behind your back. Trim with scissors if the bodice is too long, cuts into your armpits, or if you want to create an unusual neckline.
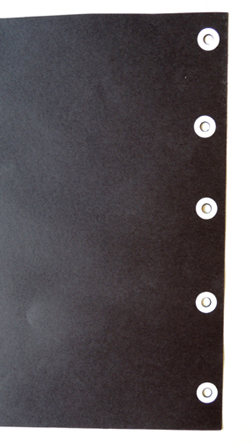
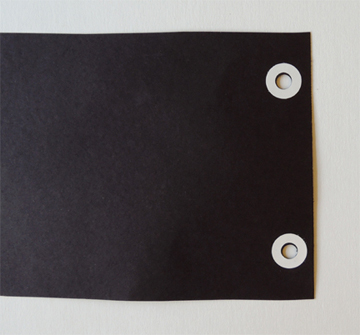
Use a hole punch to make 5 matching pairs of holes down the back of the bodice
(our holes are marked with white rings in the photo so you can see them better).
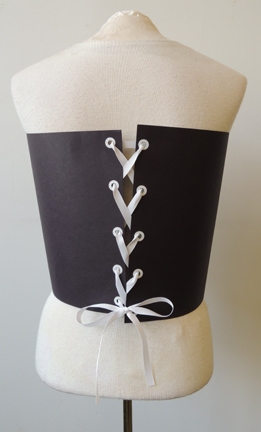
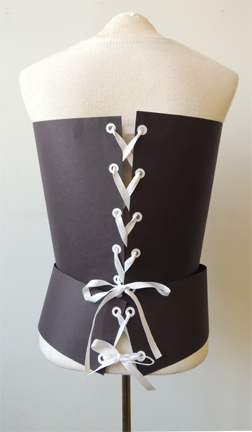
 Starting at the top of the bodice, lace the 4’ piece of ribbon through the holes. Tie
a bow at the bottom.
 Next, wrap the smaller piece of poster board around your waist until both ends almost touch. Use the hole punch to create 2 pairs of holes.
 Lace the 2’ piece of ribbon through the holes. Tie a bow.
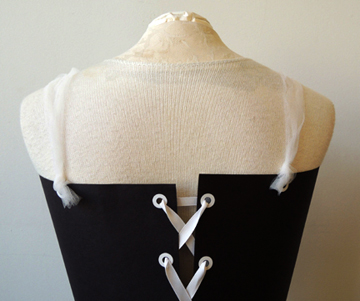
 Lastly, your shoulder straps! Slip on the bodice and adjust it to the right height on your chest. Punch a hole in the front of your bodice, directly underneath your shoulder. Punch a matching hole in the back. Thread a 20″ piece of tulle ribbon through the hole in the front and knot securely. Pull the tulle ribbon over your shoulder and thread through the hole in the back. Knot tightly and cut off any excess. Repeat on the other side. The finished straps should look like this:
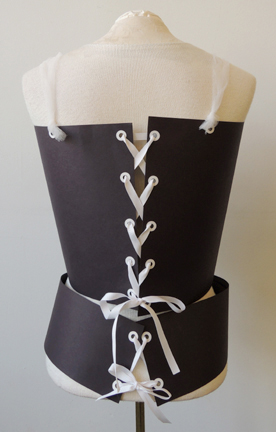
 Your dress base is complete!
 Now that you know your dress fits, I recommend unlacing the bodice and the skirt sash and laying them flat for decorating. This is especially useful for the skirt sash. It’s easier to make a huge fluffy skirt on a flat surface than a curved surface.
Here are the art supplies we used at the program:
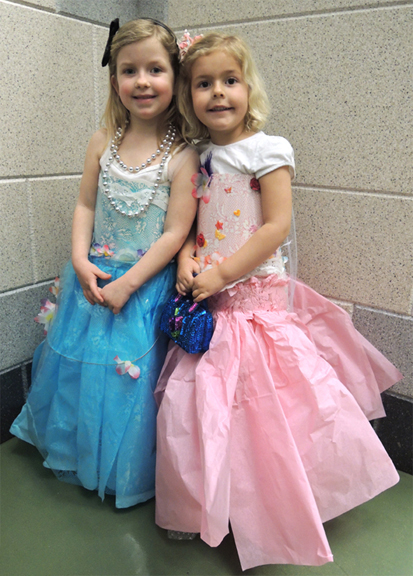
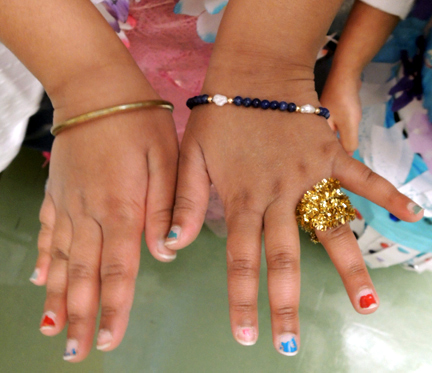
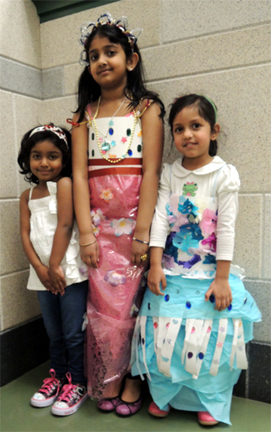
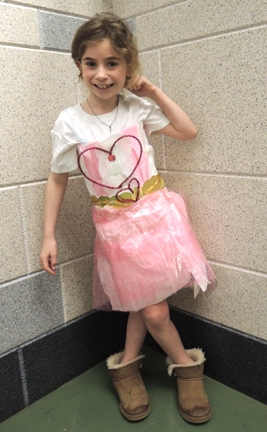
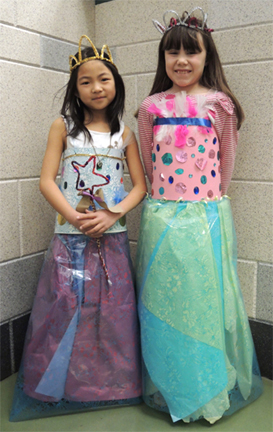
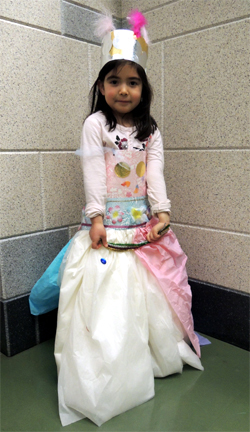
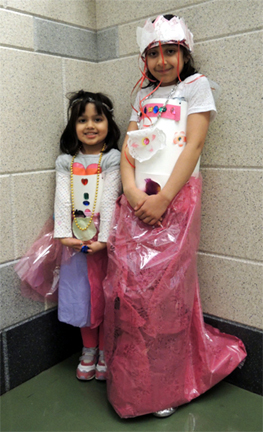
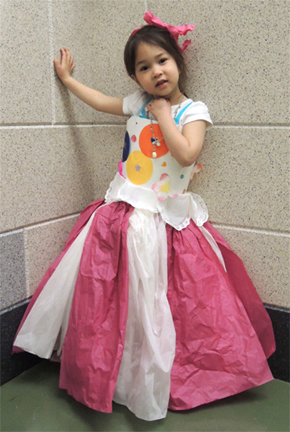
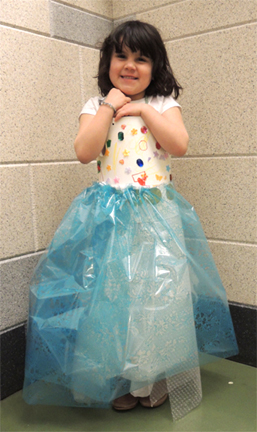
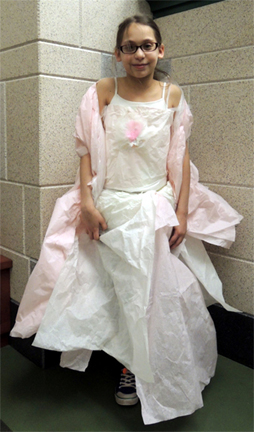
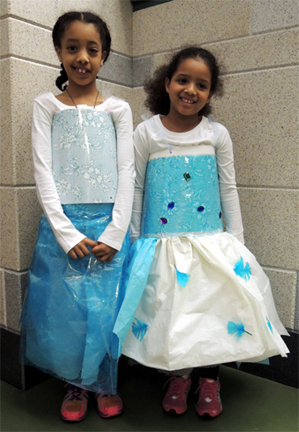
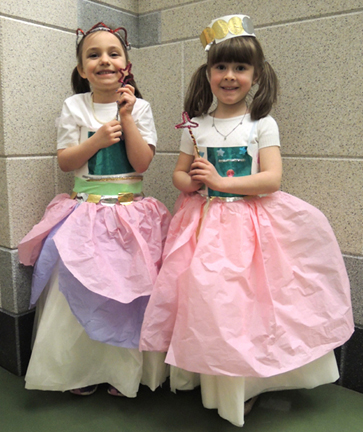
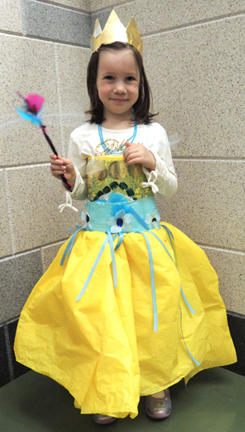
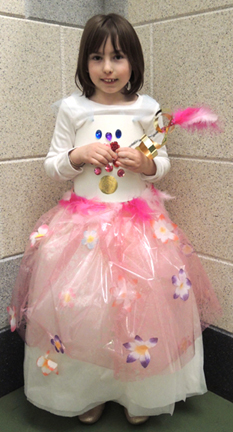
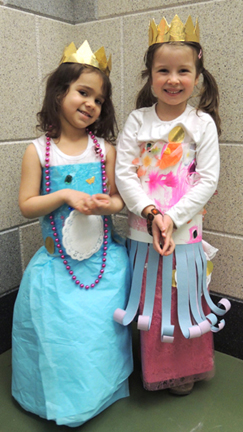
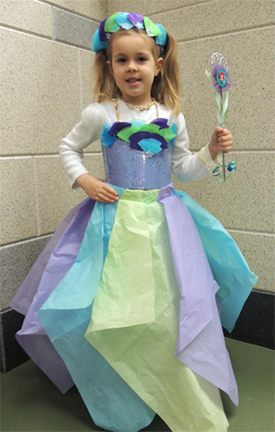
What can I say? We had a tremendous time! The kids not only made dresses, but matching crowns, wands, accessories, hairpieces, and jewelry. It was wonderful.
 And here’s the inspiration for the program, artist Vicky Gebert! Vicky answered questions about her dress, crafted with kids, and generally lent her awesome creative magic to the program.
 We were also joined by two Princeton University student groups – the Sustainable Fashion Initiative and the Stella Art Club. They were incredibly creative and incredibly sweet with the kids.
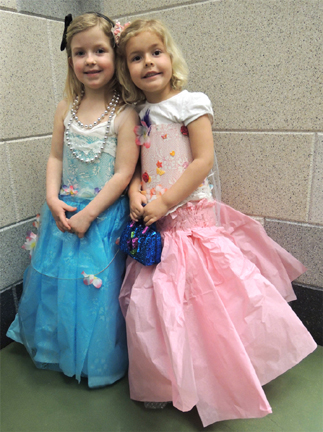
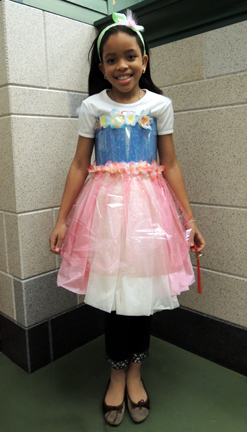
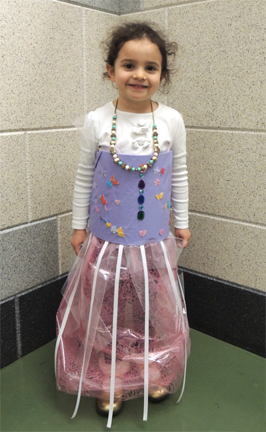
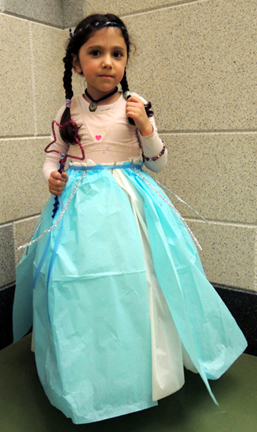
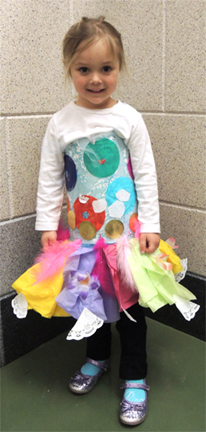
 And now…some of those fantastic, fabulous, and fanciful dresses! Fanfare please…

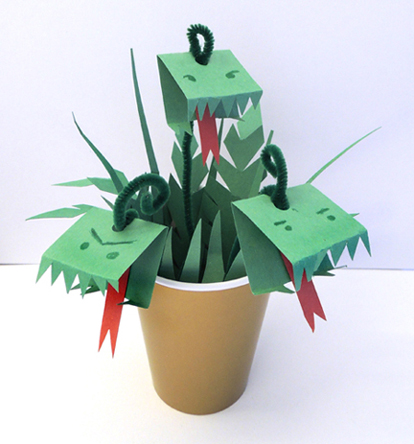 Snapdragon anyone? I’ve offered this simple project at a number of programs in the past, and it’s always well-received. “Snappy” has decorated the edges of a swamp at a Halloween party, hid in an Alice in Wonderland garden, and grown out of pots at a “Primordial Plants” event table!
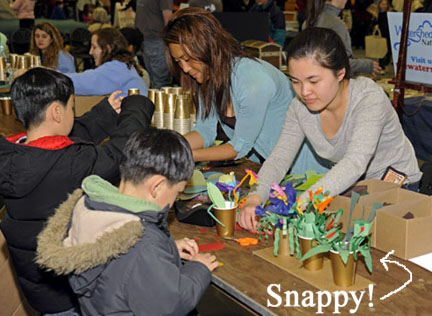 You’ll need:
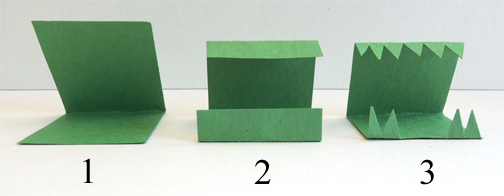 Make sure to leave a gap in the lower teeth (this is where the tongue will rest later).
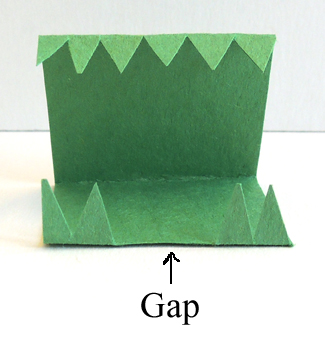 Next, punch a hole in the back of Snappy’s head…
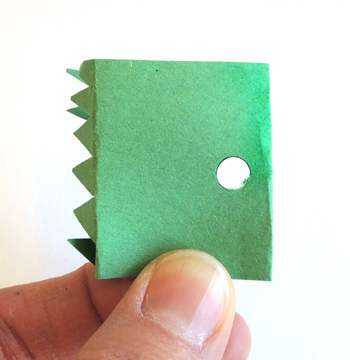 Then thread a green pipe cleaner through the hole. Twist the pipe cleaner around and thread it through the hole once again. Pull gently to tighten, then curl the end.
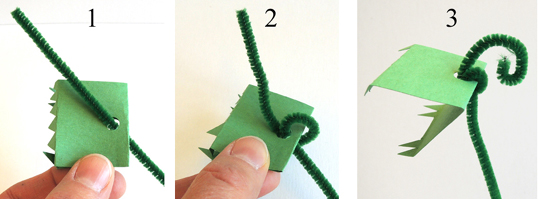 Cut the sliver of red construction paper to look like a forked tongue and tape (or glue) it into the mouth.
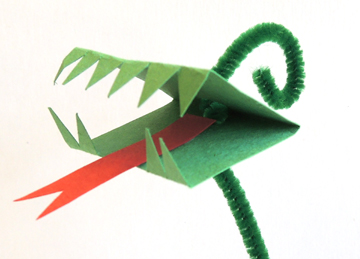 Use markers to draw eyes. I added my eyes at the very end, but younger kids might have an easier time drawing the eyes earlier, such as before they attach the head to the pipe cleaner stem.
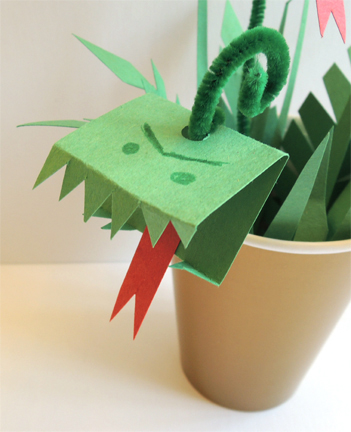 Tape the pipe cleaner stem inside the paper cup. Use extra green construction paper to add foliage. Done! Perhaps you can test out your new Snappy skills with this garden story time?