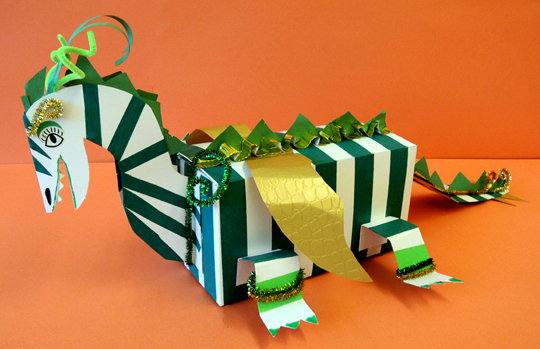
 Dragons are always popular at our story times. Who doesn’t love a dragon? This dragon is simple to construct, but allows plenty of room for creativity.
We read East Dragon, West Dragon written by Robyn Eversole and illustrated by Scott Campbell (Atheneum Books, 2012). The East Dragon and the West Dragon lives on opposite sides of the earth, but both have heard of the others’ long tail, mighty wings, and massive fire power. So they stay away from each other. However, after a funny political mishap (involving dragon-paranoid knights and the introduction of the honorable court dragons of the East) the two dragons must meet to sort out the mess – and rescue each other in the process. They become great friends and throw the ultimate dragon party.
You’ll need:
- 1 box (I used a 9” x 4 ½” X 4 ½” white craft box, but a large tissue box works too)
- 1 dragon head template, printed on 8.5″ x 11″ white card stock
- 1 wings template, printed on 8.5″ x 11″ white card stock
- White poster board pieces for tail and legs
- A selection of eye stickers
- A selection of color masking tape
- Pipe cleaners
- A selection of construction paper
- Gold heavy weight paper for wings (optional)
- Markers for decoration
- Scissors and scotch tape for construction
Since I was going to run this program without an assistant, I prepped the head, wings, legs, and tails in advance.
You can certainly use the head and wings templates as they are – meaning, printed on card stock. However, since I knew I would be using color masking tape and other weighty art materials, I traced the head template onto poster board, and the wings onto gold faux leather paper I had left over from another program.
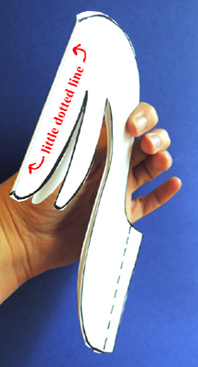
After you’ve cut the dragon’s head from them template, fold it along the little dotted line to create the “nose.”
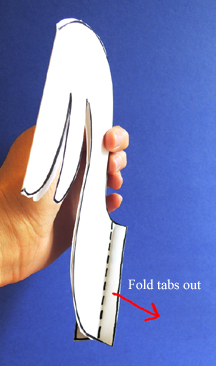
 Then fold the thicker dotted lines at the base of the neck outwards. This creates the tabs that allow you to tape the dragon’s head to its body. And don’t forget the sticker eyes!
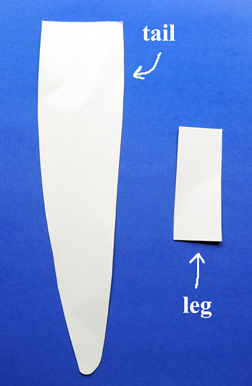
 Cut the tail and legs from poster board. My tail was about 3.5″ x 14.5″ and the legs were 1.5″ x 5″
 During the story time, we decorated the box first, then we decorated the head, tail, and legs before we taped them on the box. After all of those items were attached, we added pipe cleaner “horns,” construction paper spines, wings, and I brought out the Bling Bin for some extra touches (and, as always, the hot glue gun was ready and waiting)!
During story time, I couldn’t resist snapping a photo of this marvelous dragon, with its super-special mobility modification…

