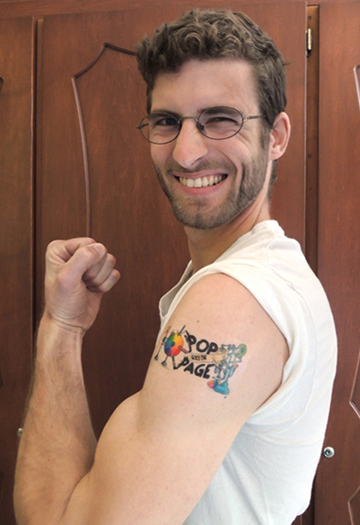
 No, this isn’t a diehard Pop Goes the Page reader permanently commemorating his fandom. Mr. Ian (whom you might recall seeing in this post) is in fact modeling a custom printable tattoo. Why? Because we’re adding art product reviews to our blogging fun, and thought we’d start by checking out this printable tattoo paper by Silhouette.
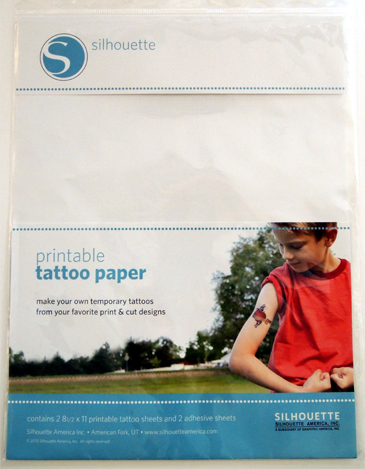 I purchased the paper at our local Paper Source store for $11.95. One pack includes 2, 8.5″ x 11″ printable tattoo sheets and 2 adhesive sheets. The instructions call for additional items like “Silhouette software,” a “Silhouette optic scanner,” a “scraper tool,” and “Robo Master software.” You don’t need any of that. You can manage perfectly well with a desktop printer (or a color copier), a credit or ID card, and a pair of scissors.
First, insert the image you’d like to use into a document on your computer. IMPORTANT! If you’re creating a tattoo with writing, or if you need the tattoo to have a particular orientation, you’ll need to mirror the image (i.e. flip it horizontally) so it will display properly later. You can do mirror images in photo editing software (like Photoshop), but we used Microsoft Publisher with much success.
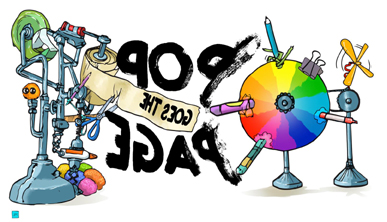 Feed the tattoo paper into the printer, making sure that the machine is set to print on the paper’s glossy side. We used an HP Officejet printer, but we also tried a color copier. Both worked!
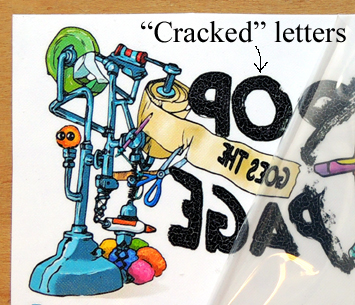
 We did notice, however, that the black lettering came out looking cracked when we used the Officejet printer. We didn’t have any problems like that when we used the color copier. So the paper definitely reacts to different types of toners.
 When the ink is dry, peel and apply the adhesive sheet to the top of the printed image. Then use a credit or ID card to flatten out any winkles or creases. Use scissors to cut the tattoo from the page.
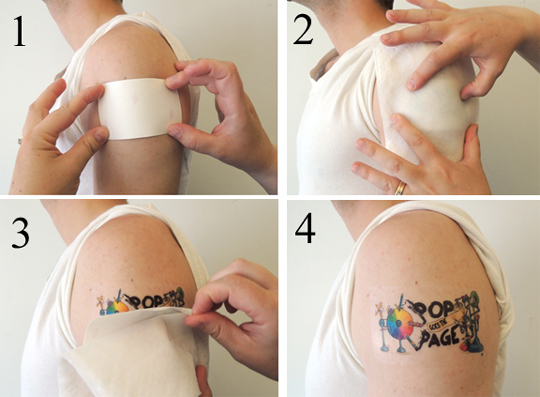
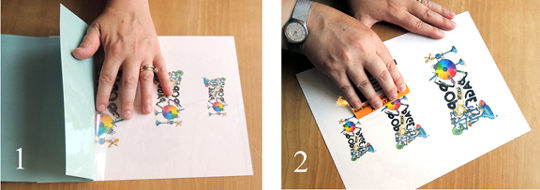 To apply the tattoo to your skin, peel away the adhesive sheet, then press the image against your skin. Cover with a wet paper towel for 30-60 seconds. Remove both the towel and the tattoo paper and you have a new (albeit temporary) tattoo!
 The creation and application of the tattoos was very easy, but we did notice a few issues when it comes to wearing them. Since this is basically a piece of film with ink adhered to it, there is a definite border around the tattoo. You can see it here (we added a dotted line to the second image in case you missed the border in the first image).
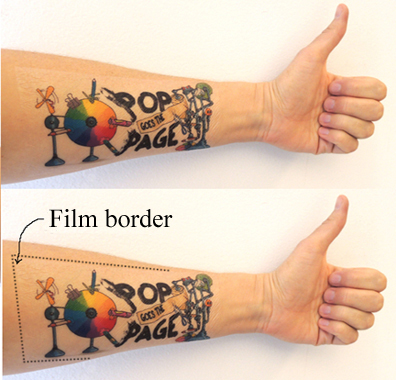 To be fair, the company does recommend you use their “Silhouette software” and the “optic scanner” to minimize this problem. Apparently, the software makes marks on the paper and the optic scanner cuts around the borders of the tattoo with laser precision. We could have also (ahem) used the scissors to cut a little closer to the image.
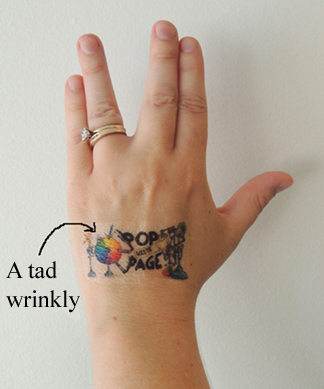
Another issue with this product is that, because the tattoos are film, they can look a little wrinkly after they’ve been applied.
 So, how do the tattoos hold up over the course of a day? According to the instructions, the tattoos “generally last a day and can be removed with a washcloth.” To put that statement to the test, we gave an Angry Birds tattoo to Katie’s 7-year-old for field testing.
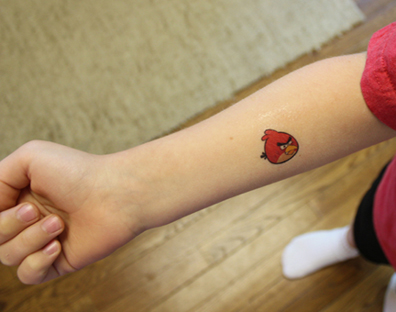 The tattoo was supposed to go to Field Day at school, but unfortunately, a fast-moving stomach virus sent our tester home before he could match it against the rigors of 1st grade relay races. He bounced back the next day and the tattoo accompanied him to an end-of-season soccer game. There, it survived 4 hours of heat and humidity. There were definitely signs of wear, but the bird was still easily visible on his forearm through the sweat, grass stains, and victory revels – his team won!
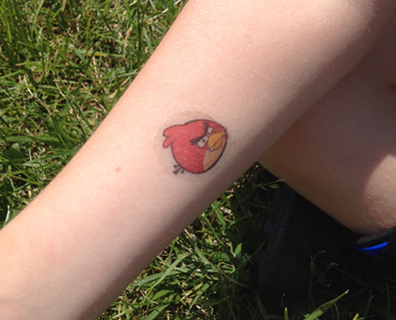 The tattoo disappeared when he showered after the game, which was well over 24 hours after its initial application. It did leave a black sticky residue, but that was easily removed with a dab of alcohol on a cotton ball. Here’s an example of the residue on another test tattoo Katie was sporting (the original tattoo read “My mom is lost. Call Jenny 867-5309”).
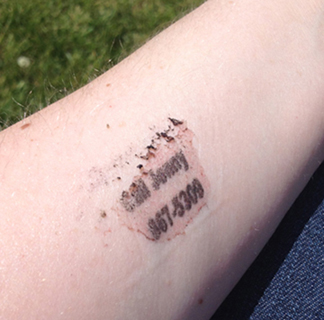 I also discovered that you can simply peel the film off your arm like a super-sticky piece of tape. That was the fate of my forearm tattoo. I wore it for an hour, but then it had to go.
Overall, the tattoos were easy to create. They weren’t perfect in terms of the film borders and wrinkles, but we got a real kick out of making our own tattoo designs. The tattoos held up well to use, but don’t expect them to last more than 24 hours (or one shower).
Now go out there and make yourself a Dauntless tattoo. You know you want one.
