
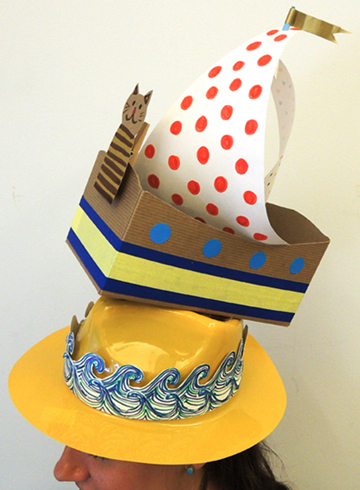
 Everyone needs a jaunty Dream Boat hat. And this one has a special night time surprise on the back!
We read Arthur’s Dream Boat by Polly Dunbar (Candlewick 2012). One night, little Arthur has an amazing dream about a “pink-and-green boat with a striped mast, polka-dotted sails, a golden flag, and a beautiful figurehead.” As he continues to describe it, the boat (which first appears on his head) gets more and more elaborate. The only problem is, no one in the family is listening…until Arthur’s amazing dream boat simply can’t be ignored!
You’ll need:
- 1 plastic fedora (I bought mine at Oriental Trading Company)
- 1 strip of white poster board for a hat band (approximately 22″ x 2.5″)
- A box (I used a 9” x 4 ½” X 4 ½” brown craft box, but a large tissue box will work too)
- A selection of color masking tape (optional)
- 1 wooden dowel
- 1 tall wooden bead that the dowel slides into (test it first!)
- 1 piece of white construction paper
- 1 strip of dot stickers for portholes (optional)
- 2, 4″ x 2″ pieces of tagboard
- 1 wooden clothespin
- Glow-in-the-dark glue (or stickers, or stars)
- Hot glue
- Tape, hole punch, and scissors for construction
- Markers for decorating
Cut the lid (or top) off the box. I also cut the sides of the box to make it a little more boat-like. I cut the long sides concave (1) and the short sides convex (2).
 Use the color masking tape to decorate the boat, and dot stickers to create portholes (or, simply use markers for this step).
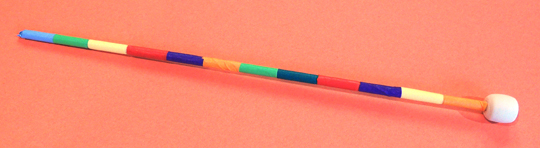
Next is the mast. Slide the dowel onto the wooden bead FIRST, and then use the color masking tape (or markers) to create a pattern on the dowel.
 When the mast is complete, use hot glue to really, really, really attach the wooden bead to the bottom (inside) of your boat, right in the middle. I put a big glob of glue on the bottom of the bead and then added more around the edges once I stuck it to the boat. I also had the kids sing the ABC song while waiting for the hot glue to completely harden.
This might seem like overkill but trust me, masts are delicate things, especially when kids start blowing on the sails or adding stuffed animal passengers!
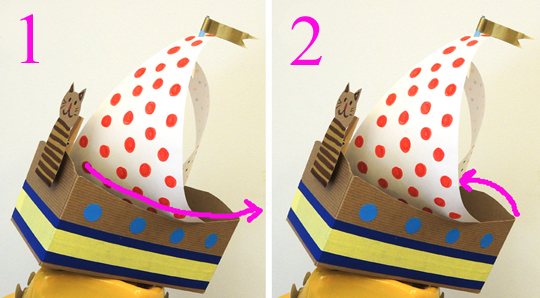
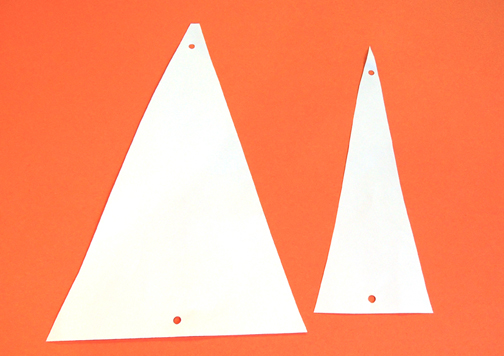
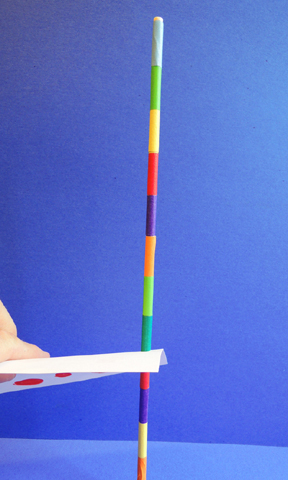
With the mast in place, it’s time for the sails! Cut two tall, triangular sails out of white construction paper. My large sail was about 12″ x 8″ and the small sail was 10.5″ x 4.” Punch holes in the top and bottom of each, then decorate with markers.
 To “hoist” the sails, slide the bottom hole of the large sail on first…
 Slide the bottom AND top holes of the small sail on next…
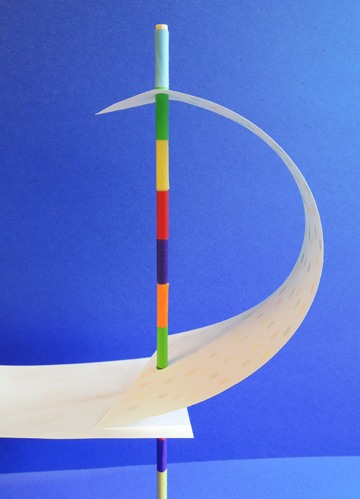 Then slide the top hole of the large sail on last.
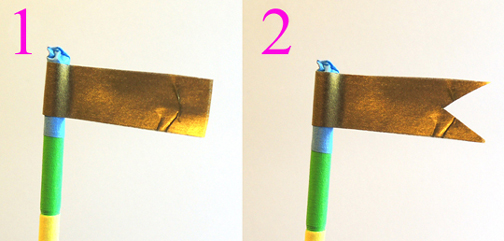
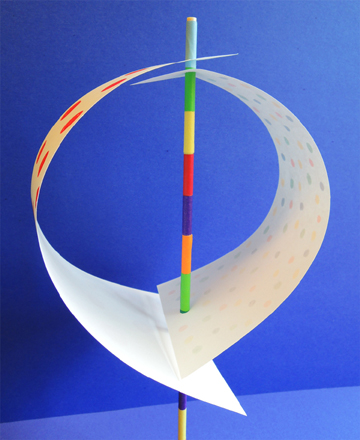 Top it off with a flag! Cut a 4″ piece of color masking tape (we used golden metallic tape to match the description in the book) and wrap it around the top of the mast. Then snip the end like a banner.
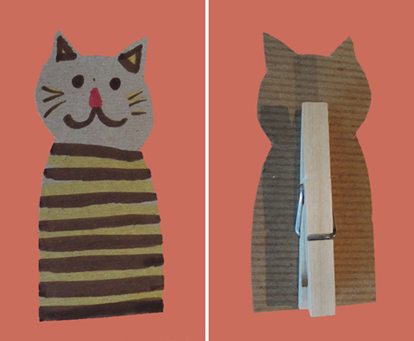
 The figurehead is next. Take a 4″ x 2″ piece of tagboard and cut out your figurehead shape. Color with markers and hot glue a clothespin on the back. Clip to the front of your ship.
 The hat band is next. We suggested drawing waves, but each kid customized his/her hat band in different ways. Tape the hat band around the hat. Hot glue the boat to the hat to finish the project.
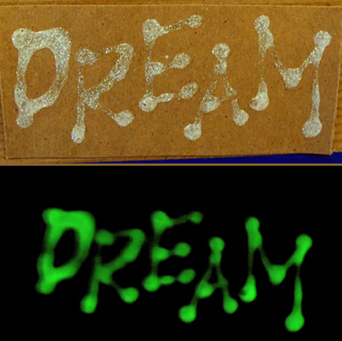
But there IS one last step. The day before the program, we used glow-in-the-dark glue to write “Dream” on a 4″ x 2″ piece of tagboard. After hot gluing it to the back of the boat, we invited kids to step into a darkened storage closet to see their dream boats light up. They LOVED it. In fact, my son still checks on his glowing Dream Boat every night at bedtime.
 If you don’t have glow-in-the-dark glue handy, the same effect can be achieved with glow-in-the-dark stickers or stars.
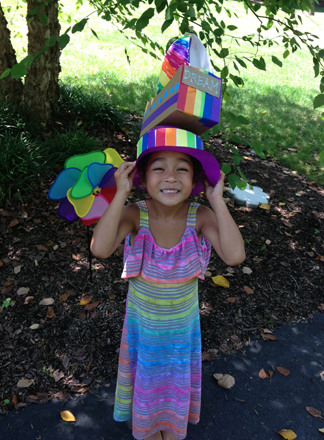
As you can imagine, there were some pretty amazing Dream Boats. In fact, later that day, a mom sent me this fantastic photo of her rainbow-loving daughter and super stupendous Dream Boat!
 FABULOUS!