
 Adventure calls! But before you gallop off into the wild woods, arm thyself with a sturdy shield and magnificent foam sword! We made these as part of To Be Continued, our story time for 6-8 year-olds. The book we read? Igraine the Brave by Cornelia Funke (Chicken House, 2006).
On the eve of her twelfth birthday, Igraine’s biggest problem is that she’s never had an adventure and will therefore, never become a knight. But danger is about to descend upon her home, Pimpernel Castle. Osmund the Greedy and his castellan, Rowan Heartless, have declared war. They want to capture Pimpernel Castle and claim its magic singing books. Igraine’s parent (who are both tremendous magic-workers), could typically handle such an intrusion but…they’ve accidentally turned themselves into pigs while finishing Igraine’s birthday gift (an enchanted suit of armor). Now Igraine must sneak past an invading army, gather the ingredients for the reversal spell, and return to save the castle!
There’s also a Ancient Greek variation for this project. Just scroll to the bottom of the post to check it out!
You’ll need:
- A 10″ x 14″ rectangle of corrugated cardboard (I used a cake pad)
- A selection of color masking tape
- 2 strips of heavy-duty poster board (approximately 1.75″ x 11.75″)
- Hole punch
- A box cutter
- 2 brass fasteners
- 1 shield emblems template, color printed on 2 pieces of 8.5″ x 11″ white card stock
- 1 foam sword (more on that below)
- Scissors for construction
- Hot glue
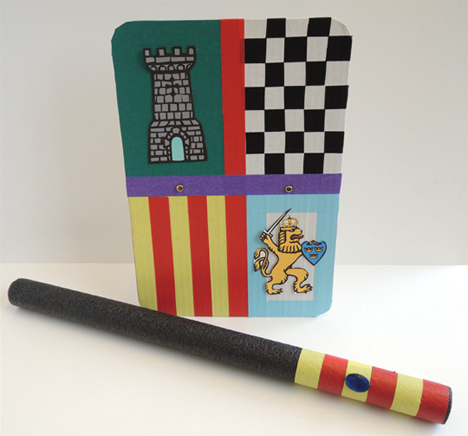
First, use the colored tape to decorate one side of the shield. If you don’t want to use tape, simply use markers (or use both). Cut the desired shield emblems from the template, and hot glue them to the shield.
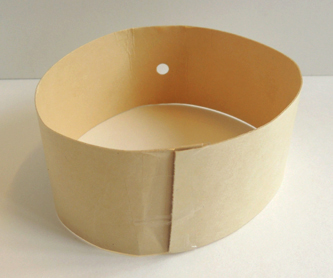
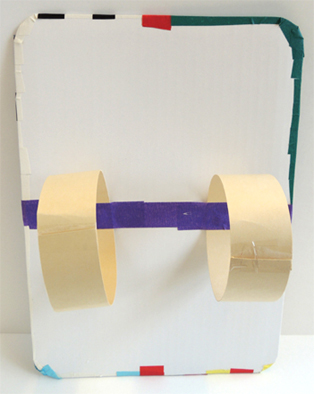
To make your shield’s arm straps, circle both strips of heavy-duty poster board around your forearm. Don’t make the straps too snug! You want your forearm to be able to slide in and out of the straps easily. Tape both of the loops closed, then punch a hole in the middle.
 Use the box cutter to cut two slits in the front of your shield, right in the middle. Push brass fasteners through the slits.
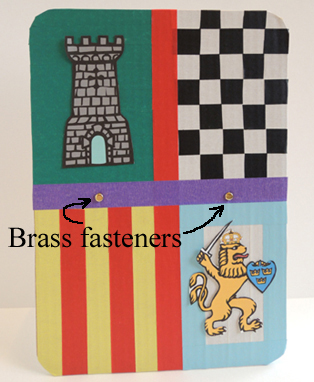 Slide the holes of the arm straps onto the brass fastener’s prongs, then open the prongs to secure the straps in place.
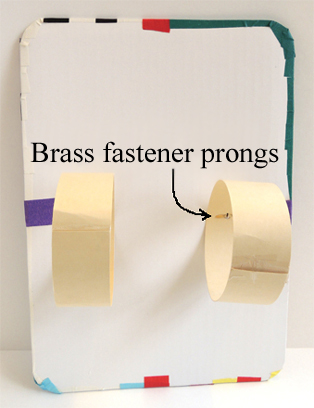 Finally, use masking tape to cover the prongs and secure the arm loops.
 All you need now is a foam sword, and you can find instructions to make a super easy (and super inexpensive) foam sword right here.
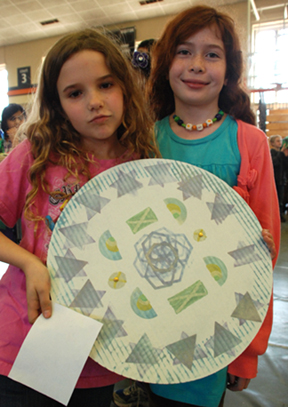
We did an Ancient Greek variation of these shields at a Lightning Thief event. I purchased bulk cases of 16″ cake circles. Kids used metallic ink pads, shape stamps, and metallic markers to decorate them. The arm straps were rigged in exactly the same way as the knight’s shield described above.
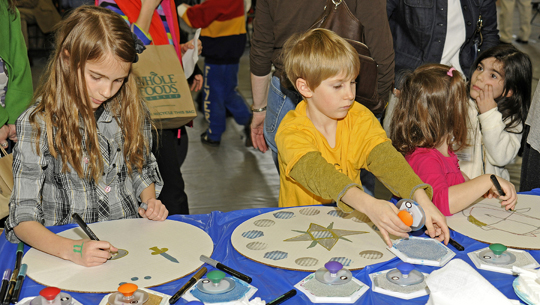 We called the table “Story Shields” and used the art activity to introduce hoplites, the citizen-soldiers of Ancient Greece. A soldier’s armor typically included a helmet, breastplate, greaves, sword, spear, and a circular shield called an aspis or hoplon. Often, the shields were colorful and emblazoned with family symbols, tributes to the Gods or heros, or they bore the symbol of the hoplite’s city-state
We invited kids to design their own personal shields. The activity was wildly popular…we went through over 750 cake circles!
 Looking for more connections? Lightning Thief fans can try this game of Mythomagic, or these awesome pan pipes. Brave knights can find dragons, herbal amulets, or how about a comedic sidekick?