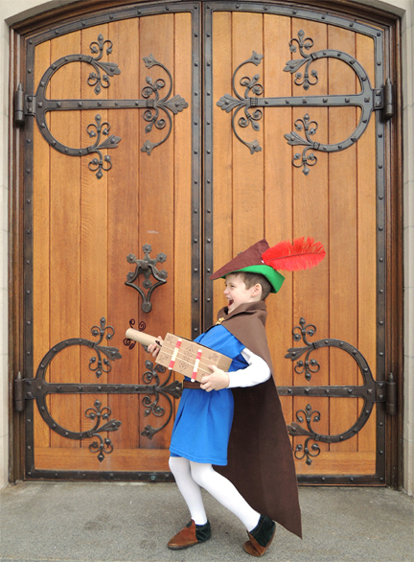
 Strum a merry tune! This box lute was designed for a Robin Hood event. It needed to be quick to assemble, made from super cheap materials, and it had to be sturdy enough to handle even the most energetic Medieval power ballad!
You’ll need:
- 1 box (mine was 4 ½” X 4 ½” x 9” but a large tissue box works too)
- Stencils (optional)
- 10 craft sticks (mine were 4.5″ long)
- 3-4 rubber bands
- 1 paper towel tube
- Hole punch
- 2 pipe cleaners
- Scissors and tape for construction
- Markers for decorating
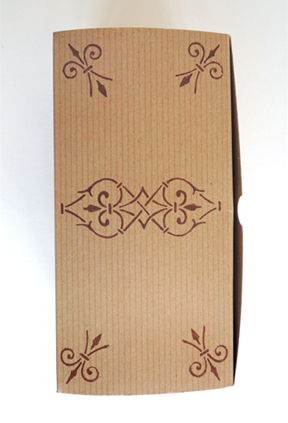
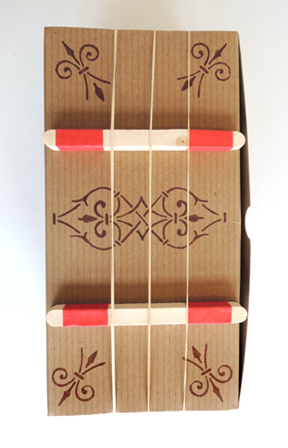
The first step of the project is optional – use a stencil to decorate the front, back, and sides of your box. I found this brass stencil in the stamp and card making aisle at Michaels craft store. It was $4.99 (I used a 20% off coupon on it too).
 I used an ultra fine tip Sharpie on different areas of the stencil to create the look you see below. But you could also use markers and simply freehand your box’s decor!
 Next, slide 3-4 rubber bands lengthwise over the box. I used different gauge rubber bands so, when plucked, they would each produce a different sound (Office Max sizes 33, 19, and 18 to be precise).
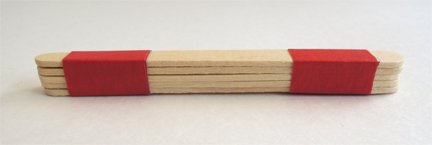
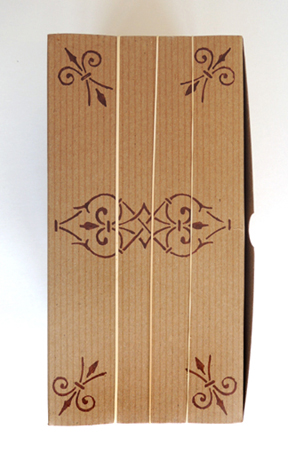 To make your lute’s “frets,” stack 5 craft sticks on top of one another, then secure them together with tape. I used masking tape to give the lute a pop of color, but scotch tape works too! Try to stick the tape close to the ends of the sticks, where it won’t interfere with the rubber bands. Repeat the above steps with the second set of craft sticks. We prepped the frets in advance, to speed along the construction process at the event.
 Slide the frets under the rubber bands. Give the rubber bands a few experimental plucks!
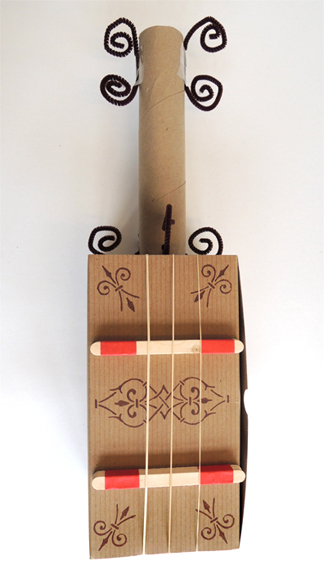
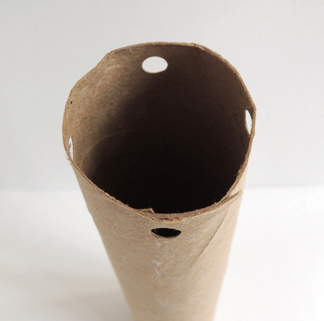
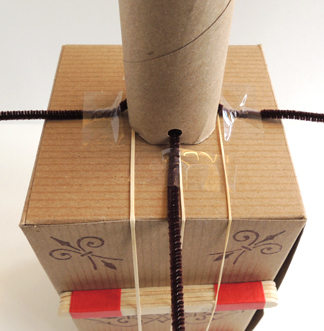
 Set the box aside for a moment, and use scissors to cut a paper towel tube down to 8″. Punch four holes in the bottom of the tube like so:
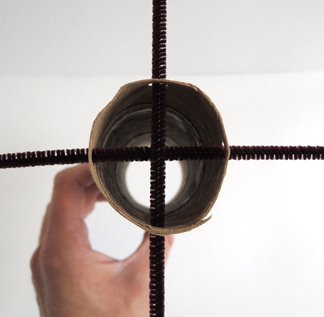
 Then thread two pipe cleaners through the holes.
 Now place the threaded tube on top of the box. Bend and tape the pipe cleaners firmly to the top of the box…
 Then curl the ends of the pipe cleaners upwards!
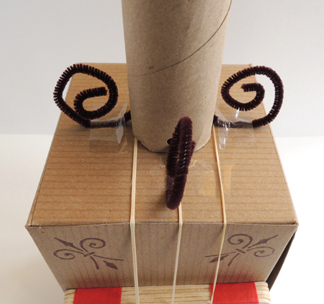
You might be wondering why I didn’t use hot glue to attach the bottom of the tube to the box. The reason is this: the Robin Hood event was 5 hours long and drew big crowds (over 3,000 people). When events get that long and large, I find non-heated adhesives for projects (like the glue dots used on this pom-pom cannon). So, pipe cleaners and tape it was!
You can leave the top of the tube undecorated (which somewhat replicates the actual neck of a lute and it’s angled-back pegbox). Or, you can curl the ends of 2 pipe cleaners and tape them to the top of the tube for some extra flourish.