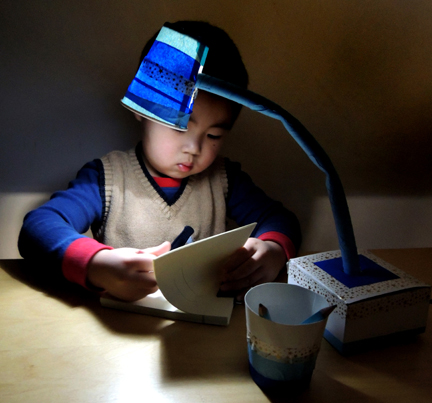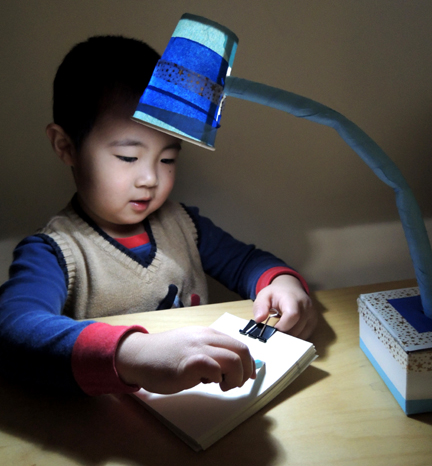
Get illuminated! This cordless DIY desk lamp actually lights up, allowing for writing, drawing, and cozy late night reading binges.
We read Mary Had a Little Lamp, written by Jack Lechner, and illustrated by Bob Staake (Bloomsbury, 2008). Mary has a little lamp that goes everywhere she goes, much to the incredulity of her parents, friends, and classmates. From school to swings to weddings, the lamp never leaves Mary’s side. But after a summer at camp, Mary finally outgrows her lamp and moves on. Now, she has a toaster.
You’ll need:
- 1 small box with lid
- 1 box cutter
- A 1.25oz plastic cup
- A strip of tissue paper (approximately 4.5″ x 29″)
- 1 cup of uncooked rice
- 2 plastic sandwich bags
- A 13.5″ piece of PVC pipe (1/2″ in diameter)
- 2 button magnets (ours were 0.75″ in diameter)
- 1 submersible LED light
- 1 paper cup
- A selection of patterned tape and color masking tape
- 2 rectangles of self-adhesive foam (approximately 1.25″ x 1.5″)
- A 3″ mini craft stick
- 1 pipe cleaner
- Scissors
- Hot glue
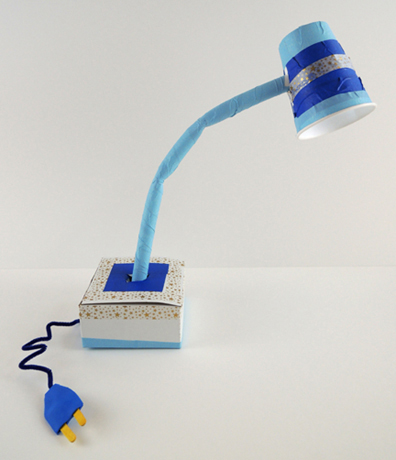
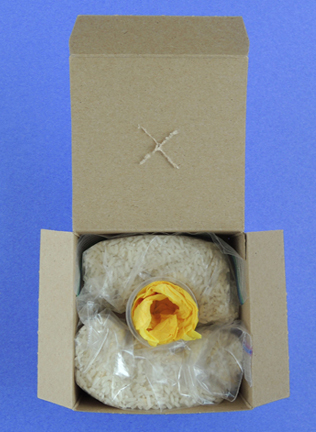
This lamp consists of 5 parts: base, neck, shade, plug, and light bulb. We’ll begin with the base! For starters, you’ll need a box with a lid. To counterbalance the long neck of the lamp, the box will also need to be fairly wide (we used a 2.5″ x 4″ x 4″ craft box with much success).
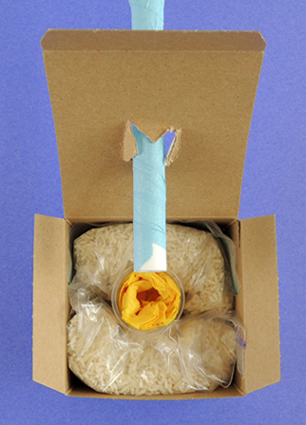
Use a box cutter to cut an X in the center of the box lid. Then open the box and hot glue a 1.25oz plastic cup to the inside the box, right below the X. Squish a long strip of tissue paper inside the cup – you’ll need this a little later. Finally, split the cup of uncooked rice between 2 plastic baggies, then tuck the sealed baggies into the box around the cup. Your base should now look like this:
Close the box and decorate it with patterned tape and/or color masking tape, but DON’T seal the lid down yet! Next, curve a 13.5″ piece of PVC pipe. The pipe is tough and doesn’t curve so easily, but Marissa the genius figured out that you can press it over a book cart handle.
 Also! The PVC won’t curve gracefully (you need a heat gun for that). But it will bend into 3 sections that approximate a curve. Once the PVC is bent, wrap it with color masking tape. Hot glue a button magnet on one end of the pipe, then push the non-magnet end through the X in the lid of the box.
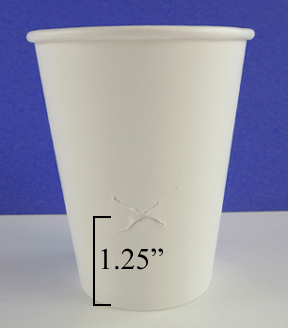
Wrap the tissue in the cup around the bottom of the PVC pipe, then lower it into the plastic cup. Once the neck is in place, you can close and seal the box lid. Next, use the box cutter to cut an X in a paper cup (about 1.5″ from the bottom of the cup).
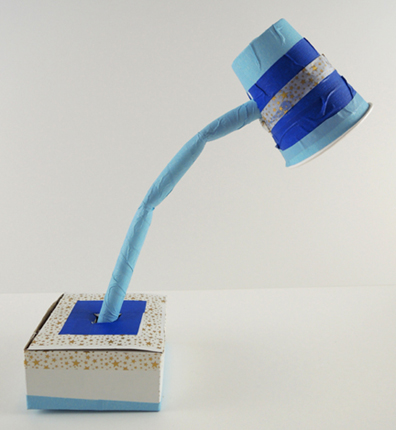
 Leaving plenty of room around the X, decorate the cup with patterned tape and/or color masking tape (or just markers). Then push the neck of the lamp through the X. Your lamp will now look like this:
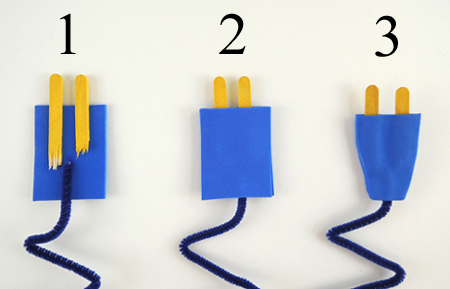
 To make the cord, snap a mini craft stick in two, then place the pieces on the back of a 1.25″ x 1.5″ rectangle of self-adhesive foam. Place a pipe cleaner at the bottom the the rectangle as well, then press a matching rectangle of self-adhesive foam on top. Trim the sides down into a plug shape, then tape the plug to the bottom of the lamp’s base.
 Finally, the light bulb! We wanted these lamps to shed light, but we didn’t want to mess with…oh…electricity. We also wanted kids to be able to switch the lamps on and off. LED votive candles flickered too much, and glow sticks eventually fade. But then I found these submersible LED lights in the floral section of Michaels Craft!
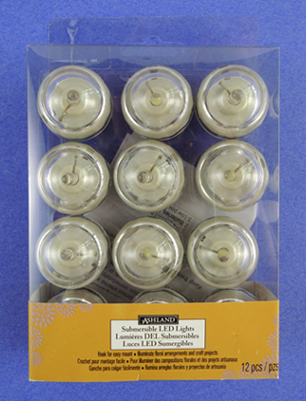 To turn the light on, you simply twist the clear dome clockwise. The LEDS also come in different colors! Woo! However, a pack of 12 costs $20, so make sure you go armed with a 40% coupon. We hot glued a button magnet to the back of each LED light, then connected it with the magnet at the end of the PVC pipe neck. Here’s a shot of the two connected pieces inside the lamp’s shade:
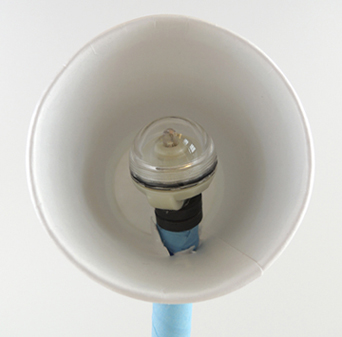 To operate the lamp, simply reach inside the shade, disconnect the magnets, and twist the LED light on. Then reconnected the illuminated LED to the magnet inside the lamp. Kids didn’t even need to peer inside the lampshade to do this – the magnets found each other quite easily.
We added a couple of desk accessories too. A pad of recycled scrap paper held together with an old binder clip, and a paper cup pencil holder (cut the cup down to 2.75″ and decorate with patterned tape or markers). Add a few golf pencils and you’re ready to write your next bestseller!