Abracadabra

abracadabra

Hat, wand, and rabbit ready? Then…it’s showtime! Prepare yourself for a magical extravaganza extraordinaire with a top hat packed with mind-boggling magic tricks!

We read Life is Magic by Meg McLaren (Clarion Books, 2016). Not every rabbit is the right fit for a magic show assistant. But Houdini the rabbit? He’s a natural! However, when a stage trick turns the magician into a rabbit himself, it’s up to Houdini to keep the show running until he can figure a way to get his human back!
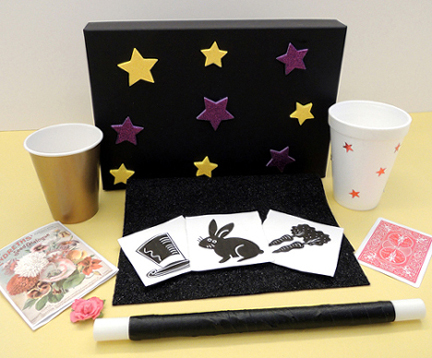
You’ll need:

  • 1 plastic top hat
  • 1 strip of white poster board (approximately 2″ x 28″)
  • Black poster board
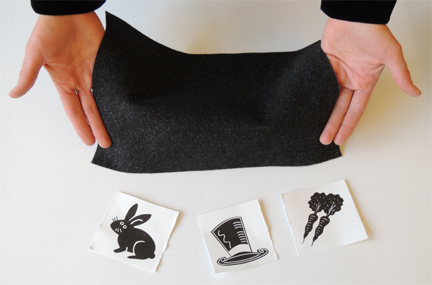
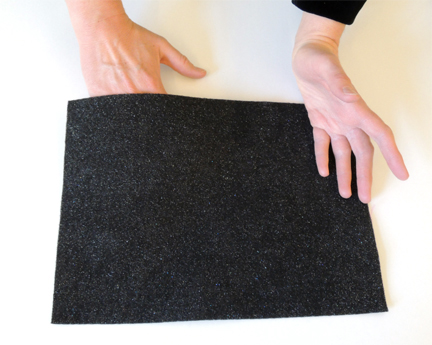
  • 1 square of plastic tablecloth (approximately 6.5″ x 6.5″)
  • 1 magic rabbits template, printed on 8.5″ x 11″ card stock
  • 1 piece of string (approximately 27″)
  • 1 snippet of plastic straw (approximately 1.75″)
  • 1 piece of PVC pipe (approximately 10.5″)
  • A selection of color masking tape
  • Scissors and tape for construction
  • Markers for decorating

magic top hat exterior

First, use markers to decorate a 2″ x 28″ strip of white poster board (we offered foil star stickers as well!). Wrap the hatband around the outside of a plastic top hat. We bought our hats from Oriental Trading Company (item #70/1284) for $8 a dozen. INSIDE the hat is where the magic happens…

magic top hat interior
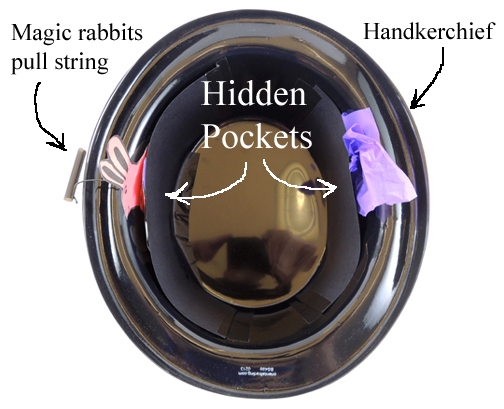
As you can see, the interior of the hat has two hidden pockets. These are made from 2 rectangles of black poster board taped inside the hat. After some testing, we learned that the pockets need to be fairly large (4.25″ x 9.5″) in order for the tricks to works successfully.

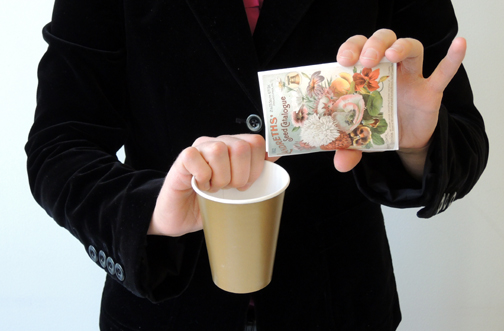
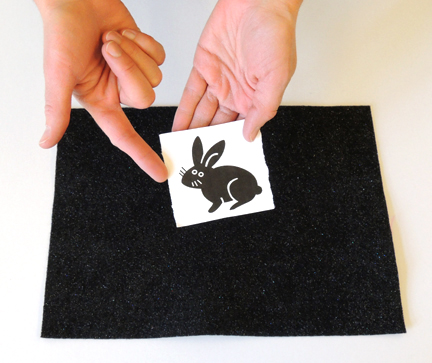
First, stuff a 6.5″ x 6.5″ piece of plastic tablecloth inside the right pocket of the hat.This is your magical “handkerchief.” Meanwhile, on the left side of the hat, notice the little 1.75″ snippet of plastic drinking straw? That’s the beginning of the pull string for a long line of magic rabbits…

magic hat rabbits pull string
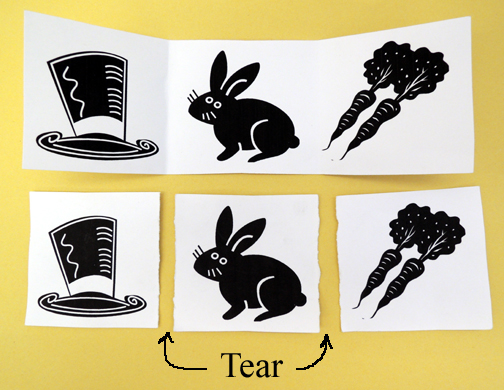
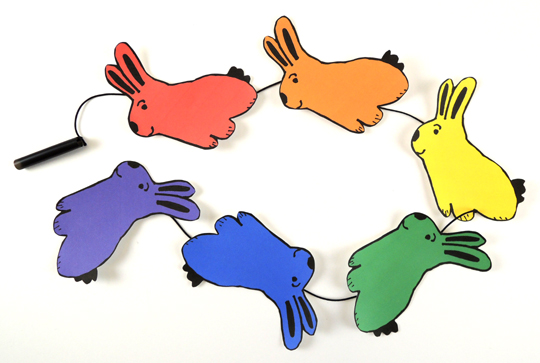
We gave the kids white rabbits to color, but if you want to print them in rainbow, you’ll find that template here. Knot a piece of string around the drinking straw snippet, then tape the rabbits to the dangling string. Bunch the rabbits up and slip them into the left pocket of the hat. However, leave the drinking straw snippet dangling outside the pocket so your fingers can find it later when you’re performing your trick.

Ready for the magic? Trick #1: First, show your audience that the inside of the hat is “empty.” Then, sneeze into your hat dramatically. While you are sneezing, pull the plastic handkerchief from the hidden pocket and say “Ta da!” Trick #2: Again, show the inside of your hat is empty. Then find the dangling drinking straw snippet with your fingers. Shout “Abracadabra!” and yank the line of rabbits out of your hat!

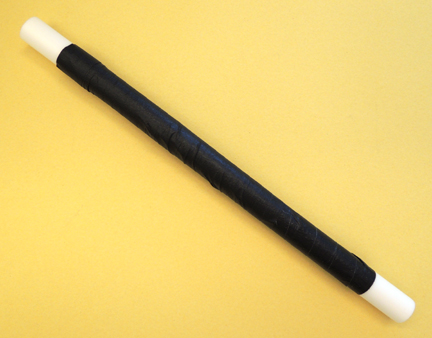
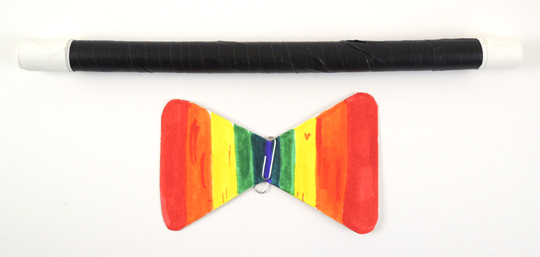
We also made classic wands by wrapping a 10.5″ piece of PVC pipe with color masking tape. And who can resist a poster board bow tie that attaches to your collar with a small paperclip?

magic wand and bowtie
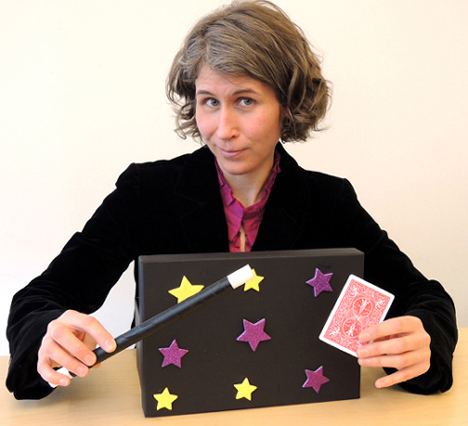
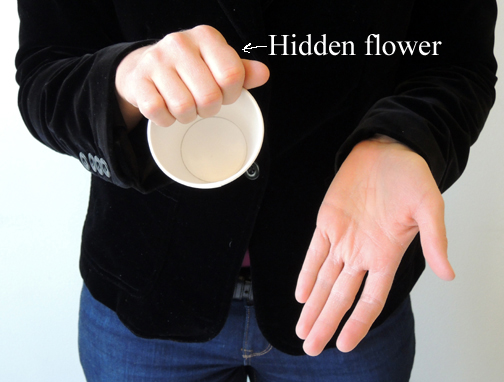
If you’d like a add a third trick to your magic show, we highly recommend the “sticky wand” trick. You’ll find it, and other awesome tricks, in this “Incredible Illusions” post, but I’ve modified the instructions slightly below.

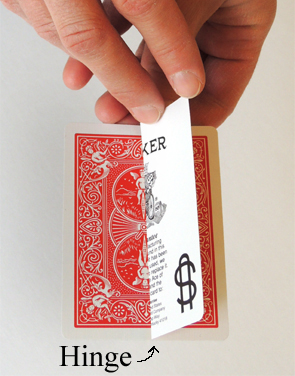
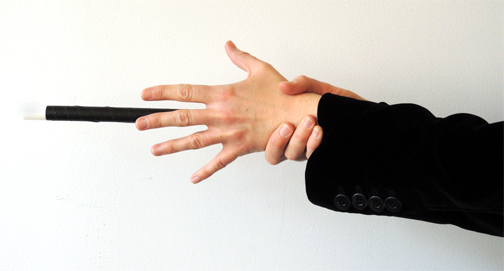
First, run your hand around the rim of your hat, announcing that it is giving you “magic magnetic powers.” Next, hold the wand in your “magnified” hand. Say “Observe my stupendous magnetic powers!” Extend your arm across your body and out to your side, still grasping the wand. Wrap your free hand around the wrist of your wand hand. Slowly and dramatically, lift each finger from the wand until you no longer appear to be holding it.

wand trick 2

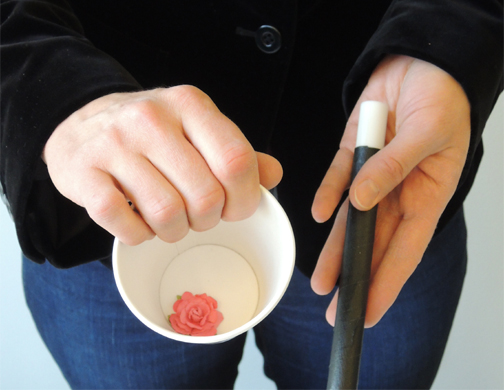
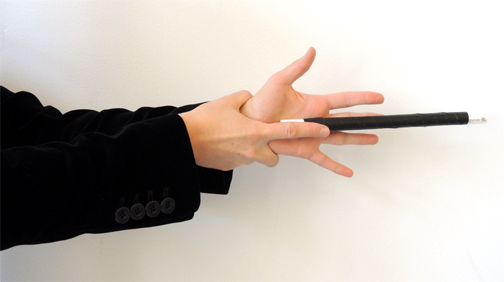
But you are holding it of course. Because when you grab your wrist, you sneak a finger behind your wand hand and hold the wand like this:

wand trick 3 Tell the audience they have magic abilities too. On the count of three, have them audience clap once to “demagnetize” the wand. When you hear the clap, lift your finger to release the wand, and let it fall dramatically to the floor. Then take a big bow!

Welcome Back, Potter

welcome back potter
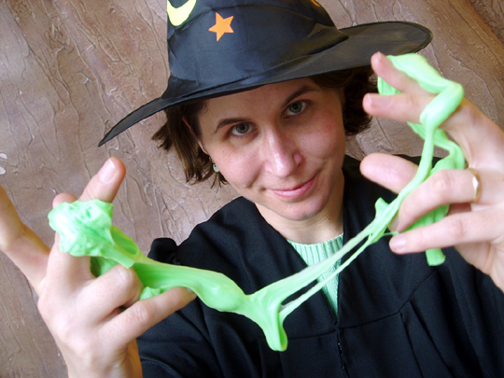
It’s Harry Potter week at Pop Goes the Page! Harry Potter and the Cursed Child, Parts 1 & 2 will be released this weekend, and there will be launch parties and countdown events galore. I thought it would be helpful to compile all of Pop’s Harry Potter posts and projects, just in case you find something that might come in handy at your wizardly celebration.

Let’s start big. This is a Spell Simulation game Princeton University junior José M Rico created for our Wand Works event. It was amazing. You can see videos of the 6 spells, and find a free download of the game here.

wand works spell simulation game by jose m rico, background by jeremy goncalves
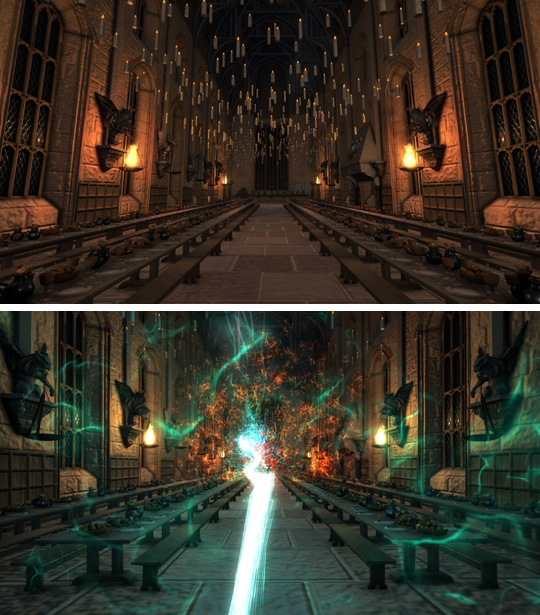
And now for more amazing-ness. This Magical Miniatures post features an interview with Sally Wallace, a miniaturist and artist who constructs astounding Harry Potter dollhouses and miniature scenes. Feast your eyes on Hogwarts!

greenhouse1 smaller
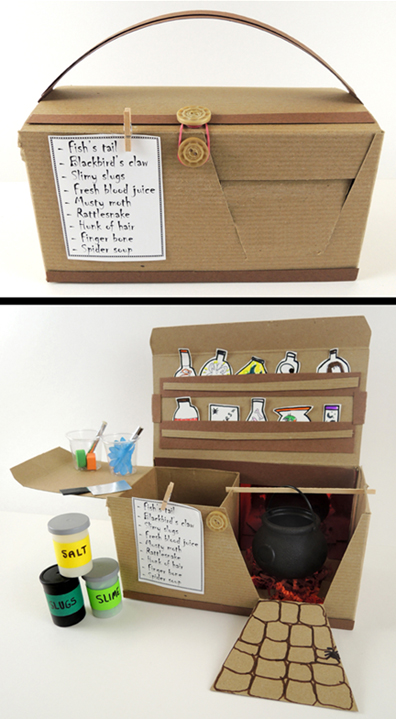
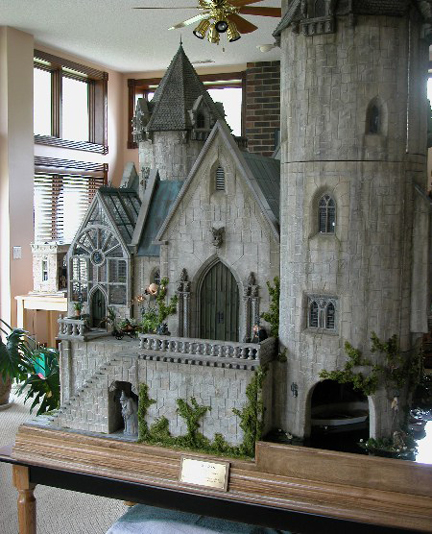
However, if your magical real estate aspirations need to be on a slightly smaller scale, try this Gothic votive castle. See the greenhouse to the left of the castle? Peek inside and you’ll see that the mandrakes are ready for re-potting!

greenhouse3 smaller
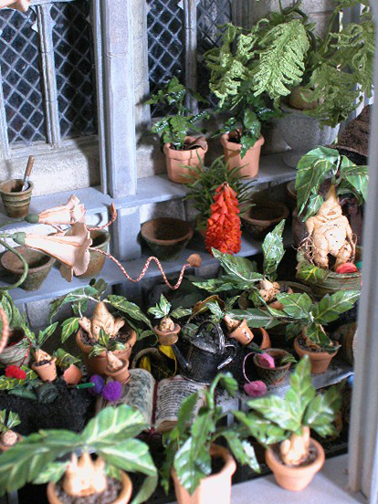
Herbology continues with this little dried herb amulet

amulet smaller
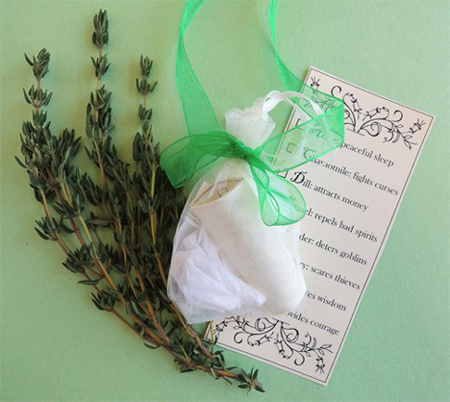
And these dashing, yet simple, snapdragons. You only need a paper cup, construction paper, and pipe cleaners (more ambitious gardeners can try these magical “growing” box gardens).

get-snappy smaller

We also have portable potion studio for all your brewing needs…

witchy kitchy stacked
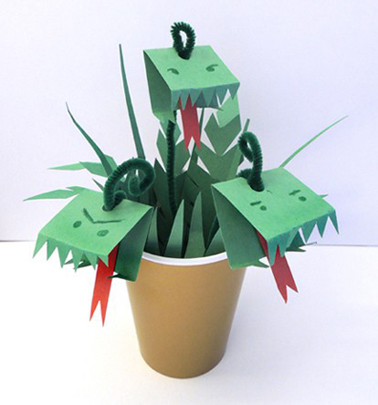
Another Harry Potter post I dearly love is this suitcase boggart. I designed it for a Defense Against the Dark Arts table. The secret to making the suitcase thump and bump convincingly? A battery-operated pet toy called “The Weazel Ball!”

the-perfect-boggart smallerWe’ve also made plenty of dragon and monster projects in the past, from this food chain to a black light tin foil dragon. Representing the forces of good, however, is this phoenix puppet. You can make it out of a tissue box, and stroll around with it cradled in your arms.

fantastical-phoenix smaller
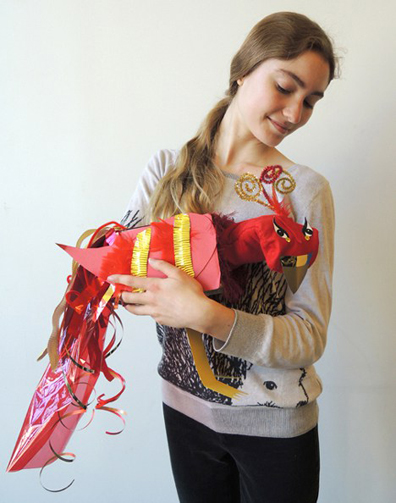
Moving on to school supplies, try these simple, but immensely popular, quill pens.

quill-pens smaller
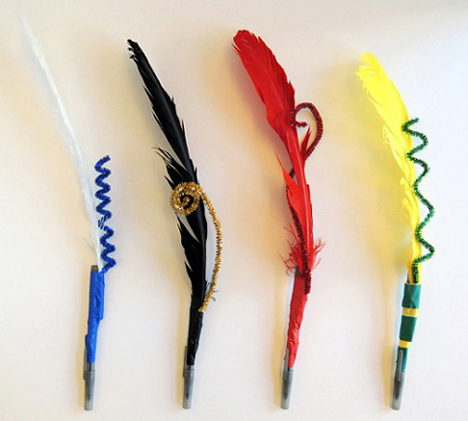
If it’s a wand you need, take a look at the custom wands we made at our Harry Potter Wand Works event (and if you’d like to meet Lane O’Neil, a real-life wandmaker, take a look at this post).

wizard with wand

Also necessary for any Hogwarts student is an inexpensive PVC pipe wands (with your choice of core, of course). There are also flying books, and things that fly OUT of books.

these butterflies can book

And don’t forget your wrist owl to deliver the mail (but not a Howler)! These handsome little fellas are made out of toilet paper tubes and pipe cleaners.

wrist owl examples

Once your school supplies are assembled, hit the classroom with the Chemistry of Magic!

chemistry-of-magic-web- smallerOr, learn some smaller spells. A pair of Slytherin students joined us at our School for Scoundrels program and taught kids Aparecium, Furnunculus, and Inanimatus Conjures. But Confundo was definitely the most popular. Also, there’s this special paper that allows you to set your spells on FIRE and watch them fly!

And, if Muggle Studies is full this year, you can always take a look at our online exhibit, which includes photos and information labels on everything Muggle.

muggle studies 101

Deluxe Chicken Grooming Kit [c.2011]

Wanting to bring a little Potter into your own home? Well, you can crank it to ELEVEN like this amazing family, or host a smaller party like the one concocted by Hope, our kid tester, which includes inexpensive decor ideas, templates, recipes, and useful links.

owl balloons

You could also go ALL OUT and recreate Knockturn Alley in your basement, like Corinne Adams did here. This is AMAZING:

WIN_20190917_15_05_35_Pro_2And what would Harry Potter be without some treats? Check out the gourmet pumpkin pasties crafted by Melody Edwards, a Princeton University graduate who is currently in culinary school. They were yummy.

birthday potter croppedWe also tested a couple recipes from the The Unofficial Harry Potter Cookbook by Dinah Bucholz (Adams Media, 2010). Including Hagrid’s famous rock Cakes!

rock cake testingThose wanting a more academic perspective on Harry Potter (not to mention a look at some goodies from our rare books vaults) should check out the Harry Potter and the Mystery of the Author’s Name post on Cotsen’s curatorial blog. It shows the different ways J.K. Rowling’s name has been spelled (and misspelled!) over the years.

If you’re wondering about the image that started this post (like how I magically manage to appear 9 years younger?), it’s a promo photo from a Harry Potter event we hosted in 2007. You can read more about the image, as well as some of my hints for promoting programs, here.

I also mentioned Harry Potter and the Cursed Child. Well ladies and gentleman, Katie, Marissa, and I actually went and saw the play on Broadway. You can see our complete (and spoiler free!) post here.

full theater 2

Incredible Illusions

incredible illusionsBehold the mystery…the wonder…the spectacle…of your very own mini magic show!

magic tricksThis project was the culminating event at To Be Continued, our weekly story time for 6 to 8-year-olds. Every week, we read from a chapter book and celebrate the the end of the entire book with a project and/or activity.

We read Horten’s Incredible Illusions by Lissa Evans (the sequel to Horten’s Mechanical Mechanisms (Sterling Children’s Books, 2012)). Young Stuart Horten moves to the town of Beeton and expects to be thoroughly bored. However, he soon discovers that he is part of a magical legacy left by his Great Uncle Tony, who was a stage magician and illusionist. In the first book, Stuart and his friend April solve a series of complicated clues and find Uncle Tony’s secret workshop. In the sequel, the friends again embark on a journey. This time, they’re searching for Great Uncle Tony’s will, which bequeths the contents of his workshop to whoever finds the document first. Clues are hidden in each of his magical stage illusions, but…the magical worlds inside the illusions are real and in some cases, dangerous. And Stuart and April aren’t the only one interested in getting their hands on those tricks.

We definitely needed some incredible illusions to celebrate the conclusion of these awesome books. I designed these individual mini magic shows to be easy enough for 6-year-olds to do, but intriguing enough for 8-year-olds. After consulting a number of children’s magic books, I found Amazing Magic Tricks: Beginner Level by Norm Barnhart (Edge Books, 2008) to be the most useful. The 4 tricks described in this post are from this book.

You’ll need:

  • 1 memory box (more about this below)
  • A 10.5″ piece of PVC pipe (05.” in diameter)
  • A selection of color masking tape
  • 1 paper cup
  • 1 paper (or fabric) flower
  • 1 empty seed packet (or small envelope simply marked “Magic Seeds”)
  • A 9″ x 12″ piece of felt (I used the glitter variety)
  • hat rabbit carrot template printed on 8.5″ x 11″ card stock
  • 1 Styrofoam coffee cup
  • A selection of foil star stickers
  • 2 playing cards
  • A 1″ foam paintbrush (or regular paintbrush)
  • Scissors and tape for construction

You’ll need a box with a lid to store your tricks and shield your hands from the audience as you prepare your tricks. A memory box is perfect for this. I purchased mine at Michaels Craft store. I went with black, but they come in all sorts of colors and patterns.

memory boxDecorate the lid of your box however you like (I found some self-adhesive glitter foam stars in the clearance section at the craft store) then slide the lid onto the box like so. This creates a “screen” and a “backstage” area to prep your tricks.

magic boxNext, wrap color masking tape around the PVC pipe. Your magic wand is ready!

wandTRICK #1: HIDDEN FLOWER

The most important thing about this trick is making sure the flower is small enough to hide in your fist. I purchased 1.25″ paper flowers for the kids (scored on discount from the scrap booking section of the craft store).

flowerBehind your box’s screen, grab the flower in your fist. Then use the same hand to hold the paper cup with your fingers.

flower trick 1To perform the trick, show the audience that your cup is empty. Then say “Oh no! It’s empty. Well, good thing I have some stupendous magic seeds!” Pick up the empty seed packet and pretend to pour seeds into the cup.

flower trick 2Wave the wand around muttering magical incantations. While the audience is distracted by the wand, open your fingers and drop the flower into the cup. Shout “Ta da!” and show them that a flower has magically appeared!

flower trick 3TRICK #2: FIND THE RABBIT

Print the hat, rabbit, carrot template. Fold and tear the strip in 2 places, like your see below. It’s really important that your TEAR the strip. Don’t cut it with scissors!

rabbit trickTo perform the trick, hold up the 3 image cards and say “You see a hat, a rabbit, and some carrots, but with my amazing magical skills, I will pull the rabbit from under this cloth every time!” Turn your back and have an audience member arrange the 3 image cards on the table and cover them with felt.

rabbit trick 2Reach underneath the felt and feel the edges of the image cards with your fingers.

rabbit trick 3The rabbit will be the only image card with two torn edges. Remove it from under the cloth with a flourish! Repeat with a difference audience member. Astounding!

rabbit trick 4TRICK #3: BALANCING CUP

First, decorate a Styrofoam cup with foil star stickers. Next, cut a playing card in half, lengthwise. Tape one half of the cut playing card to the back of another card. The half of the playing card should “hinge” outward like so

cup trick 1To perform the trick, flatten the hinge to the card and hold it up to your audience, keeping the taped side facing your body. Invite an audience member to come forward and try to balance the Styrofoam cup on top of the card. Then say “You see it is impossible. But I will now use magic to make the impossible, possible!”

While you’re talking, sneak a finger up the card and open the hinge on the back, forming an area for the cup to balance. From the side, it looks like this:

cup trick 2But from the front, it looks like the cup is now balancing on the card!

cup trick 3TRICK #4: MAGIC GLUE

To perform this trick, tell the audience that you have magic glue. Hold up a paintbrush and Invite an audience member to come up and “paint” your hand with the magical glue. For my version of the trick, we used 1″ foam paintbrushes I had left over from another program.

wand trick 1Now hold the wand in your “glued” hand. Say “Observe my stupendous magical glue!” Extend your arm across your body and out to your side, still grasping the wand. Next, wrap your free hand around the wrist of your wand hand. Slowly and dramatically, lift each finger from the wand until you no longer appear to be holding it.

wand trick 2But you are holding it of course. Because when you grasp your wrist, you sneak a finger behind your wand hand and hold the wand like this:

wand trick 3Now have the audience clap once to have the wand “detach” from the magic glue. Carefully lift your finger to release the wand, and let it fall dramatically to the floor. Take a big bow.

The kids absolutely loved this project. I performed the whole show first, and then I deconstructed all the tricks and each kid made his/her own set. If, by the way, you’d like to see the awesome mechanisms we made after reading Horten’s Miraculous Mechanisms (the first book in this set), click here.

In May 2015, I interviewed Lissa Evans about her fantastic books. If you’d like to hear it, click here!