
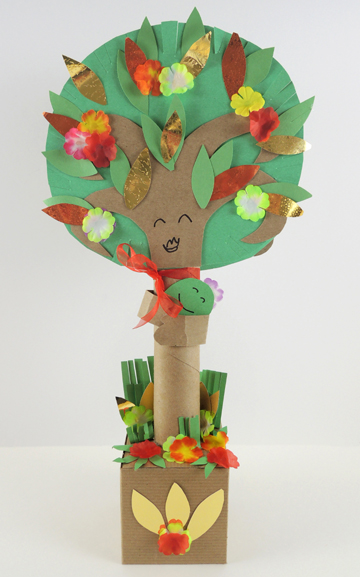
It’s a simple project bursting with love…a mama tree hugging her baby seed!
We read The Little Tree, written by Muon Van, and illustrated by JoAnn Adinolfi.The smallest tree in the forest watches time pass, the land change, and wonders what will happen to her little seed. Finally, with the help of a world-traveling brown bird, she releases her little seed to the skies. Then she waits and worries about her little seed. Then one day, a gift arrives…a leaf that belongs to the tallest, strongest, and brightest tree the brown bird has ever seen. Yes, it’s the Little Tree’s precious seed, grown up strong and beautiful!
You’ll need:
- 1 small box
- 1 paper towel tube
- Brown poster board
- Green poster board
- Tree decorating supplies (more on this below!)
- Scissors and glue for construction
- Markers for decorating
- Hot glue
First, cut 2″ off a paper towel tube, then hot glue it to the top of a small box. Glue 2 circles of green poster board to 2 sets of brown poster board branches (our branch template is here), then hot glue everything to the top of the paper towel tube. Add a pair of brown construction paper arms to your tree, and tuck a green poster board “seed” into them. Finally, decorate your tree with markers, or use green construction paper, embossed foil paper, fabric flowers, gold mirror board, and shimmer ribbon like we did. Done!
The Little Tree is a very touching book. In fact, Katie and I had a bet that I wouldn’t be able read it aloud without crying (it was a draw – I did choke up at one point!). Even more touching, however, is the author’s note at the end…
The book is a tribute to Muon Van’s mother, who fled the post Vietnamese-American war regime with her two children. In America, she gave birth to five more children. Even though she only had a third grade education, she put them all through college, and in some cases, grad school. Van lovingly praises her mother who, like the Little Tree, was brave enough to override her fears, doubts, and limitations and provide her children with a life she could not imagine for herself.
 Let me start by saying that Katie selected six OLD books for this project…retired editions that had torn pages, faded covers, and ripped bindings. Because otherwise we would have been cringing during the first step of the project…drilling holes in the spines of the books! Katie used the largest drill bit in the set – a 5/16″ bit to be exact – to drill holes in the center of the books’ spines.
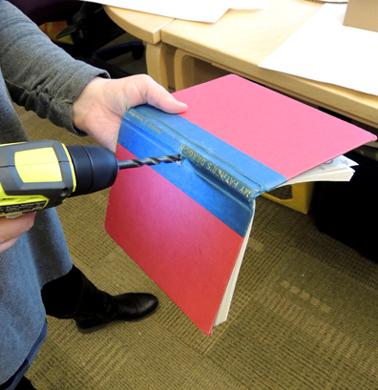 Next, she used a bottle of Mod Podge and a foam paint brush to glue wrapping paper onto the covers of the books. We went all schmancy and bought our wrapping paper from Paper Source.
 While the book covers were drying, Katie construct the tree base. She glued together two, 12″ cake pads, then glued wrapping paper on the top circle. She again drilled a hole in the center of the base, then threaded a cake support rod upwards, through the hole.
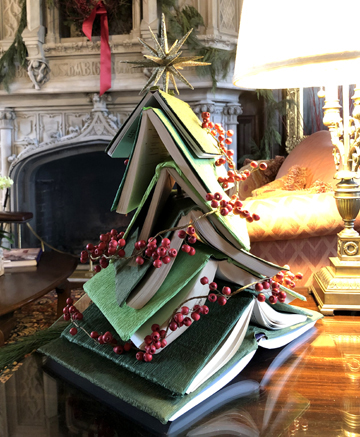
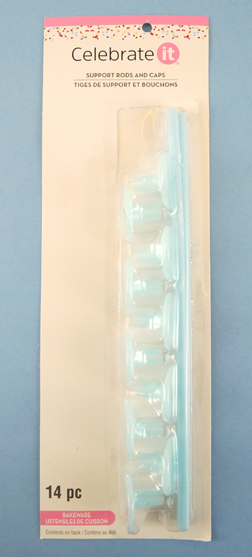 Annnnd here’s the finished base, ready to support some books!
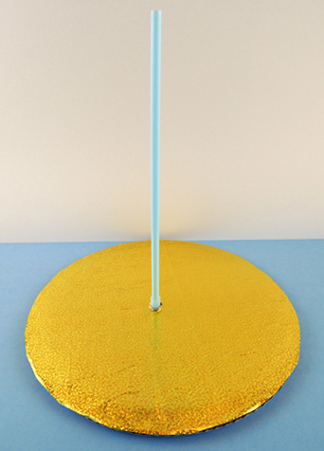 Since the initial holes Katie drilled in the books were covered with wrapping paper, she carefully re-drilled them. Then she threaded the books onto the support rod. Almost immediately, she noticed a problem. The books sagged down the smooth rod and flattening out! Katie quickly fixed the problem by wrapping rubber bands around the rod to brace each book.
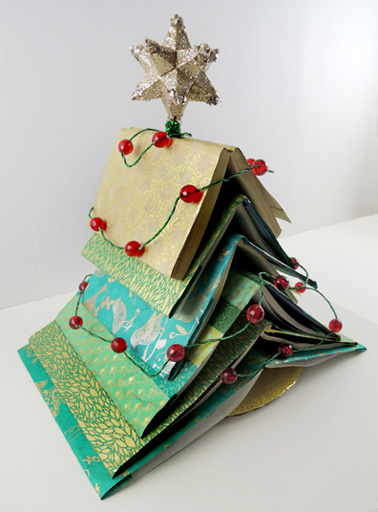
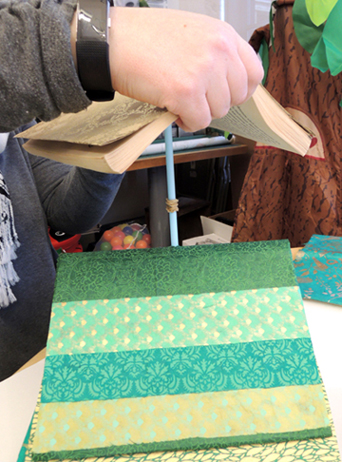 When the books were stacked, Katie added a star to the top. This was a cheap ornament with a sparkle stem wrapped around the ornament’s loop. The sparkle stem was threaded inside the cake support rod, then the star/rod connection was reinforced by a second sparkle stem. Add a strand of lights and you are done!
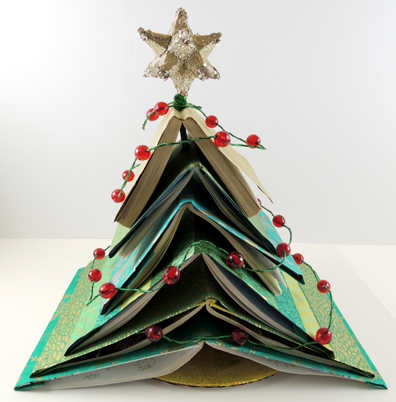
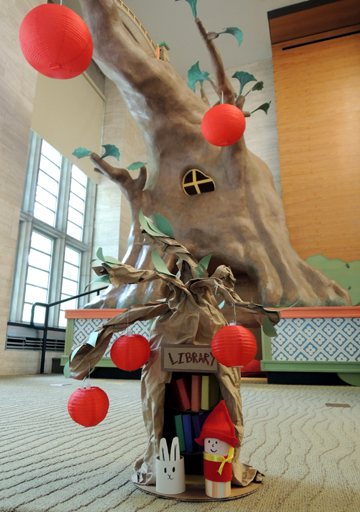
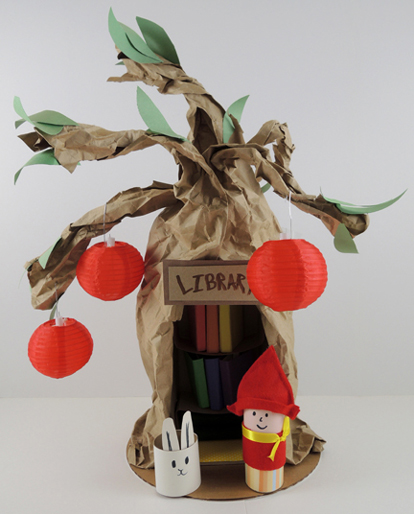
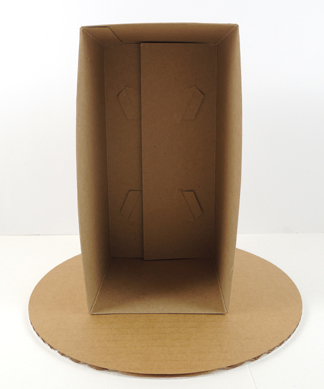 Next, crumble up a swath of brown packing paper (ours was 25″ x 36″). The more wrinkly it is, the more it will look like bark! Wrap the paper around the sides of the box, anchoring it tape or hot glue. Hot glue the paper to the base as well. One thing to note – you want the brown paper to extend about 14″ – 16″ above the top of the box. This will give you nice, fat branches on your tree.
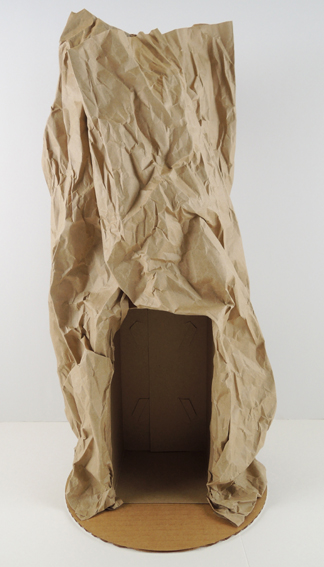 Cut sections into the paper, then twist the sections tightly to create branches. Notice in the photo below that the branch sections end 4-5″ above the top of the box. If you cut them too close to the top of the box, your branches will droop.
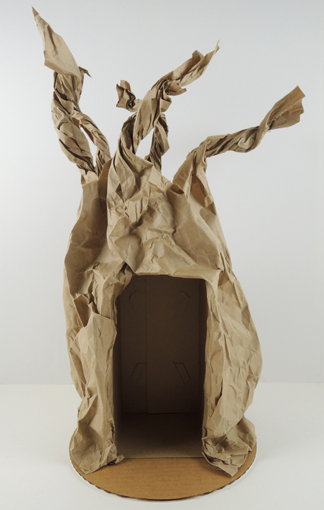 Add some green construction paper leaves, and your tree is done! We used the box lid to create shelves for the library, tucked a couple felt blankets in place, added a patterned paper rug, and made a library sign. Here’s a shot of our library’s interior.
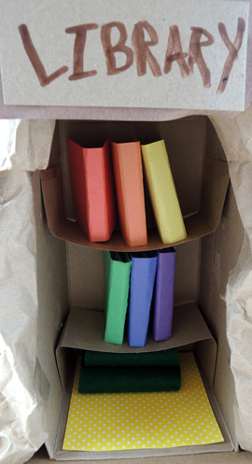 We wanted the library books to sit solidly on the shelves, so we hot glued mini craft stick spines to 2.75″ x 4″ pieces of poster board, then hot glued a couple 2.25″ x 3.25″ pages on top. It worked great!
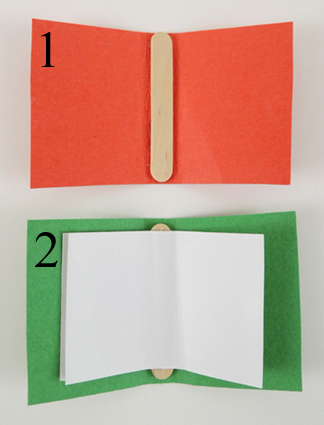 It takes a little time to make the books, and we really wanted to fill the shelves, so we prepped 6 books per kid in advance (132 books total!). Behold the fruits of our labors…
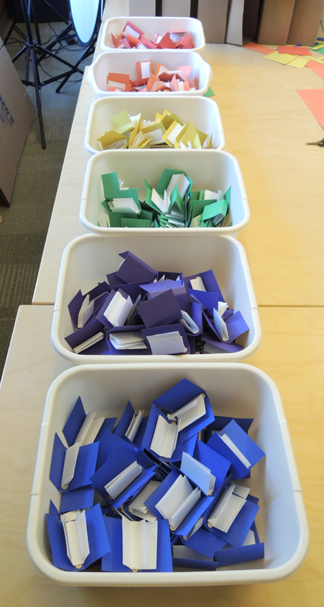 Finally, your library readers! We fashioned ours after the characters in the book, using 2 toilet paper tubes and construction paper. We couldn’t help making a red knit felt cap for the girl, too.
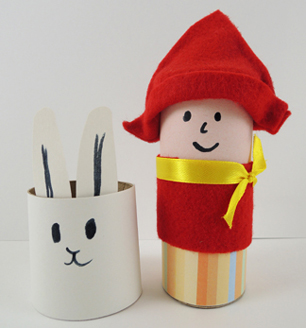 Our library tree has red lanterns so those were the final touch to our project. We recycled them from this