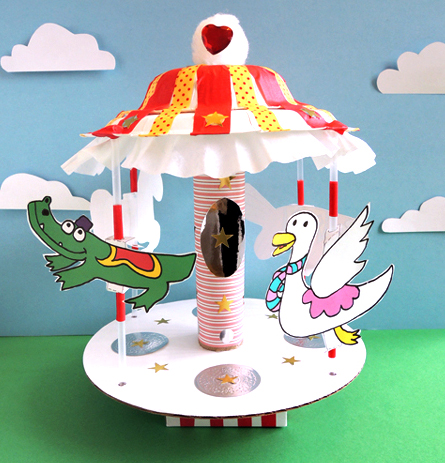
 Want to take a spin on an amazing carousel? Ride on Duck, Horse, Golden Fish or everyone’s favorite…Gator! Thanks to a little brass fastener, this carousel actually turns!
We read Gator by Randy Cecil (Candlewick, 2007). At the amusement park, a carousel spins, and Gator is the happiest animal on the carousel. He loves the lights, the wind in his face, and the laughter of the children. But when business slows and the amusement park closes, Gator becomes lonely and sad. He decides to leave. He travels through a deep, dark forest, falls into a stream, and stumbles upon some relatives in a zoo who are a lot bigger and scarier than he is. Completely disheartened, Gator slumps on a bench, crying. But suddenly, he is spotted by a little boy and his father, who recognizes Gator from the old days. Encouraged, Gator leads a crowd back to the carousel, which leaps to life once again, surrounded by the sounds of laughter and happiness.
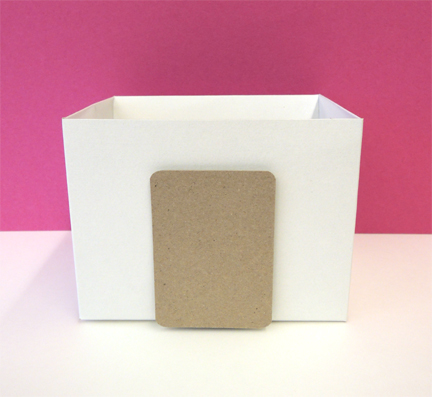
You’ll need:
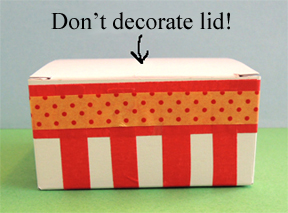
We’ll build the carousel’s spinning mechanism first. Decorate the sides of a small box with color masking tape and patterned tape (or markers). Don’t decorate the lid of the box and definitely don’t tape it shut. You’ll need to open the lid in a few steps.
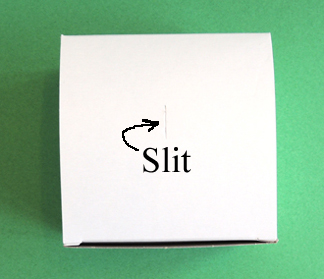
 Use a box cutter to make a little slit in the top of the box’s lid, right in the center.
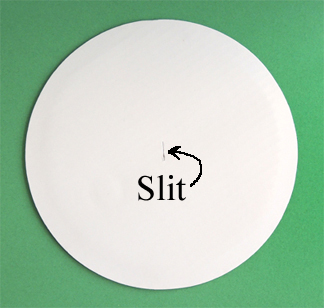
 Then make another small slit in the center of a cake circle.
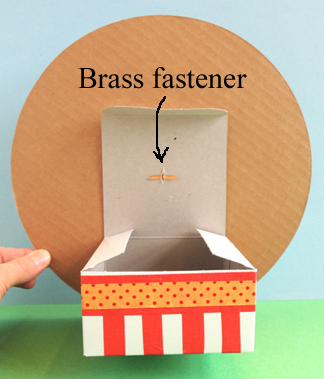
 Push a brass fastener through the slit in the cake circle. Next, open the lid of the box and push the brass fastener through the slit in the lid. Open the prongs of the brass fastener to secure it in place.
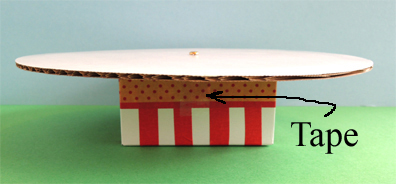
 Close the lid of the box, and tape it shut. The spinning platform for your carousel is done!
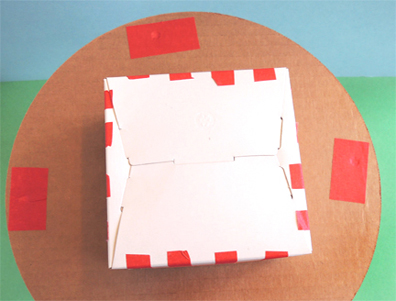
 The next step involves a paper plate, but I wanted to say a quick word about the plate before we get started. You’ll definitely need a sturdy paper plate with a deep well and sides that slant upwards. The cheaper, flatter paper are simply too floppy, especially when you need to attach the carousel animals later. So think sturdy! That said, punch 4 holes in a paper plate. When punching your holes, keep them close to the edge of the plate like so:
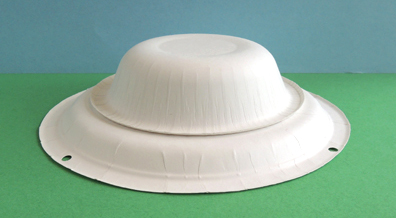
 Hot glue a paper bowl to the top of the plate. You now have a canopy for your carousel!
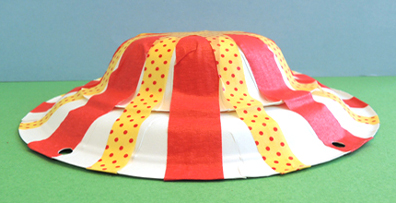
 Decorate the canopy with color masking tape and patterned tape (or just markers). If you cover your holes with tape while your decorating, don’t worry. Just re-punch the holes when you’re done.
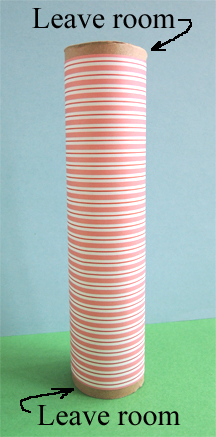
 Cut a paper towel tube down to 8″ and wrap with patterned paper (or white printer paper). Don’t, however, wrap the paper all the way to the top and bottom of the tube. Leave a little bit of the tube exposed at both ends. This will make it much more sturdy when your hot glue the tube to the platform and the canopy of the carousel.
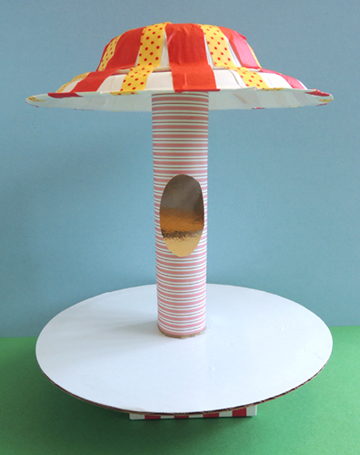
 Hot glue 2 mirror board ovals to the sides of the pole (these carousel “mirrors” are optional, but the kids really got a kick out of seeing themselves reflected in them). Now hot glue the tube to the center of the platform. Then hot glue the canopy to the top of the tube. Use lots of hot glue…you don’t want this coming apart later! Your carousel will now look like this:
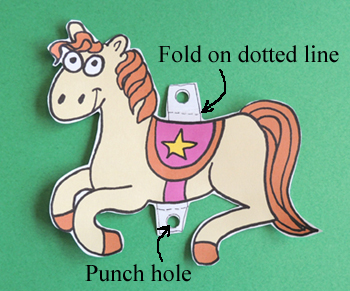
 Time to attach the carousel animals! I’ll use the horse as the example for the steps below. First, cut and color the horse from the template. You’ll notice that the horse has a tab extending from its top and bottom. Each tab has a circle on it, as well as a dotted line. Use a hole punch to punch out the circle, and fold each tab along the dotted line.
 Thread a drinking straw through the holes, and add a piece of tape to the back of the animal to keep it from sliding down the straw.
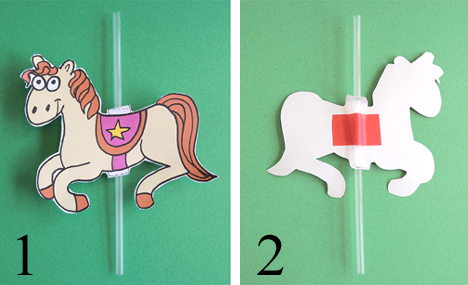 If you get stuck using clear plastic drinking straws like I did (I had a bunch leftover from this Cinderella program) you can use color masking tape to add stripes to it. Just make sure to leave the very top and the bottom of your straw tape free.
To attach the horse to the carousel, stick the top of the straw “pole” through a hole in the carousel’s canopy. The pole might stick up a little, but that’s totally OK.
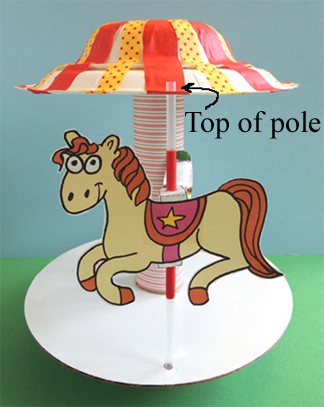 Next, line the bottom of the pole up with the carousel’s platform. Punch a hole in the platform, right underneath the bottom of the pole.
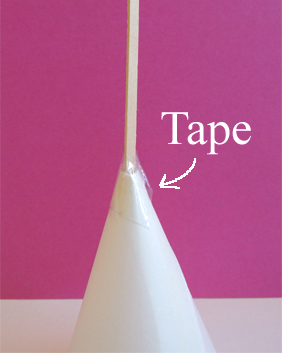
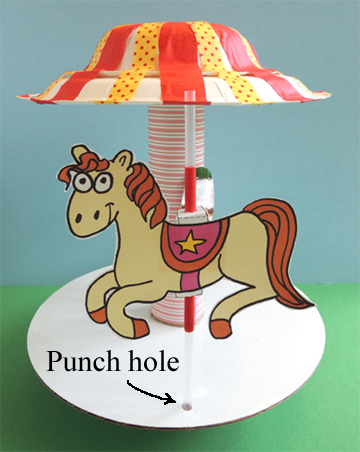 To keep the pole from slipping downward, stick a piece of masking tape over the hole, but put the tape on the underside of the platform. Sorry about the awkward photo, but here you can see the underside of the platform, with 3 punched holes covered by pieces of red masking tape:
 Now drop the bottom of the pole into the platform hole. The pole will stick to the masking tape, but I highly recommend putting a little hot glue in the hole before you slide the pole in, just to keep it extra secure. You can also skip the hole punching and simply attach the bottom of the pole to the platform with masking tape.
Finally, cover the canopy hole with masking tape to make the pole nice and snug. Repeat the above steps with the remaining 3 carousel animals.
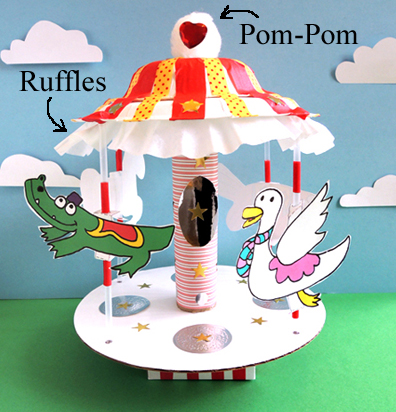
 Decorate the carousel with metallic dot stickers, embossed foil seals, and foil star stickers (anything shiny really). Hot glue a jumbo pom-pom to the top of the canopy, and hot glue 2 large gemstones on the sides of the pom-pom. If you want to add a bit of ruffle to your carousel’s canopy, cut the rounded edges off 2 coffee filters, and hot glue (or glue stick) the filters to the underside of the paper plate canopy.
 To spin your carousel, hold the box base firmly in your hand, grab the platform, and turn! These turned out awesome, but if I was to do this project again, I would change 2 things: 1) I would cut all the carousel animals from the template in advance so there was more time to color and assemble the carousel; and 2) I would make the carousel animal templates double sided so they would look good from all angles. If you’d like to try doubled-sided animals, here is a reversed carousel animals template. Just slide the reversed image onto the corresponding pole, secure with tape, and you’re good to go!
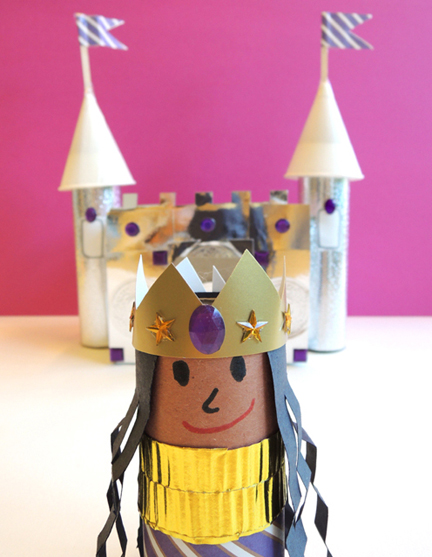
Looking for a circus to go with the carousel? Take a look at this little big top! Or perhaps you’d like some delicious fairground refreshments?
The artwork for the carousel animals was inspired by Randy Cecil’s amazing, warm, and wonderful illustrations. You go Duck!

 This year marks the 150th anniversary of the publication of Alice in Wonderland, and we decided to honor the occasion at Princeton University’s Community & Staff Day! Our event table was stocked with some super, yet simple-to-assemble, thaumatropes. There was also some breakdancing. Well, sort of. Scroll to the bottom of the post to see our mashup of Alice and the 1980s.
 You’ll need:
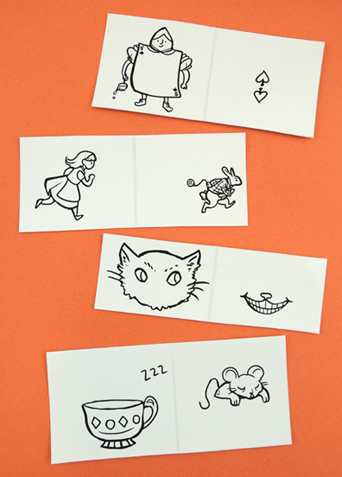 First, select a template, and use colored pencils or crayons to color it. Then, fold the template in half (along its faint grey line).
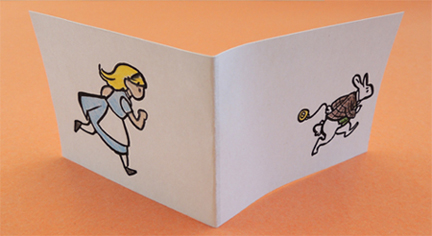 Flip the thaumatrope over, and tape a pencil to the back of one of the panels like so:
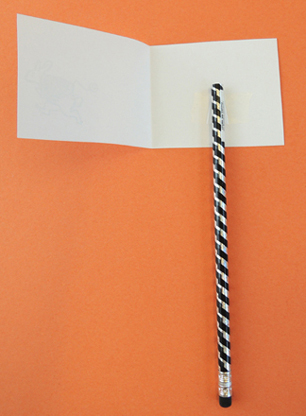 Fold the thaumatrope closed, then secure the panels together with a piece of tape. You’ll also want to tape both sides of the thaumatrope to the pencil, to make it extra sturdy.
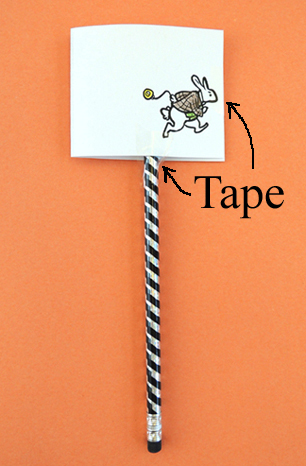 Hold the pencil between your palms and roll it briskly back and forth. Your thaumatrope will turn, and the two images will appear as one!
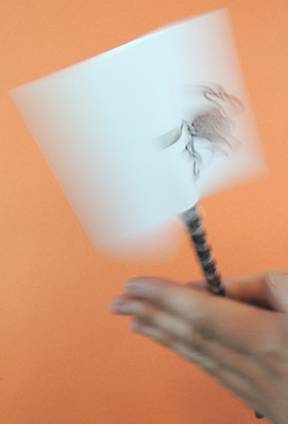 Here’s what our craft table looked like (and, if you’d like to explain a bit of the science behind how the device works, here’s a pdf of our thaumatrope table sign):
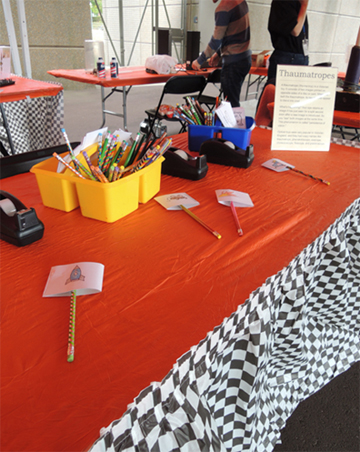 We also had some pens and blank thaumatrope cards on hand, just in case kids wanted to try their hands at making one from scratch.
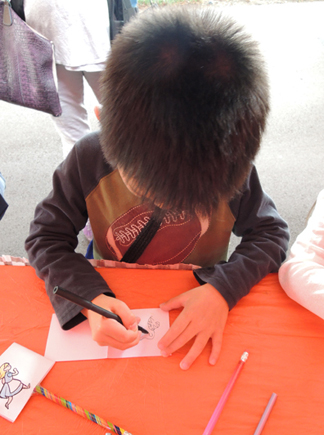 On the other side of our event tent, we loaded a table with optical illusions cards, tops, Photicular bookmarks, flip books, replicas of vintage thaumatropes, kaleidoscopes, and mini chess boards.
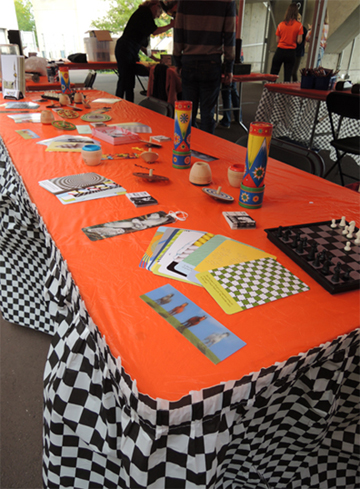 While color print-outs of optical illusions work just fine, I highly recommend this pack of Usborne optical illusion cards. There are 50 illusions in the pack. They’re colorful, sturdy, and the science behind the illusions is explained on the back of the cards. The deck retails for $10.
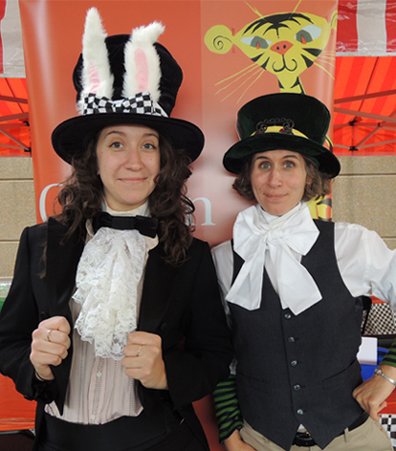
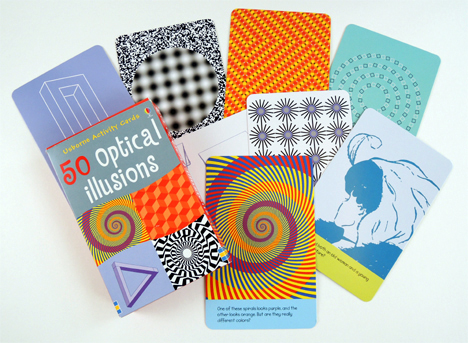 No event is complete without a little costuming, and Marissa and I raided both our closets and the Costume Shop at the Lewis Center for the Arts for our garb. This was completely unintentional when we snapped the shot, but…don’t Marissa and I look like we’re going to bust out some 80s breakdancing moves?
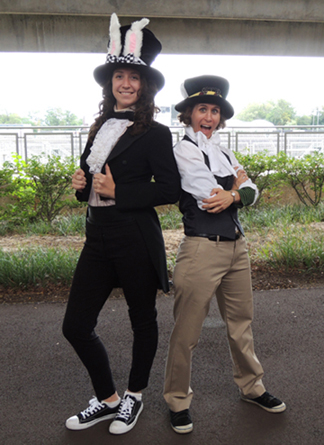 Maybe it’s the shoes? The jaunty pose? Hmmmm. What if we adjust the backdrop a little…
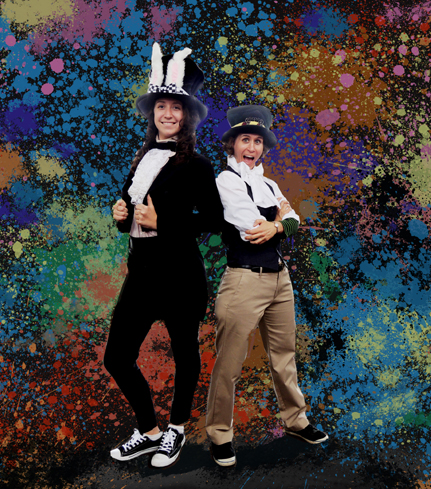 Oh yeah. I dare you to pin it.