Brand Names

brand namesIt’s grilling season, but we couldn’t JUST serve up a steak. We had to make it personal.

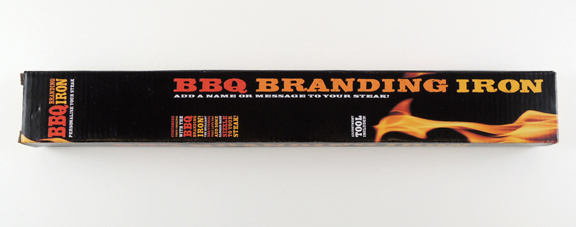
Today, we’re testing a “BBQ Branding Iron” which purports to “Add a name or message to your steak!” It’s offered by multiple Amazon sellers each using different descriptive names, but every listing appears to sell the exact same product. Prices range from $11.65 to $39.99, but we paid in the lower range and ordered from a seller who offered Prime shipping.

bbq branding iron box
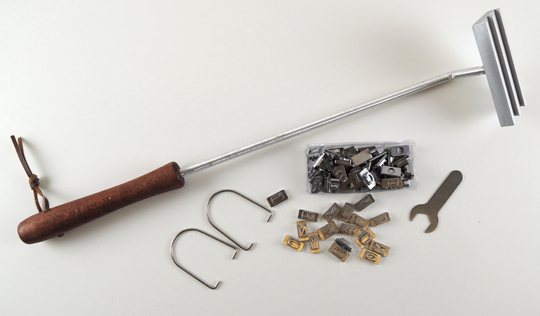
The box includes a handle with a letter block, individual letters, blanks to insert between the letters, a small wrench, and 2 metal loops to prevent the letters from sliding out of the block.

bbq branding iron box contentsOur office grill champion took on the task of testing the bbq brander. Take it away Katie!


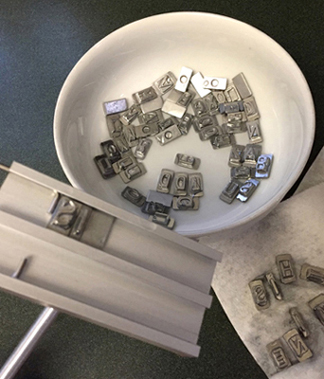
First, I hand-washed the metal letters, letter track and two loop locks before playing around with funny messages to brand. “YES” was an easy choice, as was “DO NOT TOUCH” and “THIS IS MINE.” I finally settled on “GET IN MY BELLY.” When arranging the letters, you have to remember to put them into the letter track backwards. It’s easy to forget, particularly with some letters that aren’t identifiable already backwards. The kit also includes blank metal spaces to separate the words in your message. You attach the two loop locks on either side of the letter track to keep everything in place as you are using the iron.

putting together the lettersOnce I felt confident I had everything backwards and spelled correctly, I headed out to start cooking. Beef steak was first.

ready to grill
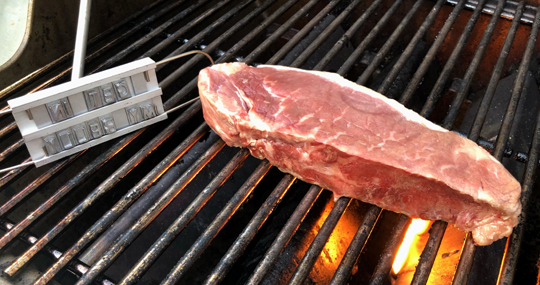
As my grill was heating up, I put the branding iron inside and made sure to leave the wood handle sticking out. I grilled one side of my steak, flipped it over, and tried the iron. Despite having left the wood handle outside of the grill, it was still hot. VERY hot. Not wanting to continue burning the palm of my hand, I dropped the branding iron and scurried to my kitchen to get an oven mitt.

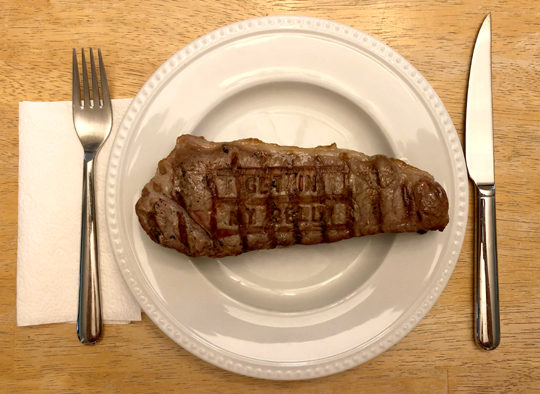
The second attempt was a success. After 10 seconds of leaving the hot branding iron on the sizzling meat, the message “GET IN MY BELLY” appeared on the steak. Nice!

grilled steak
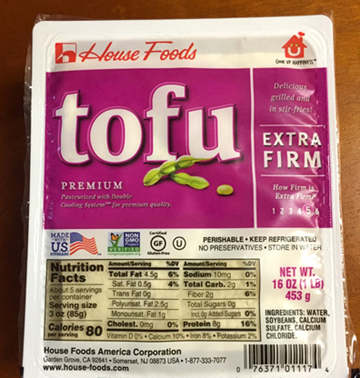
The next food test was for our vegetarian and vegan friends: TOFU! (Side note: I am not a tofu connoisseur and had no idea it comes in different sizes and varying consistencies. Who knew? I do now!). I went extra firm, to get as close to the consistency of steak as I could.

extra firm tofuIn order to change the letters, I ran the branding iron under cold water and simply slid the used letters out of the track. Not feeling terribly creative, I changed the message to read “NOT MEAT.”

Perhaps my inexperience grilling tofu didn’t help with the branding, but it was an epic fail. I tried multiple times to make the “NOT MEAT” brand dark enough on the tofu. Not once did it work. I tried leaving the brand on the grill for more time, putting the iron on the tofu longer, and it just didn’t take. I also thoroughly destroyed the tofu as I was flipping it over (and over).

tofu failMy thoughts on the BBQ Branding Iron? Steaks – beef, pork, lamb – and certainly chicken breast are the choice meat to use in order to get the message sufficiently branded. I suspect that hamburger might also work, but since I didn’t test the iron on a burger, I’m not sure. Tofu is definitely a no-go.

There were some reviewers who felt there weren’t enough letters included in the package, and that the letter track was too small and should be wider for longer messages. I can fully appreciate and understand their concerns.

I believe the BBQ Branding Iron would provide a clever personal touch for a reception or party where steaks are on the menu. It also would be a great gift for someone who loves to grill. Personally, I can’t imagine myself using it on a regular basis.

Recommended for grill masters, meat lovers, and party planners!

Pickin’ Peas, Or, A Problem with Rabbits

pickin peasIt’s garden season and the peas are plumb and ripe for pickin’. Unfortunately, Mr. Rabbit is on a mission to score a succulant snack! We made bunnies, baskets, and pea plants and then headed to our story time garden to catch that naughty nibbler in the act!

rabbit basket pea plantWe read Pickin’ Peas, a classic Southern folktale retold by Margaret Read MacDonald, and illustrated by Pat Cummings (HarperCollins, 1998). A little girl plants and carefully tends a pea garden. When the peas are nice and plumb she starts to pick them, singing as she goes (“Pickin’ peas. Put ’em in my pail.”). Mr. Rabbit, hiding in the row behind her, starts to eat the peas, singing as well (“Pickin’ peas. Land on my knees!”). Eventually, the little girl catches on to rabbit’s tricks and nabs him. But with some quick thinking, a song, and a dance, the rabbit manages to escape for further culinary daring-dos.

You’ll need:

  • 1 small box (mine was 4” x 4” x 4”) – a small tissue box works too!
  • 1 strip of tagboard for the basket handle (mine was 2″ x 14.5″)
  • Brown masking tape
  • A selection of patterned tape
  • 1 toilet paper tube
  • Brown construction paper
  • 2 eye stickers
  • 1 pink dot sticker
  • 1 small white pom-pom (mine was 0.75″)
  • 1 green pipe cleaner
  • 1 rectangle of green construction paper (approximately 3″ x 3.5″)
  • 3-4 mini pom-poms (mine were 0.25″)
  • 1 small plastic cup (mine was 3oz.)
  • 1 pea garden game (more on that later!)
  • Stapler, scissors, and tape for construction
  • Markers for decorating
  • Hot glue

There are three parts to this project: the basket, the rabbit, and the pea plant. We’ll start with the basket! Cut the tabs and lid off the top of a small box. If you’re using a tissue box, simply cut the top off. Attach a tagboard (or poster board) handle. Use brown masking tape and/or patterned tape to decorate the basket (or, just use markers!).

basket stepsNext is the rabbit! Wrap a toilet paper tube with brown construction paper, then add eye stickers and a dot sticker for the nose (or just use markers to create eyes and a nose). Tape a pair of brown construction paper ears to the inside of the tube. Hot glue on a white pom-pom tail, And don’t forget to draw a smile! The final step: write your name on the back of your rabbit so you can identify it later, during the garden game.

rabbitLastly, the pea plant. First, cut a pea pod and a leaf from a 3″ x 3.5″ rectangle of green construction paper. Here’s what mine look like:

pea pod and leafUse markers to draw some veins on the leaf. Write your name on the back of the leaf as well (so you identify it later, during the garden game).

Cut a pipe cleaner in half. Bunch the two halves together and tape the bottoms together tightly with masking tape (I used green tape, but any color will do). Curve the right pipe cleaner downward and tape the pea pod to it. Corkscrew the left pipe cleaner and tape a leaf to it. Finish by hot gluing 3-4 mini pom-poms to the pea pod (I used green pom-poms for my plant, but during story time, we let kids choose any colors they liked).

pea plant stepsYour pea plant also gets a “pot.” This is a 3oz plastic cup. I had some old office labels in the art supply cabinet, so I made “Peas” labels for the kids to color in. You can tape your pea plant inside the pot like this:

potted pea plantOr…you can wait, leave the pea plant detached from the pot, and play our garden game!

Our garden started as a low, flat box. We added 4 shrubs, tall grass, rocks, daisies, a smattering of flower stickers, pipe cleaner pea vines, a tagboard picket fence, and 3 oatmeal container rabbit holes. Here’s an image of the garden from the front:

garden from frontAnd here’s a birds-eye view so you can see how the shrubs are staggered and where the 3 rabbit holes are located:

garden from topWe knew the shrubs and rocks were going to get bumped pretty hard, so Katie attached them to jumbo craft sticks and slid them into slits she cut in the box.

shrub on sticksYou’ll notice that the shrubs have little pockets on them. This is so you can slide your pea plant into the pocket, and lo! It is now “growing” in the garden.

pea pocketTo play the game, we had every kid “plant” their pea plant in a pocket. Next, I collected all the rabbits. One by one, I hid a rabbit somewhere in the garden – in holes, behind rocks, in the tall grass, etc. – then I called out the name written on the back of the rabbit. The rabbit’s owner jumped up, ran over to the garden, and tried to find the rabbit before it “ate” any peas!

garden gameAfter everyone had caught their rabbit, the kids returned to the garden to “pick” their pea plants and tape them inside their pots. Since the kids’ names were written on the backs of the pea plant leaves, every plant was returned to its rightful owner.

Rabbits ruled this story time, but what happens when vegetables strike back? Click here to find out!

Ice Cream for All

truckBecome an ice cream entrepreneur! The lid of this fabulous pull toy opens to reveal a delicious variety of flavors to serve to your happy customers.

compositeIn addition to being simple, this project is highly portable. This summer, I brought it to a reading program hosted at the community pool and it was a big hit.

We read Issac the Ice Cream Truck by Scott Santoro (Henry Holt & Company, 1999). Issac is a relatively happy ice cream truck, but he can’t help fretting that other trucks seem to have more important jobs than him (lifting, hauling, moving, building). One day, a building fire traps Issac between several enormous fire trucks. After the fire is put out, the hardworking firemen (and firewoman!) are delighted to see a little ice cream truck waiting for them. Isaac realizes that he does have an important job after all…making people happy.

You’ll need:

  • 1 box. I used a 9” x 4 ½” X 4 ½” box
  • An ice cream truck template, printed on 8.5″ x 11″ card stock.
  • 4 black poster board wheels
  • Hot glue
  • 1/2 pipe cleaner
  • 1 jingle bell
  • 1 long piece of curling ribbon
  • Markers for decorating
  • Scissors and tape for construction

For the ice cream:

  • 1 cone water cup
  • 1 sheet of tissue paper (mine was 20″ x 29″)
  • Masking tape
  • 1 small pom-pom (mine was 1/2″)
  • 3 toilet paper tubes
  • Construction paper and/or patterned paper
  • 3 medium-sized craft sticks
  • Hot glue
  • 1 small plastic cup (mine was a 3 ounces)
  • 2 jumbo pom-poms (mine were 2″)
  • 1 small plastic spoon (or mini craft stick)
  • Crayons for decorating
  • Scissors and tape for construction

Start by using markers to customize your ice cream truck template. Cut and tape to the box. Then add the wheels. You can tape the wheels, or use hot glue to make them extra secure.

Next, cut a small notch in the front of the truck, right at the top. Knot one end of the ribbon and slide the knot into the notch. Then tape the knot inside the truck. This might seem like overkill, but trust me, these trucks take a real beating from their enthusiastic “drivers.”

notchNow it’s time for the bell! Bend1/2 of a pipe cleaner into an upside-down L, thread the bell on one end, then curl the end to keep the bell from falling off.

threaded bellTape the straight end of the pipe cleaner on the back of the truck like so:

bellYour truck is done…it’s ice cream time! I’ve included instructions for multiple types of ice cream, but you can modify according to your needs. For example, when I took this project to the local pool, we just did ice cream cups and single Popsicles (and I hot glued the sticks on the Popsicles in advance).

To make a cone, use crayons to color the cone water cup (marker just smeared on the cup’s semi-waxed surface). Then, take a sheet of tissue paper and gently squish it into a ball shape. Gather the bottom of the ball together and secure masking tape around it. This creates the “ice cream plug” for your cone.

ice cream plugHot glue a small pom-pom on top & pop it in the cone for the perfect finish!

cone with cherry

To make a Popsicle, wrap a toilet paper tube with patterned paper or construction paper, then hot glue a craft stick on the inside edge of the tube. To make it a double, simply hot glue two finished pops together.

popsFor an ice cream cup, drop 2 pom-poms in a 3 oz. cup and add a small plastic spoon. If a spoon isn’t handy, use a mini craft stick.

two scoops in cupA few months after I did this project, a mom made a special trip to my library to see if there was any chance of getting another truck template and box. Apparently, the ice cream truck was her son’s favorite toy, and it had finally succumbed to his various adventures with it.  She was hoping to build a new one with him. I was delighted to set her up with some fresh supplies and very flattered. You really really can’t get a better compliment than that!