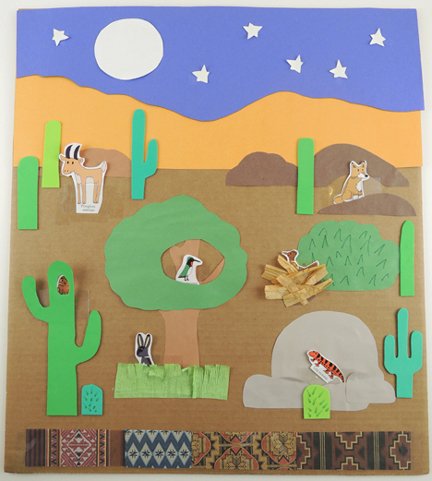
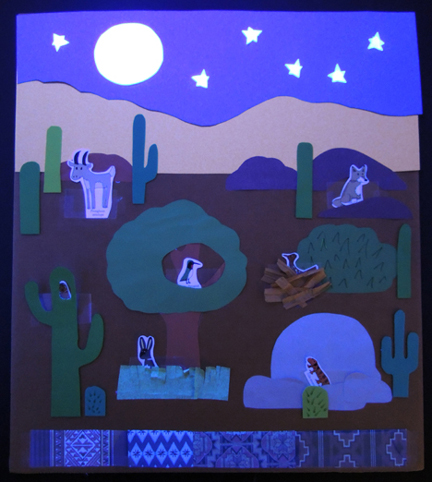
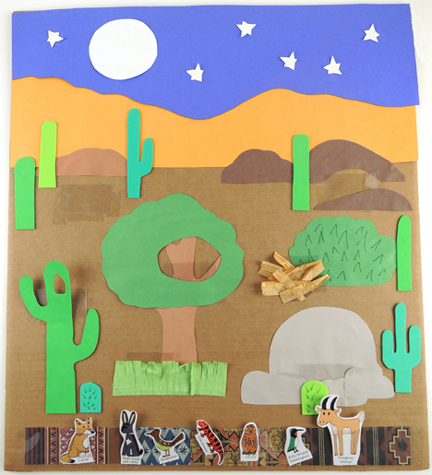
 Settle down Southwestern critters! As the moon rises over the cacti in this lovely construction paper landscape, it’s time for the birds, animals, and reptiles to find their special spots. Turn off the lights, and your moon and stars glow in the dark!
 We read Bedtime in the Southwest by Mona Hodgson, illustrated by Renée Graef (Rising Moon, 2004). Twilight has come to the Southwest, and it’s time to go to bed. But is everyone ready? The little hare is hopping on his bed, the skunk appears to be ignoring Mama, and the porcupine is poking quills in his pillow in protest. But eventually, everyone scoots, snuggles, and nestles down to sleep.
You’ll need:
- A large, flat piece of corrugated cardboard (ours was 22″ x 25″)
- Dark blue poster board
- Orange poster board
- Brown, green, white, and gray construction paper
- Several pieces of green self-adhesive foam for cacti (optional)
- A southwest critter template color printed on 8.5″ x 11″ white card stock
- Scissors, glue and tape for construction
This project was a step-by-step endeavor, as opposed to our more go-crazy-with-the-supplies-and do-anything-you-want projects (here’s looking at you, Roy). And while crazy art is fun, there’s also something soothing about methodical projects. That was definitely true of this project. It was very mellow. We even removed all the tables and chairs and worked in a big, relaxed circle.
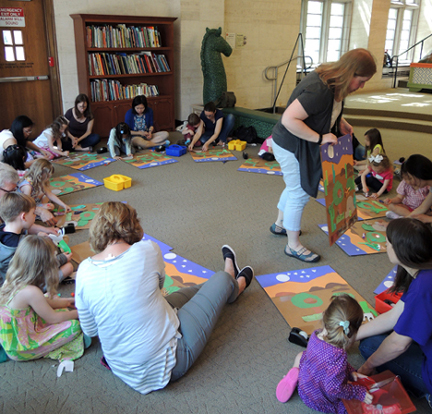 We also prepped all the project items in advance, so it would be easier for the entire group to progress through the project together.
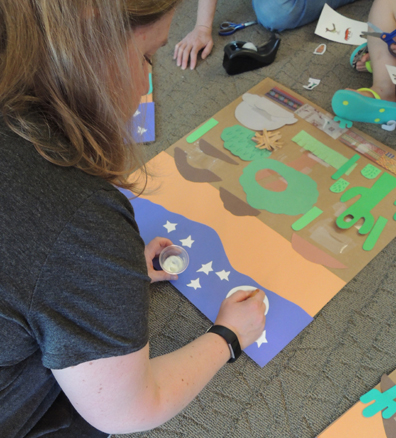
First, the backdrop boards! Glue a 7.5″ x 22″ piece of dark blue poster board to the top of the backdrop board. Then, cut mountain ridges in the top of a similarly-sized piece of orange poster board, overlap it a little with the blue poster board, and glue it in place. Glue a white card stock moon and stars to the night sky. Next up, your critter habitats!
But first, a word about the little pockets each critter gets tucked into. We had a ton of old archival mylar lying around, so we used that to create clear pockets. Overhead projector transparency sheets work too. But you can opt for non-transparent pockets and use good old construction paper. Also, your pockets needs a little wiggle room at the top for sliding the critters in and out. So leave 0.75″ of the pocket un-taped.
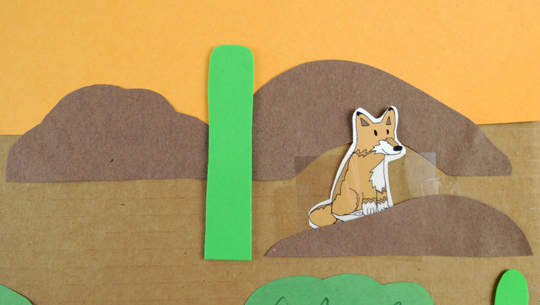
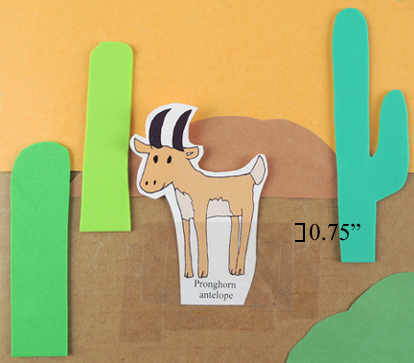 As you can see, the pronghorn habitat is a small bump of brown construction paper with a pocket taped in front of it. Super easy! The coyote habitat is 3 brown dirt mounds, one cut to look like the entrance to a burrow. The pocket is taped behind one of the mounds.
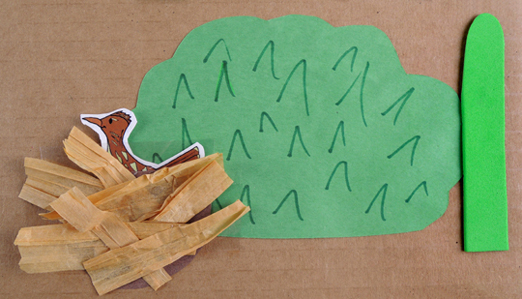
 The roadrunner habitat is a big spiky green bush with a little construction paper nest in front of it (the pocket is under the nest). Then we we then covered the nest with (optional) brown raffia pieces.
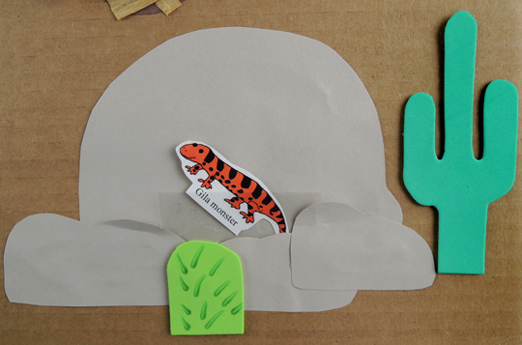
 The gila monster habitat is 4 gray rocks, with the pocket behind 3 overlapping rocks.
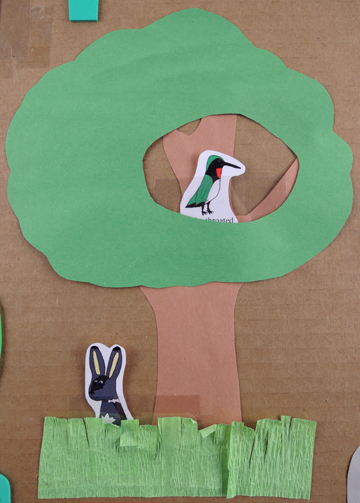
 For the hummingbird habitat, cut a branched tree trunk out of brown construction paper, then tape the pocket over a fork in one of the branches. Cut a tree canopy with a big hole in it, then glue it over the top of the tree trunk and the pocket, leaving plenty of room to slide the hummingbird in and out. The hare habitat is at the bottom of the tree. It’s a pocket covered by a fringed 6″ piece of green crepe paper (or just use construction paper).
 Finally, the elf owl. Did you know that elf owls live in cacti? We wanted to capture that awesomeness, so Katie painstakingly cut holes in 2 dozen cacti. Tape the owl’s pocket directly to the board, slide the owl in the pocket, and then position the hole in the cactus directly over the owl’s face.
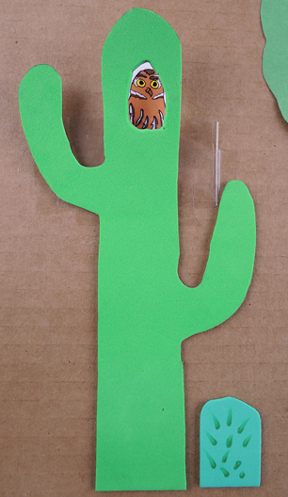 Because you need to retrieve your owl, you only want to attach the bottom section of the cactus to the board. We used self-adhesive foam for our cacti, and solved the problem by leaving the paper backing on the top part of the cactus, but peeling and sticking the rest:
 We used self-adhesive foam for all our cacti. It gave them a terrific texture, and it was fun for the kids to peel and stick them wherever they wanted. But construction paper works too! At the very bottom of our background boards was a long mylar pocket to store the animals when they’re not tucked into their habitats. We slid some cool Southwestern patterned paper into the pocket too.
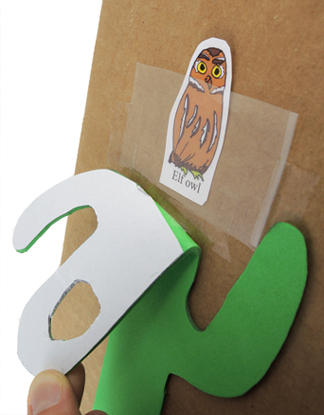
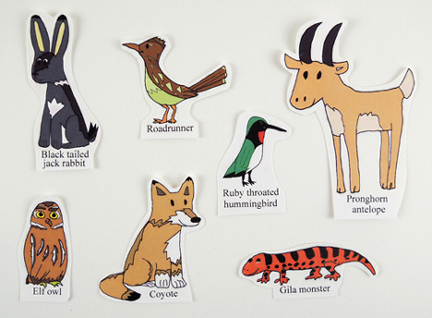
 You might have noticed that we kept the names of the critters on our template cut outs. I also broke from tradition and presented them to the kids already colored in. That’s because we wanted the kids to see what the various Southwestern critters looked like, and to learn their names. However, if you’d like the same template in black & white, here it is!
 The very last thing Katie and I did was go around with a bit of glow-in-the-dark paint and fill in their moon and stars. We also added optional shooting stars (by painting glowing lines behind one of the stars on the board).
 And that’s it! I like to think that, later that night, little Southwestern landscapes were glowing softly across town as kids tucked the animals in and went to sleep. Goodnight, sweet Southwest.
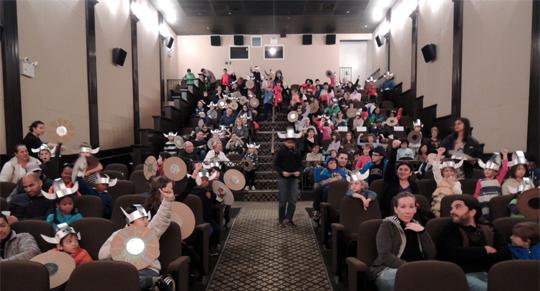
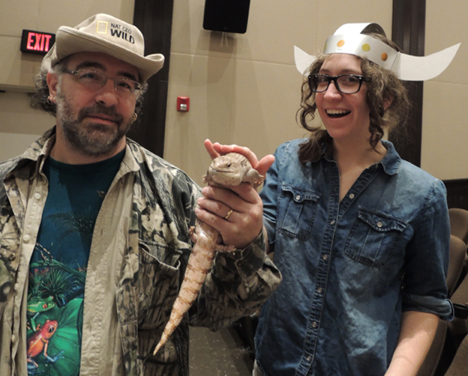
 Vikings and Dragon Riders! Don your horned helmets, grab your shields, and get ready for the ultimate How To Train Your Dragon theater experience, complete with real reptiles!
 After watching How to Train Your Dragon with my kids, I was delighted to learn that the movie was based on the book series by
 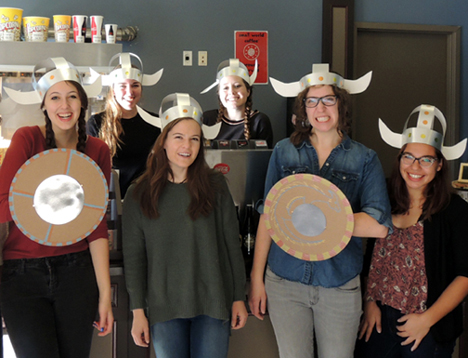 You’ll need:
 It never hurts to thrown in a little history, so we included informational table signs at all the hands-on activity tables. Here’s the
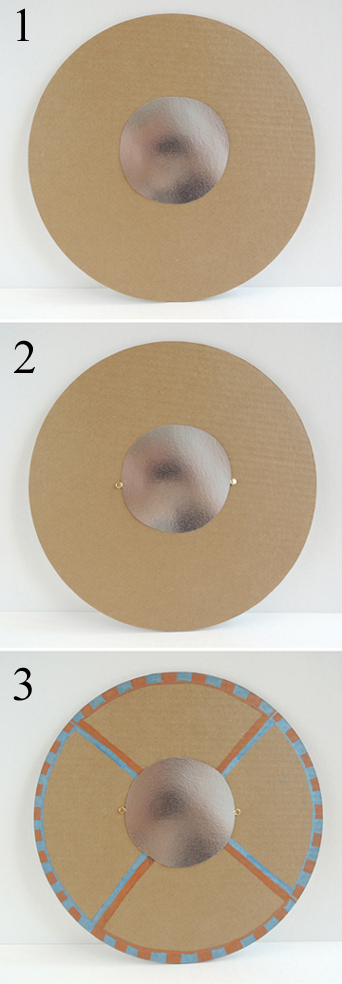 Next, loop 2 strips of poster board loosely around your forearm. Stapled them closed. Punch a hole in each loop, then thread the prongs of the brass fasteners through each hole. The back of your shield will now look like this:
 If you’re worried about scratched forearms, put tape over the prongs of the fasteners. Here’s the
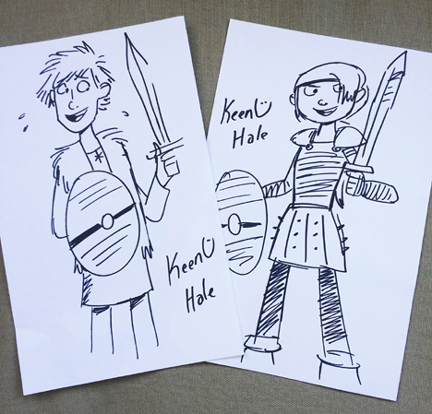
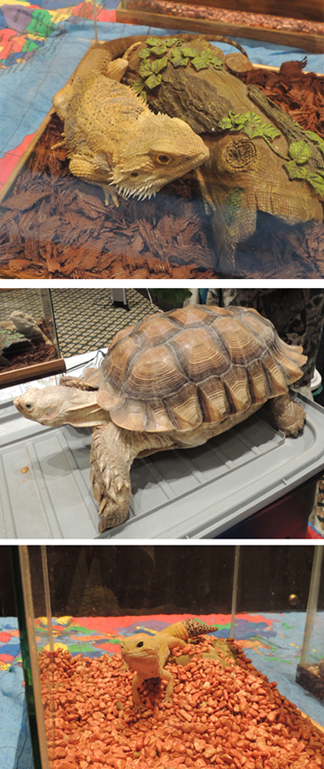
 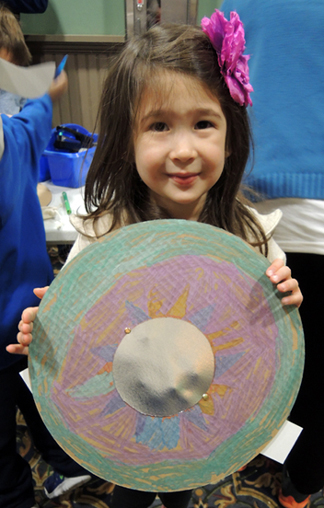 Not far from the helmet and shield tables was the very talented
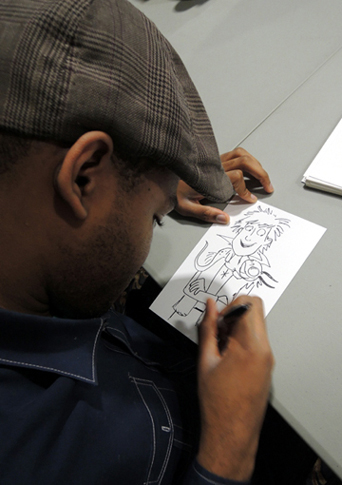
 The final activity table was a replica of a Viking game. It was WAY popular. Marissa found it in Hands On America Volume 1: Art Activities About Viking, Woodland Indians, and Early Colonists by Yvonne Y. Merrill (Kits Publishing, 2001). It’s a snap to put together.
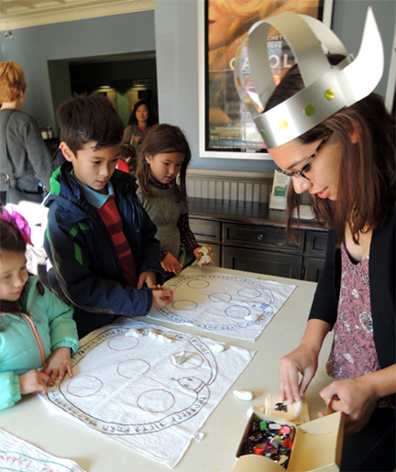
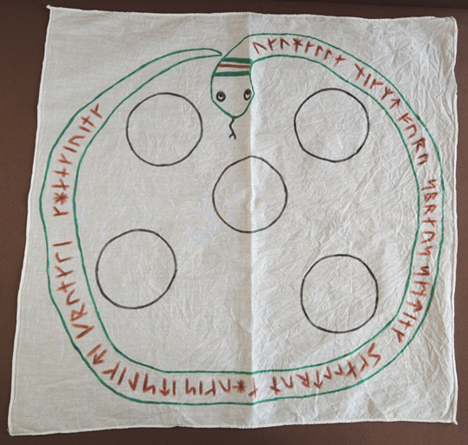 The game pieces are little birds (about 2″ long), made with air dry clay.
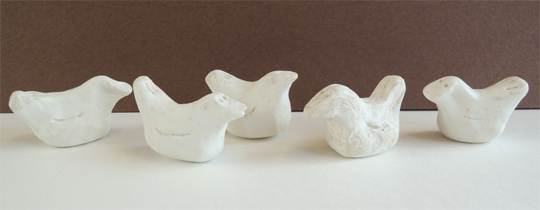 To play the game, toss the clay birds onto the game board.
 The other prize was a chance to win a cardboard Toothless standee (purchased on Amazon for $30). Kids automatically got a chance to win when they first entered the theater, but at the Viking game table, 1 point equaled 1 extra chance to win. So 3 points equaled 3 more chances to win. The kids really liked that!
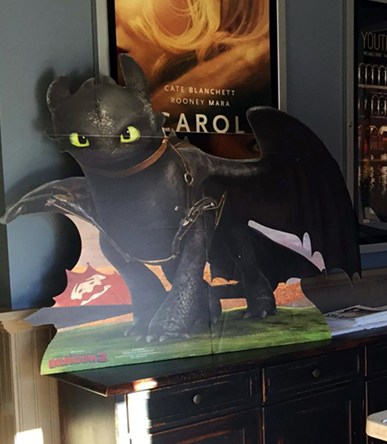
 Finally, it was time for the film. Having only seen it on my laptop, I can say I was completely blown away watching it on the big screen. The flying! The fire! The CLOUDS!