 Prepare to embark on an epic journey through a variety of obstacles. Weave in and out of topsy-turvey turtles, dodge two plump pigs, avoid the chomping alligator, and face off with a vacuum cleaner elephant. It’s the world’s biggest puddle…can your little boat make it?
We read The Puddle by David McPhail (Farrar Straus Giroux, 1998). One rainy day, a little boy decides to sail his toy boat. He finds a truly enormous puddle, but unfortunately, a frog hijacks his boat. The boy can’t chase after the frog – he’s promised his mother he’ll stay out of puddles. The frog crashes the boat into a turtle just as an alligator shows up and offers assistance. The alligator retrieves the boat, but it’s a wee bit crushed. In the meantime, a pig arrives for a swim and is being quite messy about it when an elephant appears and drinks the entire puddle. This prompts all the animals to yell at her to put the water back. So she does. Quite forcefully. By this time, the sun comes out, the puddle dries up, and the boy heads home for a hot bath. What a day!
You’ll need:
- 1 small box (I used a 4” x 4” x 4” box – a small tissue box works too)
- 2 rectangles of (mine were 3″ x 12″)
- A section of color masking tape
- 2 toilet paper tubes
- A selection of construction paper
- A selection of multicultural construction paper
- A selection of patterned paper
- 1 wooden dowel
- 3 foam beads
- 1 sails template, printed on white 8.5″ x 11″ paper
- Hole punch
- 1 piece of string or yarn (approximately 27″)
- 1 puddle obstacle course (more on this later!)
- Scissors, tape, and stapler for construction
- Markers for decorating
- Hot glue
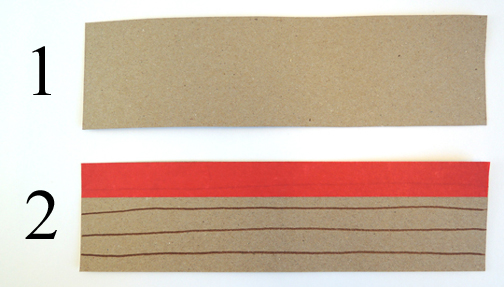
 We’ll begin with the boat! The first steps are exactly the same as this Noah’s Ark balancing game. Cut the lid and tabs off your box (if you are using a tissue box, cut the entire top off). Your box should now be about 3″ tall. Set it aside for a moment. Next, use a marker to draw horizontal lines on 2 rectangles of tag board. This creates the “boards” of your ship. For a bit of color, run a piece of color masking along the top of each rectangle (or just use markers).
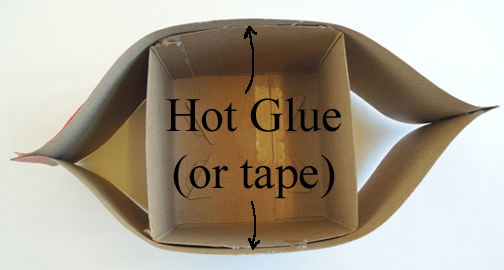
 Place both rectangles on top of one another, staple the short ends together, and slide them over the box. Secure them in place with tape or hot glue. This step is really important! If the sides of the boat aren’t attached to the box, the sides will pop off when you yank the boat’s pull string later.
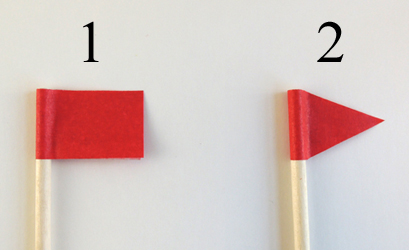
 Next, wrap a 4″ piece of color masking tape around the top of a wooden dowel, then snip the tape with scissors to create a triangular flag.
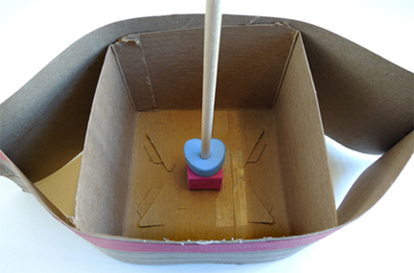
 Push 3 foam beads on the opposite end of the dowel, then hot glue the foam beads to the bottom of the boat. This is your ship’s mast.
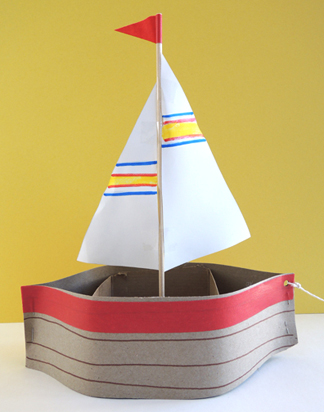
 Color and cut the sails from the template, then tape them to the front and back of the mast (we made the sails short so they wouldn’t pull the dowel over, feel free to discard the template and make your own sails if you like). Finally, punch a hole in the front of the boat and knot a piece string through it. Here’s the finished boat with the flag, the sails, and the pull string in place:
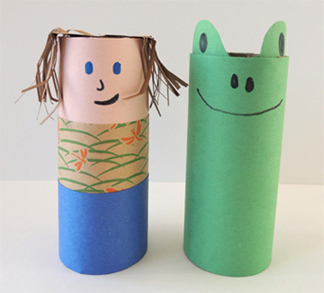
 We made 2 crew members (a person and a frog) using multicultural, construction, and patterned paper. Here’s Marissa’s self portrait, with a froggie friend:
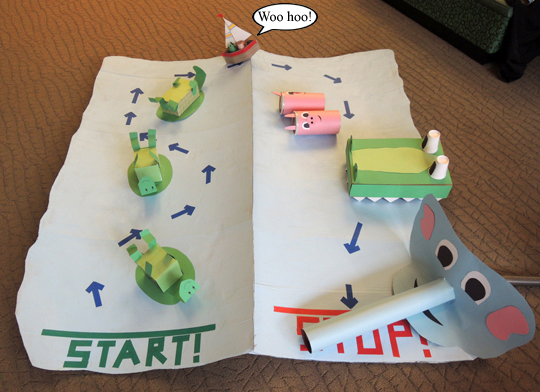
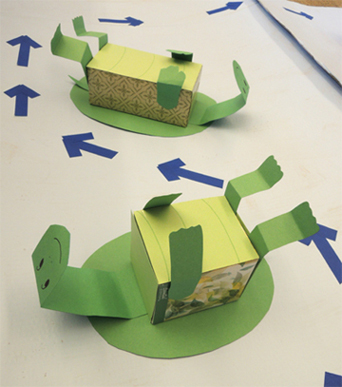
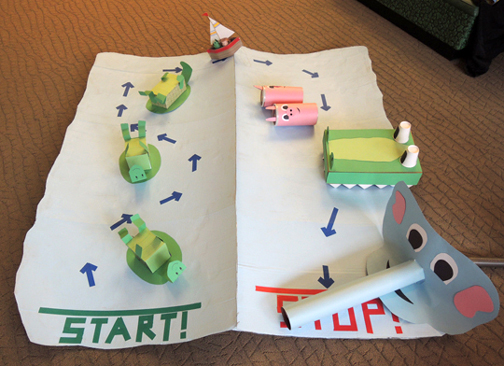
 Now for the obstacle course! We snagged 2 huge pieces of cardboard from the recycle bin, and painted them light blue. Interestingly, the paint warped the edges of the cardboard upward, creating “waves.” While the paint was drying, we crafted some animal obstacles. The turtles are tissue paper boxes with green poster board shells, arms, legs, tails and heads.
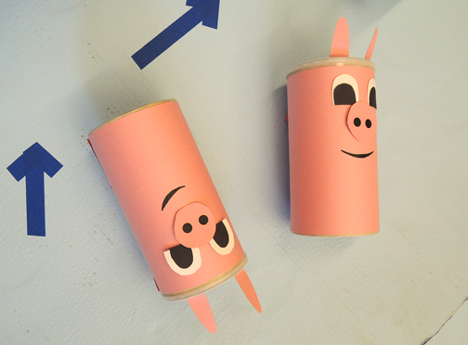
 The pigs are large oatmeal containers wrapped with pink construction paper.
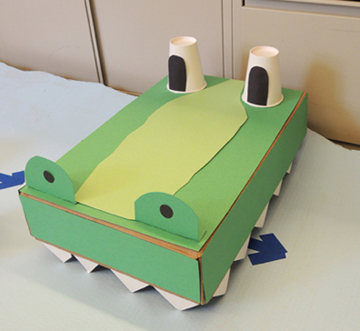
 The alligator is the lid of a copy paper box covered in green poster board, with paper cup eyes and poster board teeth.
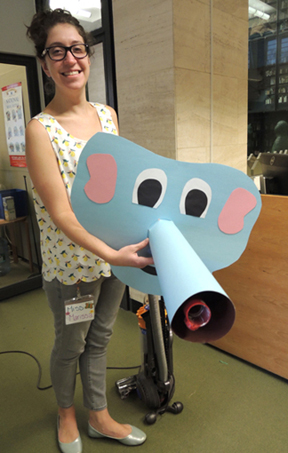
 The elephant’s face and nose was constructed out of light blue poster board, and a vacuum hose was inserted in the trunk.
 After placing all the obstacles on the cardboard, I used blue masking tape to make directional arrows. I decided not to glue any of the obstacles down (I’d rather have kids send them flying than trip over them).
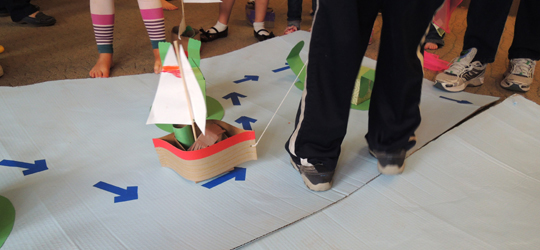
 To run the course, kids had to navigate their boat through the turtles, ride over some waves, and avoid the pigs (which were rolling all over the place as kids walked on the warped cardboard). Next came chomping alligator (which consisted of Marissa moving the box lid up and down and saying “Chomp! Chomp!” – we’re super high tech here.) Here’s a boat on course:
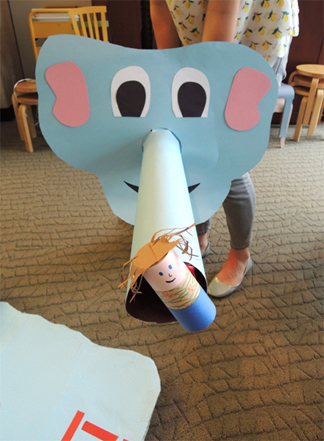
 Right before the finish line, the boats had to pass by the vacuum elephant. That was my job. I would make the elephant suck a toilet paper tube character right out of the boat, and then the kids had to pull it off the end of the vacuum nozzle! Fun!
 IMPORTANT! Some kids are afraid of vacuums. I asked vacuum-averse kids to turn their name tag stickers upside down. That was my signal to turn off the vacuum while they completed the obstacle course. It worked great!

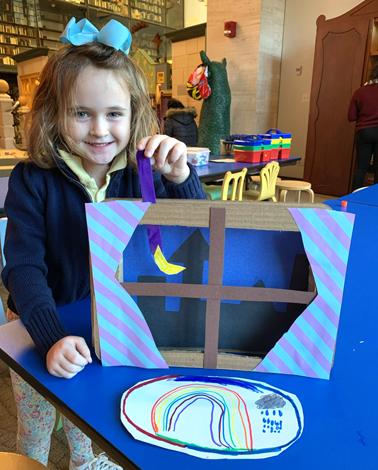
 Storms can be very scary, but this story time project lets YOU be in charge of the clouds, rain, and lightning!
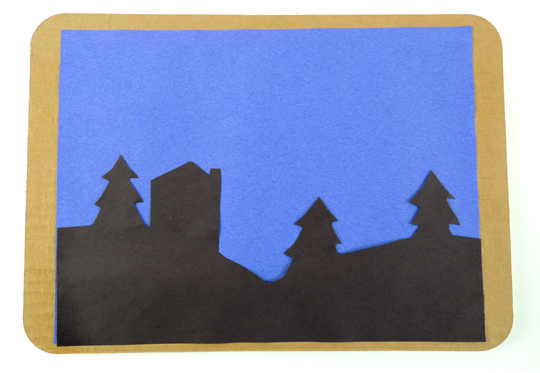 First, glue a piece of blue construction paper to a corrugated cardboard rectangle (we used 9.75″ x 13.75″ cake pads). Next, cut a silhouettes from black construction paper and glue it down as well. Definitely make sure to glue these down tight, so the edges don’t snag on your puppets later. Here’s the front piece…
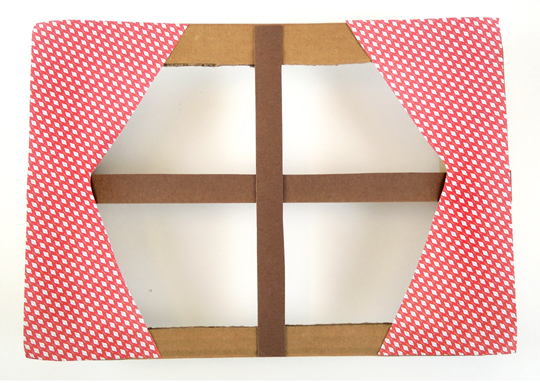 Use a box cutter to cake a window in the second corrugated cardboard rectangle. Then glue or tape 2 strips of poster board to the front of the window (definitely use poster board, construction paper is a little too saggy). Add a pair of optional window curtains. Then flip the front piece over…
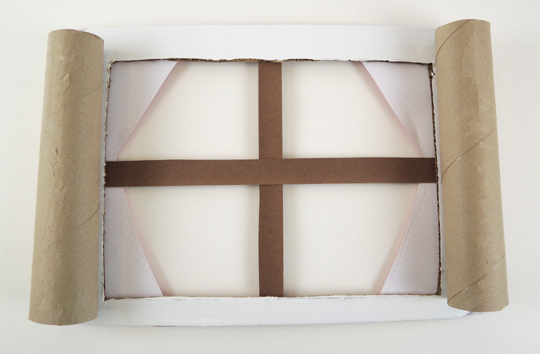 Shorten 2 paper towel tubes so they fit inside the sides of the window, then hot glue them firmly in place (we reinforced the connection with tape as well). Hot glue the tubes to the back piece of the theater. Now there is a gap between the front and back of the theater. This is where you drop your stick puppets! We also hot glued a small box to the very back of the theater to keep it more steady (our box was white, sorry, it’s a little hard to see in the photo!).
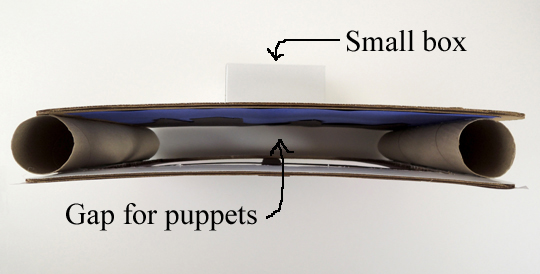 To make the stick puppets, cut a lightning bolt, fringe of rain, crescent moon, and storm cloud from construction paper, then glue or tape them to the bottom of a jumbo craft stick (ours were 8″ long).
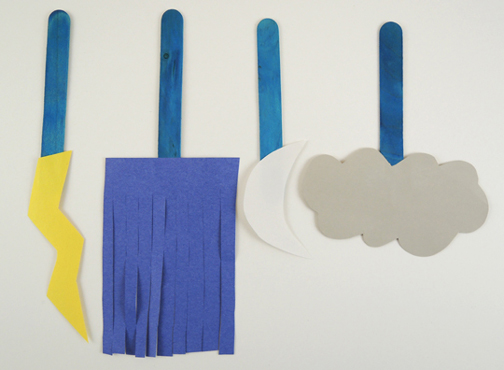 To operate the theater, simply drop the puppets into the gap and narrate the story as storm clouds move in, rain comes, lightning strikes, and the skies finally clear to reveal the moon!