
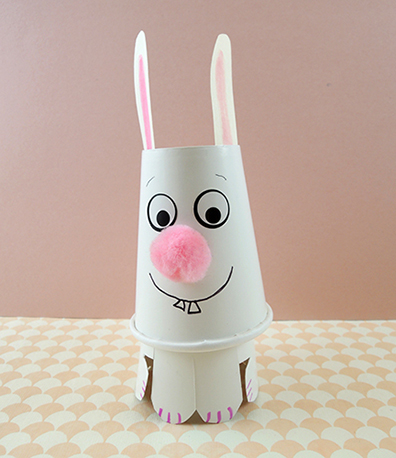
Do you have a case of the wiggles this winter? So does this little bunny! Press down on its head to watch it hop and bobble. Originally spotted on Instagram as an octopus, we re-imagined the project as a rabbit…and all it takes is 2 paper cups and some poster board!
We recommend reading Hop Little Bunnies (Bloomsbury, 2020), written by Martha Mumford and illustrated by Laura Hughes (read here by Kids & Company). The little bunnies are sleeping until noon, but when they wake, they traipse through barnyard, waking the other animals until it’s a cacophony of cheeps, meows, quacks, and so forth. Full of animal sounds, this one is sure to get the audience reading along with you! And for the musically inclined, you can try the singing version on the publisher’s official channel.
You’ll need:
- 2 papers cups
- White paper for rabbit ears
- 2 strips of 1″ x 13″ poster board
- Scissors and tape for construction
- Markers for decorating
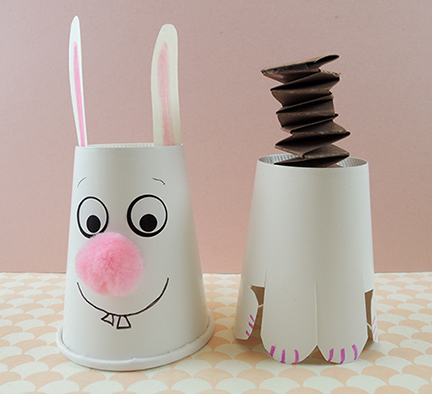 This project is essentially two cups stacked on top of one another with a paper spring in the middle. To begin, flip both cups upside down, then use markers to draw a face on the first cup. Add some paper ears (and an optional pom-pom nose if you desire!). Use scissors to cut bunny legs on the second cup.
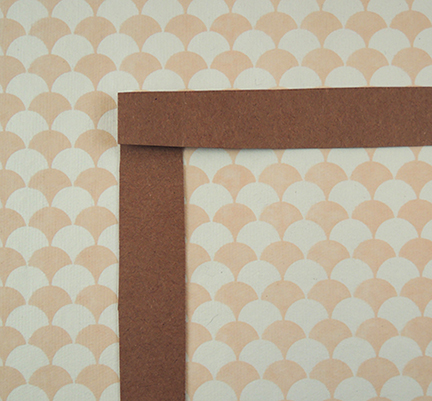
Now for the paper spring! Take two, 1″ x 13″ strips of poster board and put them corner to corner at a 90 degree angle, like so…
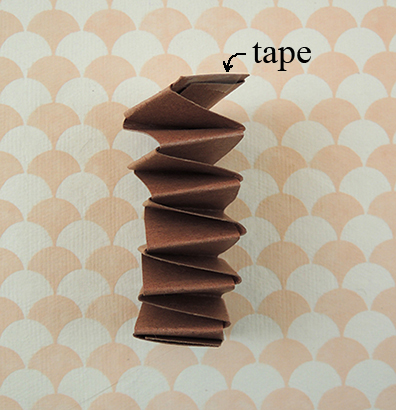
 Keeping the corners together, alternately fold each strip up towards you. Continue until the strips are completely folded into an accordion spring. Tape the end sections together for more stability.
Sometimes it’s easier to show then tell, so here’s Katie’s demonstrating her her awesome paper spring folding skills:
You can secure the spring to the bottom cup with tape or glue, or leave it loose for some extra wiggle. To finish, place the bunny head cup on top the body cup. Then press and release the bunny’s head to watch it bounce!
Original octopus project credit goes to strange_side_of_crafting on Instagram!


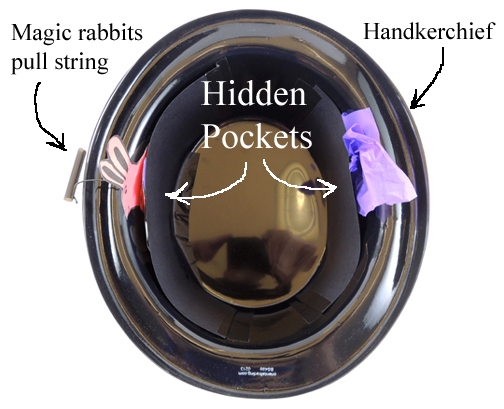 As you can see, the interior of the hat has two hidden pockets. These are made from 2 rectangles of black poster board taped inside the hat. After some testing, we learned that the pockets need to be fairly large (4.25″ x 9.5″) in order for the tricks to works successfully.
 We gave the kids
  If you’d like a add a third trick to your magic show, we highly recommend the “sticky wand” trick. You’ll find it, and other awesome tricks, in this “
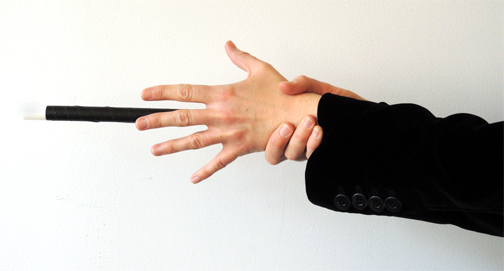
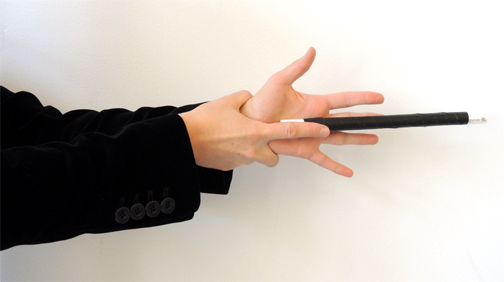 Tell the audience they have magic abilities too. On the count of three, have them audience clap once to “demagnetize” the wand. When you hear the clap, lift your finger to release the wand, and let it fall dramatically to the floor. Then take a big bow!