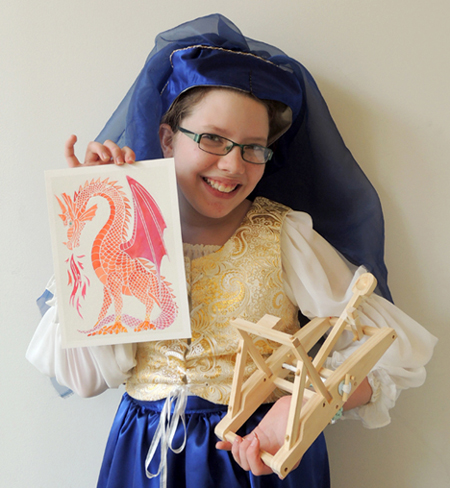
 Enter the realm of mythical beasts, sieige engines, and truly stunning Medieval headdresses…it’s time for more kid-tested product reviews! Today, Hope is taking on the Aquarellum Junior paint kit by SentoSphere (ages 7+, retails for approximately $20) and the Tabletop Catapult kit by Sterling Innovation (ages 8+, retails for approximately $25). Have at thee Hope!
Hi everyone! I’m back… and this time, with a Medieval twist! First, I’m going to review the Aquarellum kit.
 Opening the box, I found four pieces of light, thin, cardboardy canvas, referred to in the instructions as “Aquarellum Board.” The face of each board had a rendering of a dragon outlined faintly on the surface. One of them looked like a Chinese dragon, and the other three were a jumble of Viking and Medieval. There was also a plastic paint palette, six watercolor paints in bottles, a paintbrush, a plastic eyedropper, and a set of instructions. Dr. Dana thought the instructions were beautiful, and their bright colors captured my attention too.
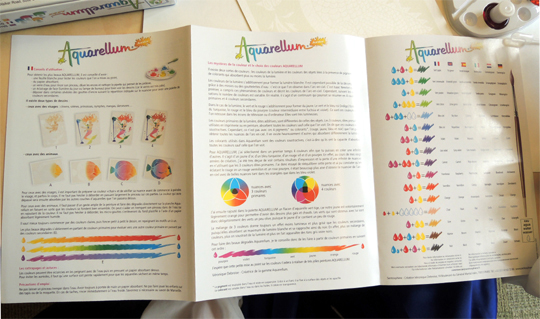 The instructions were a 3 page, double-sided foldout. I started reading them hoping to glean a bit of information on using the product. But the instructions were written completely in French! Scouring them, I finally found a miniscule paragraph written in English. Sadly, it offered me only a vague idea of the procedures of the project. It described the board and how to paint on it, how to mix and dilute your paints, gave a few application tips for the paints, and then… nothing. But I got the “picture” (hahaha). However, I was sad that I couldn’t read the rest of the lovely illustrated instructions. Ah well. C’est la vie!
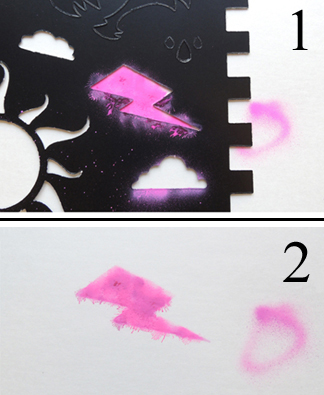
Basically, each Aquarellum “canvas” had a picture of a dragon outlined in wax. Since the paint was water-based, any messups would be deflected by the wax. What an epically cool concept! It was almost impossible to mess up! Choosing one of the canvases, I assembled the extra materials recommended for the project. And I quote…
- a blank sheet to test mixed colors on
- absorbent paper
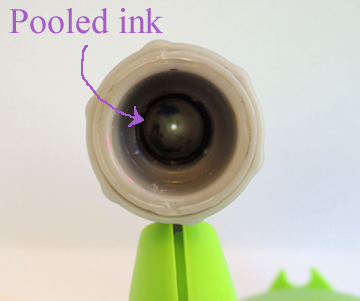
- A glass of water in which to rinse your brush, dilute inks, and clean the dropper used to dose the inks
- Direct light (sunlight or a desk lamp), allowing you to clearly see the designs, since the varnish is very pale.
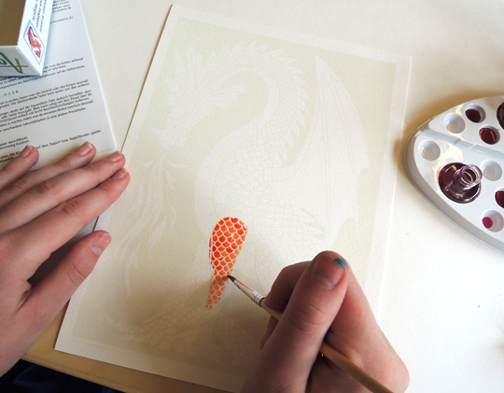
Setting up the materials, I readied the brush and paints.
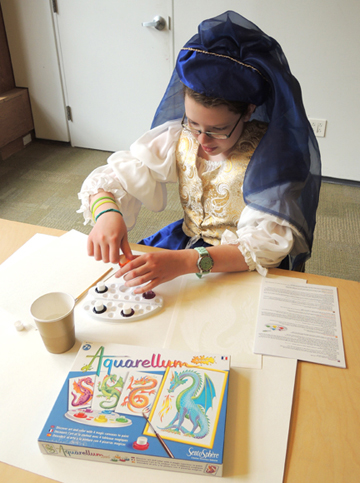 I used the plastic dropper to place the paint in the cavities of the palette, tested the mixed colors on a piece of paper, and washed the dropper and the brush off in a cup of water.
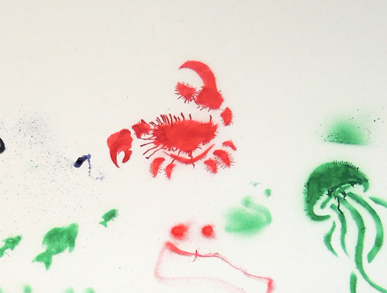
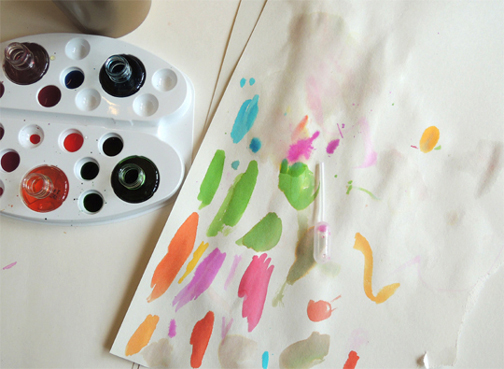 Then I started to paint. Oh! What fun!!! The colors were vibrant, the paint easy to use, and it was nearly impossible to mess up!
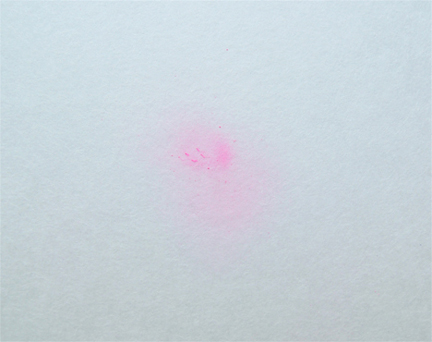
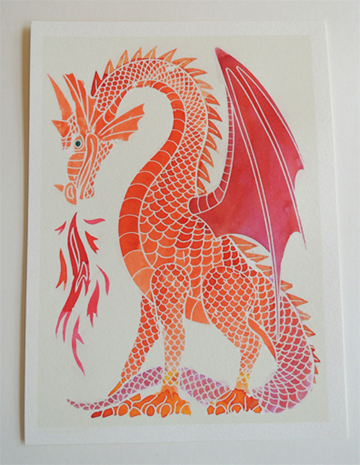
 I finished one dragon, and moved onto the next. I found that the paint dried super quick, which made it easy to layer more colors onto the canvas, creating new shades. It was awesome! The only downside was that the paint dried so quickly, it sometimes dried on the wax, creating smudges. Here’s a finished canvas:
 Overall, I really enjoyed this project! It was super fun, and my results turned out beautifully, even though I am not an expert at painting. The only downsides of the product were that if you went outside the main outline of the dragon, the smudges dried so fast that they could permanently mar your art.
Also, the bulk of the instructions were in French! This was especially frustrating because the French instructions were beautifully illustrated and clearly had more detail than the paragraph written in English. Also, Dr. Dana and I could not figure out the correct way to pronounce the product name! Aquarellum? What a tongue twister!
And the Scores Are In!
AQUARELLUM
PROS: Fun to use, vibrant colors, easy, entertaining, beautiful results.
CONS: Directions mostly in French, smudges dried too quickly.
SCORE: 5 OUT OF 5!!!!!!!!!!!!!!!!!!!!!!!!!!!!!
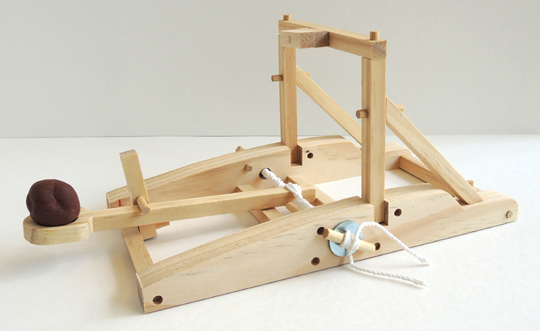
Setting aside the dragons, I turned to the weaponry….BEHOLD! A catapult!
 Opening the box, I found a book titled The Art of the Catapult, wood pieces, wooden pegs, directions, a chunk of brown clay in a plastic baggie, metal washers, white twine, a wire, and some glue. Unfolding the directions, I discovered that they were mostly illustrated. While I liked that they were so precisely illustrated, the text directions were vague, which confused me. The directions also called for a “Healthy Snack,” which was funny, because we only had marshmallows handy (more on those later)!
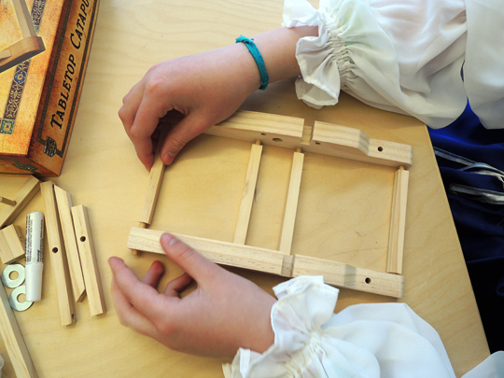
I used the inventory sheet on the first page to make sure I wasn’t missing any pieces, and started building the catapult. It was pretty straightforward. Use the wooden pegs to connect the wood pieces together to construct the base of the catapult.
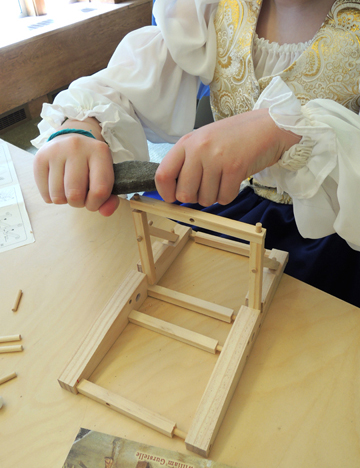
 However, some of the pegs were loose. I used some glue, which (thankfully) seemed to help. Other pegs were too tight and had to be hammered in with a piece of stone that Dr. Dana had in her office!?! It was ludicrous, but equally hilarious, to see me pounding pegs into the wood with a huge chunk of stone. Rock dust flew everywhere, and the noise… let’s just say it was painful.
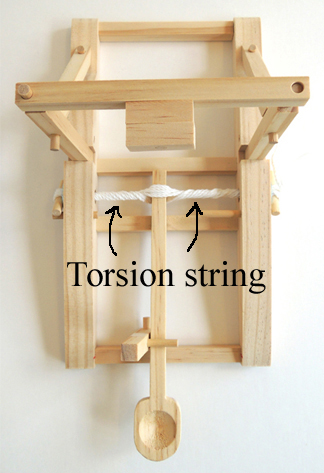
 After I had finished building the base and support structure, I had to construct the torsion string. When I saw the word torsion I thought, “WHAAAAAAAAT?!?!” (Torsion means “to be twisted” or “the act of being twisted”).
In a nutshell, to make the torsion string, I had to coil the string several times and use a wire to thread it through two washers and two holes in the catapult base. Then I wound the ends of the string loops around two pegs (called the “tensioners”). The catapult’s swing arm was inserted in the center of the torsion string and I used the tensioners to tighten it. Dr.Dana assisted, using her knightly muscle.
 The directions for this part definitely could’ve used more clarification. The picture/word combination was just too weak for the complexity of the task. I couldn’t figure it out, so I called in Dr. Dana, who also had to carefully inspect the directions and fiddle with the catapult. But figure it out we did!
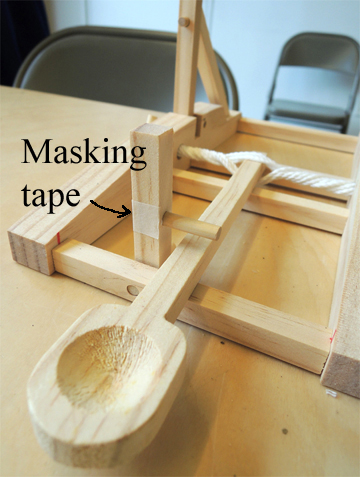
 We made a ball out of the clay…but there was another problem. The wooden peg on the “trigger” was too weak to hold the catapult arm back – the peg just kept popping out. So Dr. Dana reinforced it somewhat with masking tape.
 But there was another problem. Now the entire trigger would flop over, releasing the catapult arm. It just wasn’t strong enough to hold the arm down. So we ignored the trigger and used our fingers to hold down catapult arm while we loaded it.
But it was fun to use! It was just so utterly entertaining to watch stuff fly through the air! First, we launched the clay ball. Later, we launched a marshmallow and a ping pong ball. The clay ball had the lowest altitude when launched, the marshmallow went the farthest distance, and the ping pong ball went the highest.
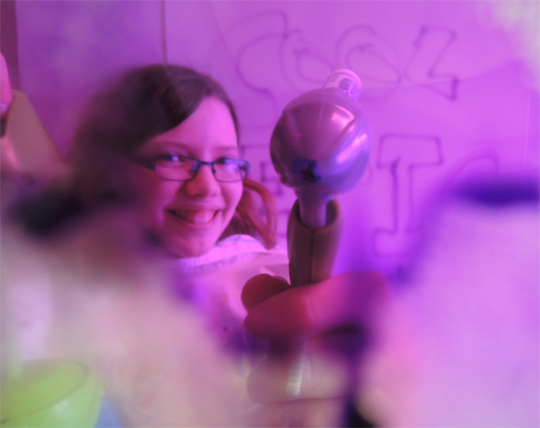
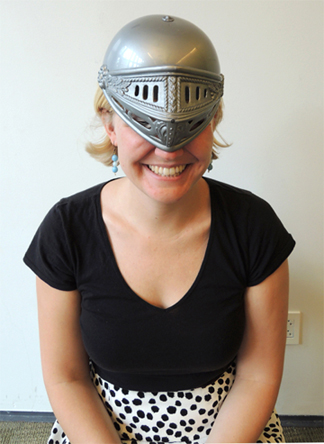
Then we decided (of course) to try to launch a marshmallow into curatorial staffer Ellen’s mouth. First, we made sure she was wearing proper head and eye gear:
 Ellen sat in a chair approximately 65” away from the catapult. We tried again and again, moving the chair all over, but missed every time! Finally, Ellen took matters into her own hands:
Needless to say, we had fun!
The kit also came with a book called The Art of the Catapult, by William Gurstelle (Sterling Innovation, 2004). The book was broken up into nine chapters. Each chapter contained at least one or two additional catapult-like projects you could build. However, they were far more complex and difficult than the catapult that came with the kit.
The rest of the book was information about the evolution and variation of catapults around the world. To me… well, some of it was cool. Alexander the Great, Saladin, and Richard the Lionheart. But the rest of the projects and history of the catapult…. frankly, it felt like too much dry detail.
In addition, the writing style seemed to change throughout the book. Sometimes it felt like an adventure novel, sometimes a history textbook, and other times, translations of ancient writings, like the Torah, Bible, or Koran. It was odd, because the book was by one author. But maybe the author’s interests were also varied, and his writing simply reflected that. It just didn’t flow very well.
The catapult kit was kind of fun, but overall it was more confusing than excellent. The directions were annoying with their briefly captioned illustrations. The project was recommended for ages 8+. Yet I had to use a rock to hammer pegs into the catapult. To me, it suggests that something is wrong. And so…
The Scores Are In!
TABLETOP CATAPULT
PROS: Fun to use (because of laugh factor. It was so fun to launch marshmallows at Ellen), good excuse to eat marshmallows, sturdy materials, came with a book (yay!), built a catapult!
CONS: Confusing directions with not enough written description, aiming was hard, trigger not effective, clay projectile a bit disappointing, book was a little dry.
SCORE: 3 OUT OF 5!
Postscript: Dr. Dana here! Last night, I took the catapult home to my 2 children (ages 4 and 6). For 3 straight hours, they launched ping pong balls around the house. The little catapult held up beautifully, even though the trigger never worked. We ended up removing the trigger and just using our fingers. For extra fun, use a Sharpie to draw silly faces on the ping pong balls.

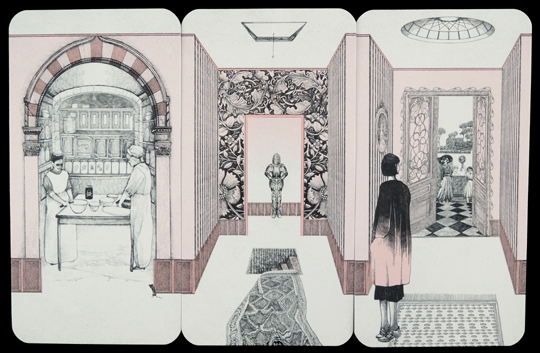 A mysterious phone call, a revealed trapdoor, a suspicious red envelope, a missing portrait. This is the world of “The Mystery Mansion,” a storytelling card game by Magical Myrioramas ($20).
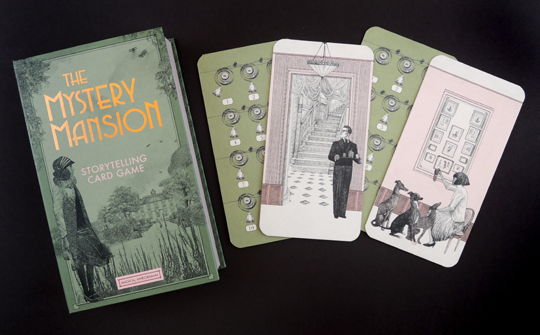 The set comes in a neat-o box that opens like a book, with the cards and 2 sets of instructions nestled inside. One set of instructions give short, enticing descriptions of the cards. Example: “He should be a loyal member of the household, but his face belies a bitter grudge…” The second set of instructions repeats the same card descriptions from the first set (which is rather redundant), but it also gives suggestions for various game play.
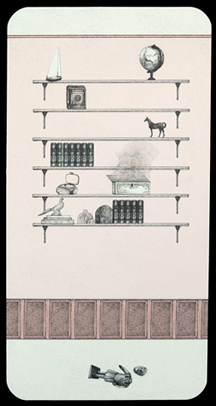 There is no suggested age range listed for this product, but my 7 and 9 year-olds played with it quite happily. The dominant color is light pink, but that didn’t seem to bother my son one bit. The theme IS murder, so it might not be an appropriate topic for all kids. But in my opinion, the imagery isn’t too terribly disturbing. Here, in fact, are the 3 most intense cards.
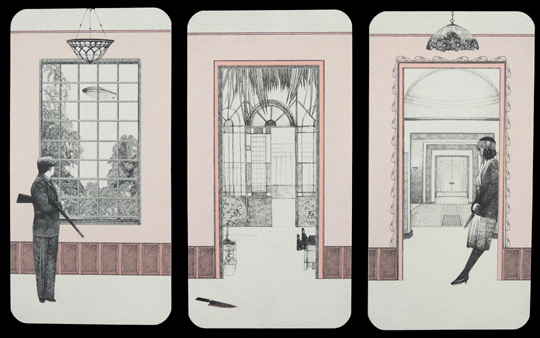 Magical Miroramas also has “The Hollow Woods,” which is very Brothers Grimm and graphically speaking, lot more sinister. They are also releasing “The Shadow World” this August, and that looks very cool – all sci-fi and steampunk!