Oh, The Places You’ll Go

paris postcard
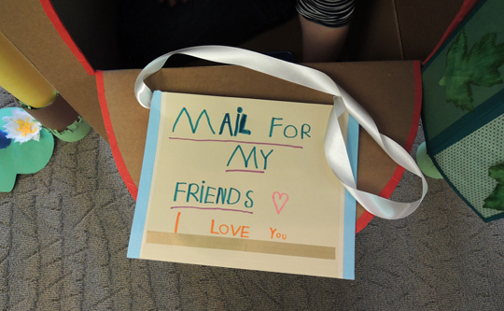
It’s the ultimate global adventure that ends with custom postcards in your very own mailbox! We made classic blue mailboxes, then visited locations around the globe to create postcards to send home. And don’t forget the stamp!

We read Will Goes the the Post Office by Olof and Lena Landstrom, translated by Elisabeth Dyddegaard (R&S Books, 1994). Will is excited when the post office notifies him of a package that’s arrived from his Uncle Ben. At the post office, he discovers that the package is GIGANTIC! What could it be? With a little help from Karen, Peter, John and Susan, Will and the gang carry the package home and eagerly unwrap it. At first, it seems like the box is just full of paper…but then they discover a fantastic globe packed inside! And the globe lights up! The five children (and Mama) pile in the closet to see Will’s new globe lamp shine.

You’ll need:

  • 1 small tissue box
  • 1 box cutter
  • Blue construction paper
  • Blue poster board
  • 1 mailbox signs template, printed on 8.5″ x 11″ white card stock
  • A selection of
  • 4 foam beads
  • 1 small piece of drinking straw (ours was 1.5″ long)
  • A blank postcards template, printed on 8.5″ x 11″ white card stock
  • Print-outs of different locations around the globe
  • Small stickers
  • Scissors and tape for construction
  • Markers for decorating
  • Hot glue

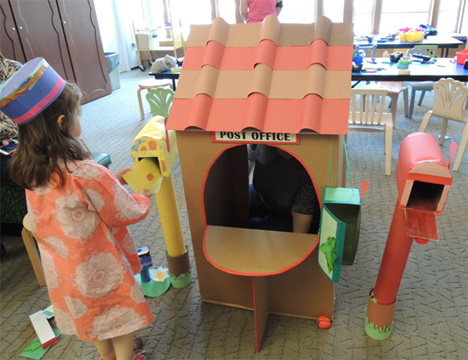
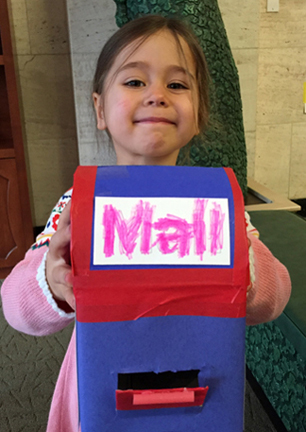
This project was created by Katie, and I have to say, the kids absolutely LOVED it. I mean, who wouldn’t love this cute little mailbox? The round top! The feet! The door at the bottom!

completed mailbox
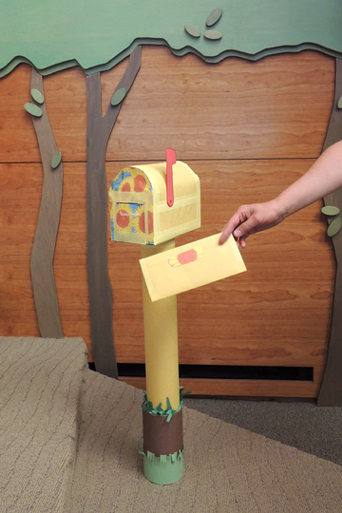
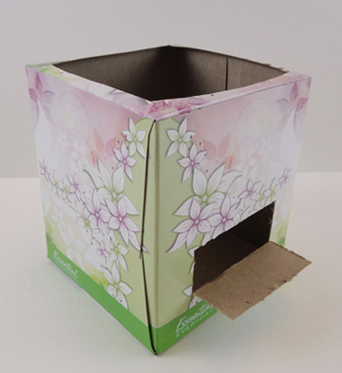
To make a mailbox, cut the top off a small tissue box. Use a box cutter to cut a little door at the bottom of the box. The postcards are 3″ wide, so make sure your door is 3″ or wider.

mailbox step1
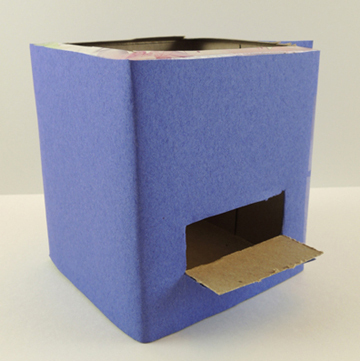
Wrap the box with blue construction paper, then use the box cutter (or scissors) to re-establish the little door.

mailbox step 2
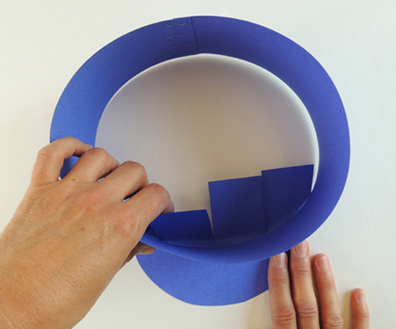
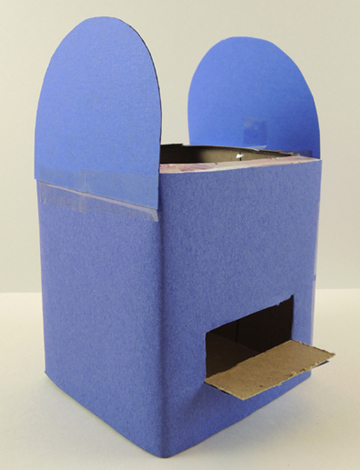
The rounded sides of the mailbox are 2 pieces of blue poster board (ours were approximately 4.25″ wide, and 3.25″ tall). Secure them in place with tape.

mailbox step 3
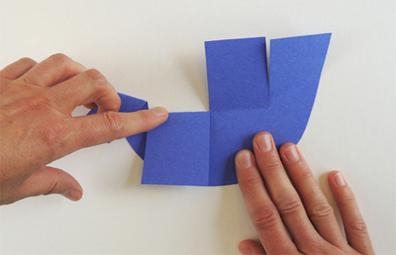
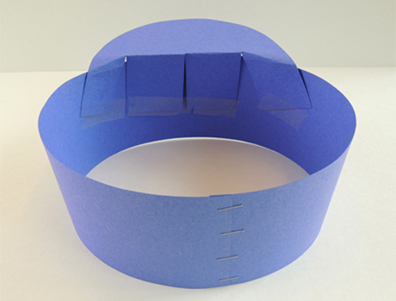
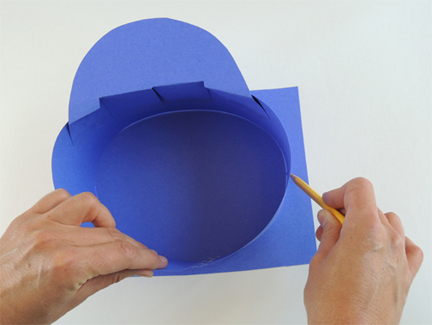
To make the top of the mailbox, cut a 3.5″ mail slot in the center of a 4.5″ x 9″ rectangle of blue poster board. Gently curl the poster board over the rounded sides of the mailbox, then tape in place. The curling and taping is definitely the toughest part of the project. Keep in mind that it doesn’t need to be perfect!

mailbox step 4
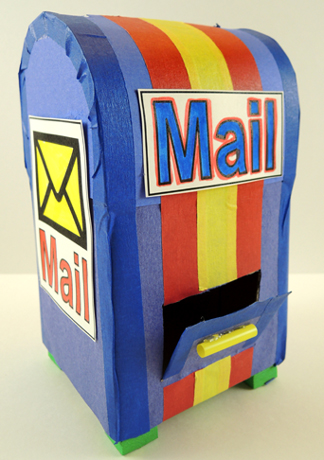
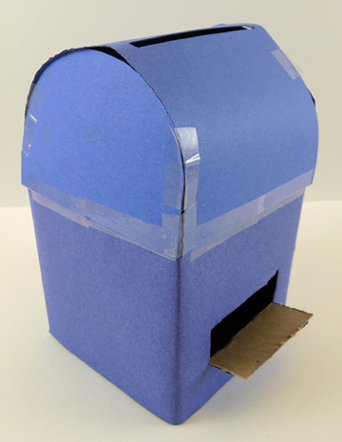
Next, use colored masking tape to reinforce the edges of the mailbox, and to decorate it. Color and cut the mailbox signs from the template and tape (or hot glue) in place.

completed mailboxFinish by hot gluing 4 foam bead “feet” to the bottom of the box, and a small piece of drinking straw to the front of the little door. Your mailbox is done – grab it and get ready to travel!

a postwoman

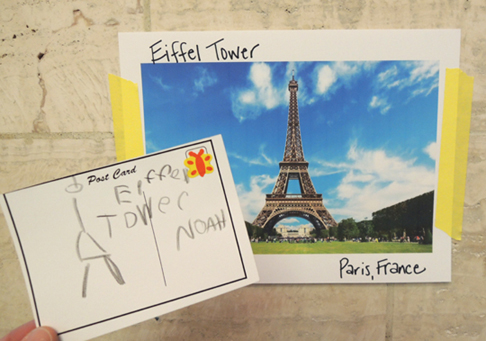
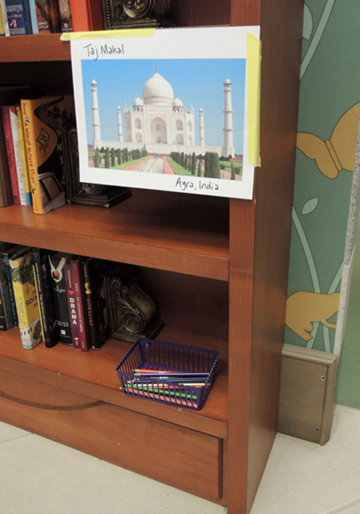
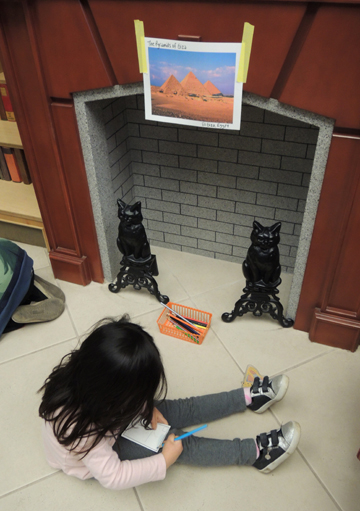
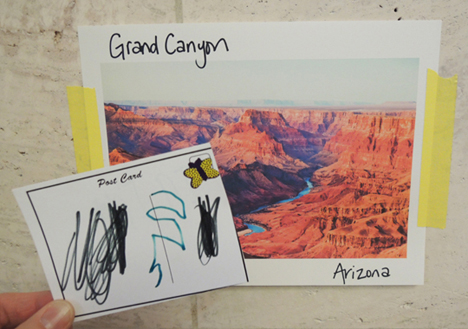
Katie printed up photos of different places (thank you, Google image search!), and taped them up around the gallery. Katie wrote the names of the locations or landmarks, as well as the country, on the photos as well. Underneath each photo was a basket of color pencils.

taj mahal postcard

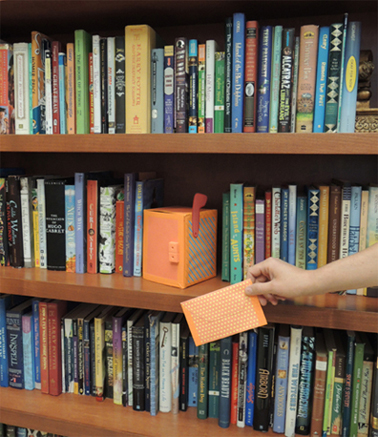
We invited kids to grab 6-8 blank postcards and visit different locations, sketching what they saw in the photos on their postcards. Here’s someone visiting London, England:

england postcard

And another traveler enjoying the Pyramids of Giza in Egypt:

egypt postcard

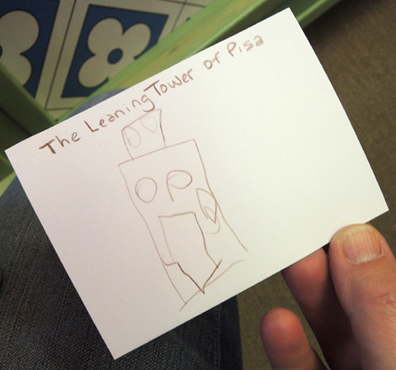
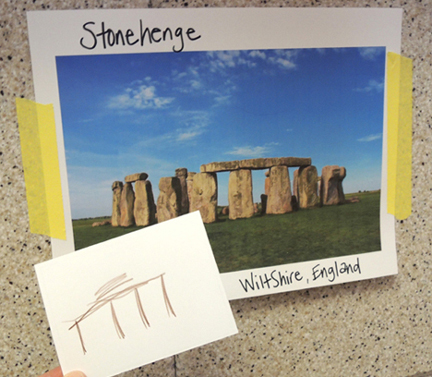
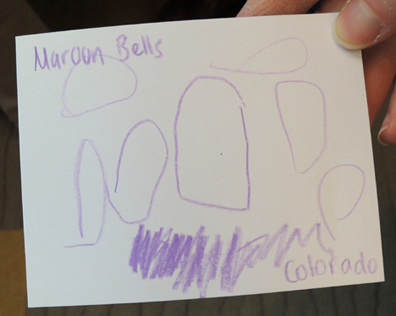
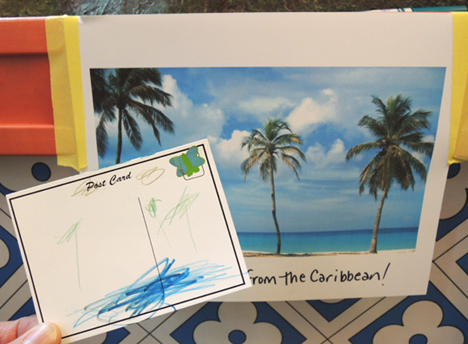
Ready to see some postcards from around the world?

grand canyon postcard

pisa postcardstonehengepostcardmaroon bells postcard

beach postcard
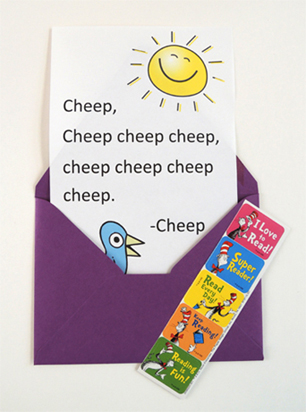
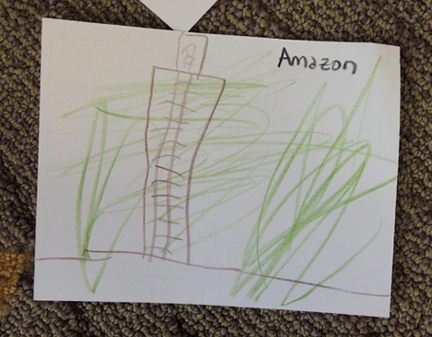
We even got postcards from places we didn’t include! Here’s a postcard from the Amazon, even though it wasn’t one of our photo locations. I think that’s a person on top of a giant tree with a ladder? Cool.

amazon postcard
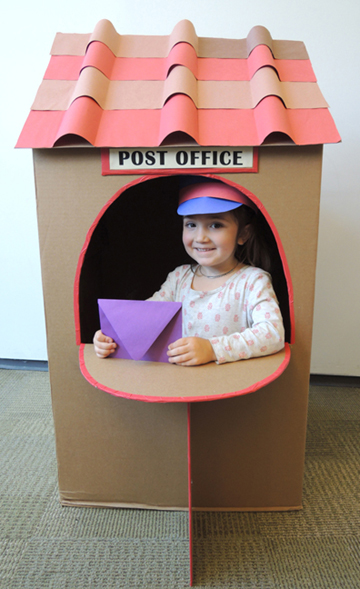
To make the postcard activity official, Miss Melinda donned a stamp-selling visor and circulated the gallery, “selling” stamps that were actually cute little stickers.

melinda the stamp seller

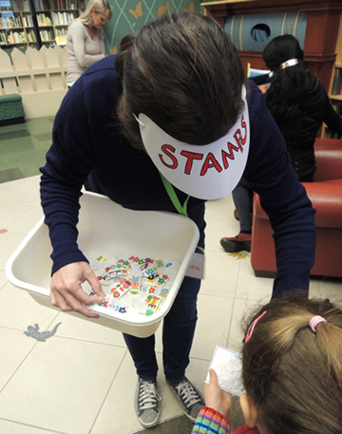
Melinda joined us this fall – she’s a Cotsen volunteer who works at the Princeton Writing Program. I went easy on her the first couple weeks, but slowly, inevitably, Melinda will be drawn into the vortex of ridiculous story time tasks. Today, a visor-wearing stamp seller. Tomorrow, a giant paper cookie!

You’ve Got Mail

you've got mailWaiting for that special letter from a special pal? Wait no more! We made hats and mailbags, and then headed to the post office to collect and deliver. When the job was finished, there was a lovely letter (and Seuss stamps) at the counter, just for you!

letter and stampsWe read A Letter for Leo by Sergio Ruzzier (Clarion Books, 2014). Leo the mailman (or technically speaking, the mailanimal) is always busy delivering boxes, letters and packages to the friendly citizens of his town. Sadly, however, Leo has never received a letter himself! One day, he rescues a lost baby bird named Cheep. As time passes, the two friends become a little family. But when spring arrives, Cheep needs to rejoin to his flock. They bid each other a tearful farewell, and Cheep flies away. Leo returns to his regular rounds, but life doesn’t feel the same anymore. Then, one day, Leo receives a letter from…guess who? A little birdie with a big heart! This is a warm and beautiful book, and, if you really want to choke up, check out the final illustration!

You’ll need:

  • 1 strip of blue poster board (approximately 3.25″ x 22″)
  • 1 rectangle of blue poster board for hat brim (approximately 4.5″ x 7″)
  • 1 hat brim template, printed on 8.5″ x 11″ white card stock
  • 1 rectangle of blue poster board (approximately 7″ x 9″ )
  • 1 strip of red poster board (approximately 1″ x 22″)
  • 1 manila folder
  • A selection of color masking tape
  • Hole punch
  • 1 piece of ribbon (approximately 41″)
  • 1 small envelope (mine was 4.75″ x 6.5″)
  • 1 letter template, printed on 8.5″ x 11″ white printer paper
  • 1 strip of stickers to use as “stamps” (optional)
  • 1 post office and post office game (more on that later!)
  • Pencil, scissors, stapler, and tape for construction
  • Markers for decorating

finished mail hatBegin with the hat! Circle a 3″ x 22″ strip of blue poster board around your head, and staple it closed. Print and cut the hat brim template, then trace the template onto a square of blue poster board. You’ll notice that there are three dotted lines on the template. Keeping the template on top of the poster board, cut along the dotted lines. You now have 4 tabs in the hat brim like so:

hat brim step 1Set the hat circle on top of the brim. The edge of the hat circle should just cover the bottom of the hat brim tabs. Soft-fold fold the tabs upwards, creating a soft crease on each tab.

hat brim step 2Remove the brim from the hat circle, and hard-fold the tabs along the creases.

hat brim step 3Return the brim to the underside of the hat circle, and fold and tape the tabs inside the hat.This will bend the hat circle into more of an oval, but that’s totally OK! I found that it was easier to tape the brim with the hat flipped upside down like this:

hat brim step 4Now place the top of the hat circle on a rectangle of blue poster board. Use a pencil to trace its perimeter onto the poster board.

top of hatCut out the oval, and tape it to the top of the hat. Finish by taping a red poster board strip around the hat as a hat band!

finished mail hatTo make the mailbag, cut a manila folder until it is approximately 8.5″ x 10.5″ Staple the sides together (but not the top of course) and used color masking tape to cover the staples. Decorate with markers if desired. Punch a set of holes at the top, and knot a ribbon through each hole to create the strap. You’re ready for your rounds!

mailbagWe had a huge cardboard box just begging to be made into a post office. Katie took the lead on this one and I must say, she totally surpassed herself. Look at that sturdy counter! The fancy tiled roof! The red border!

post officeWe also made 5 mailboxes with 5 matching letters or packages. Mainly, we used wrapping paper tubes, oatmeal containers, craft boxes, patterned paper, construction paper, and some items from the Bling Bin.

green mailboxyellow mailboxorange mailboxred mailboxblue mailboxThen we whipped up some mail route cards. Each card was labeled “Deliver” or “Collect”  and color-coded to a particular mailbox and piece of mail. The game began with a Deliver card. A kid came to the post office, picked up a Deliver card, and put the 5 pieces of mail in his/her mailbag. Then, following the color-coding on the card, he/she delivered the mail to the correct mailboxes.

delivery card and mailboxWhen the job was done, he/she returned to the post office to find that a letter had arrived for him/her, as well as a set of “stamps” (i.e. spare stickers I had in the art cabinet)! The letter replicates the sweet message Cheep wrote to Leo (such a wonderful book). Ten bonus points if you noticed that I put the letters in purple envelopes, completing the rainbow created by the 5 mailboxes. Heh heh.

letter and stampsAnd thus, the mail was delivered. Next, another kid came to the post office and received a Collect card. He/She had to travel to all the boxes, collect the mail in his/her bag, and return it to the post office. Then the whole process started again with another kid and a Deliver card.

Color matching? Logic? Sequential thinking? It sounds awesome doesn’t it?

Well, I’ve promised to report the good, the bad, and the ugly on this blog, and therefore I must report that we had a complete activity fail. There were 2 dozen kids at story time that day. They loved the activity, but it…took…way…too…long. In the beginning, blazing with optimism, I positioned the 5 mailboxes around the gallery so kids could walk to them.

trip to red mailboxWell, walking took some time. So did figuring out the color coding. So did opening the little mailbox doors and adding or removing the mail. So did stuffing the mail in the mailbag. So did removing the mail from the mailbag.

As the clock ticked waaaay past the end of story time, I had to make some on-the-fly adjustments. I squished all the mailboxes together. I asked the kids to leave their mail bags at the post office and carry the mail in their hands. I opened the doors of the mailboxes to allow for quicker stuffing and removal. It still took ages.

lined up boxesIf I was to do this over again, I would still have 5 mailboxes and 5 matching pieces of mail. But I would have each kid deliver or collect just 1 piece of matching mail, not all 5. That way, you could have 5 kids out on route at a time, which would move things right along. Ah well. The good news is that everyone (finally) got a turn, everyone got some stamps, and everyone received a lovely letter.

cute mail bagBy the way, you don’t have to make a fancy post office or mailboxes to play the mail game. A tabletop will do just as nicely as a post office. A couple of shoe boxes wrapped in color paper make great mailboxes. You can even skip the mail boxes and deliver the mail directly to your favorite stuffed animal friends!