 Afraid of the dark? Nah! With this fantastic, illuminating friend, you can discover how much fun the dark really is! And if you’re still not convinced, join us for a glowing balloon bounce bonanza!
We read Orion and The Dark by Emma Yarlett (Templar Books, 2015). Orion is scared of everything, but he’s especially scared of the dark. Imagine his surprise when one night, the dark comes alive and drop right into his room! It turns out the Dark is actually a fun and playful friend. Together, they explore Orion’s house and town and he learns that the things he was afraid of…aren’t that scary. They’re actually kind of cool! In the grand finale, Orion and the Dark endeavor to conquer Orion’s final fear – outer space. Far from scary, outer space is simply magical. The friends return to Orion’s house just as dawn breaks. The Dark must go, but he promises to never be far away. In fact, he’ll be back every night for a visit!
You’ll need:
- 1 large oatmeal container
- 2 toilet paper tubes
- Some tagboard or strong cardboard
- Blue construction paper
- A selection of foil star stickers
- A pair of wiggle eyes
- A small piece of white pipe cleaner
- Glow-in-the-dark paint or glue
- 1 paintbrush
- Scissors and tape for construction
- Hot glue
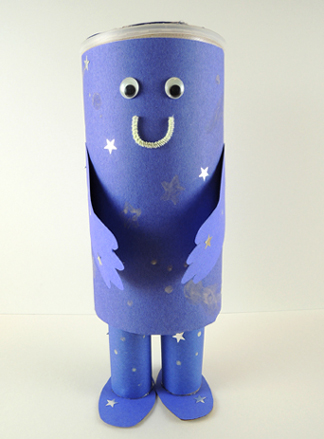
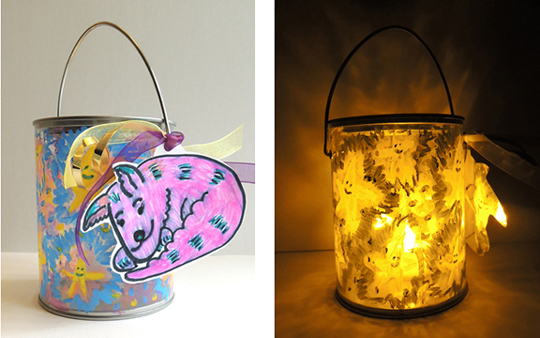
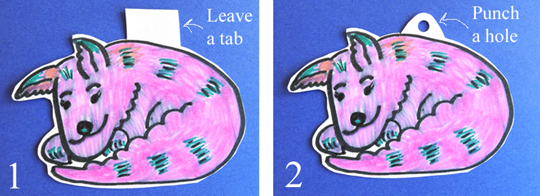
Begin by wrapping a large oatmeal container and 2 toilet paper tubes with blue construction paper. Set them aside for a moment. Cut a pair of oval feet (our were approximately 2.25″ x 3.75″), then cover the tops of the ovals with blue construction paper. Hot glue the feet to the bottoms of the toilet paper tube legs, toggle the legs a bit to get the balance just right, then hot glue them to the bottom of the oatmeal container.
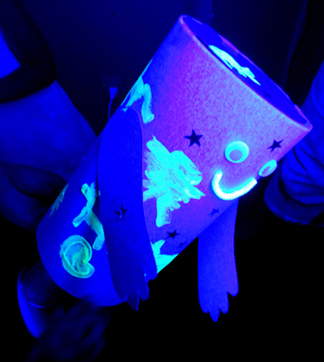
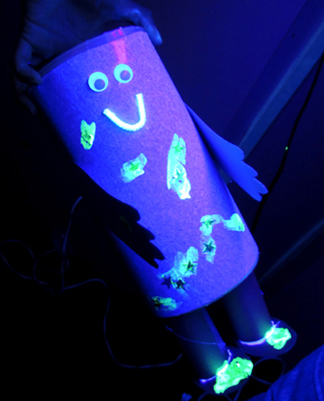
Finish by adding a circle of blue construction paper to the top of the oatmeal container, construction paper arms on the sides, and foil star stickers everywhere.
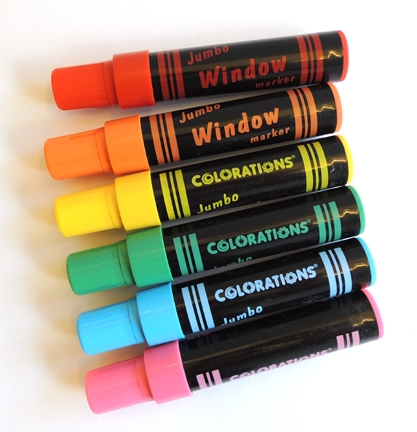
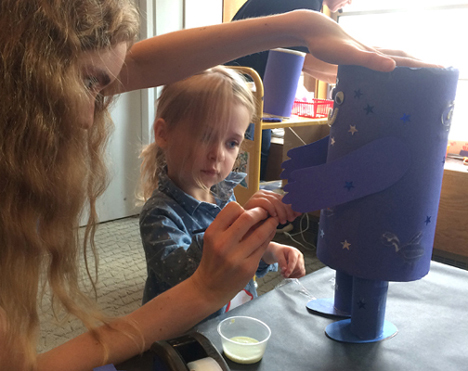
Now to add the glow! We had a bottle of this non-toxic glow pigment in the cabinet, so we went with glow glue. I’m sure you’d also get great results with glow-in-the-dark paint as well (it’s sold at Michael’s Craft Store for $3 – $5 a bottle). We covered our work tables with paper, gave each kid a little cup of glue and a paintbrush, and let them create a night sky on their projects.
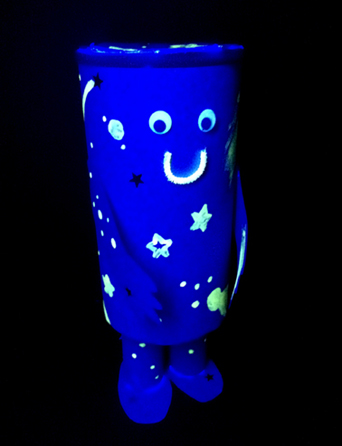
 The neat thing about the glow glue is that it dried semi-clear, so there’s a bit of a dramatic reveal when it illuminates:
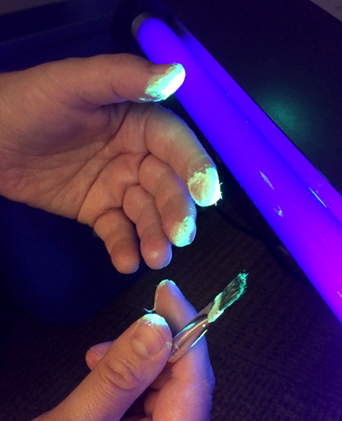
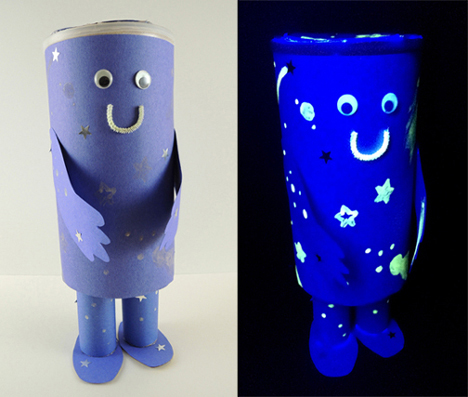 Notice how the eyes and mouth of the project are glowing too? Those are glow-in-the-dark wiggle eyes (available through Oriental Trading Company – a pack of 100 is $3) and a snippet of white pipe cleaner painted with glow glue. We were dubious at first, but the glue stuck to the pipe cleaner very nicely and dried quickly. It also stuck to Katie’s hands, giving her awesome alien fingers.
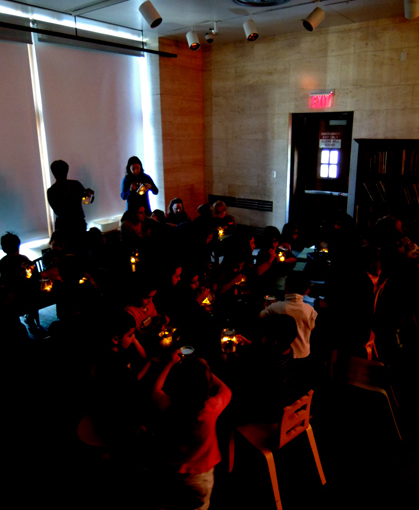
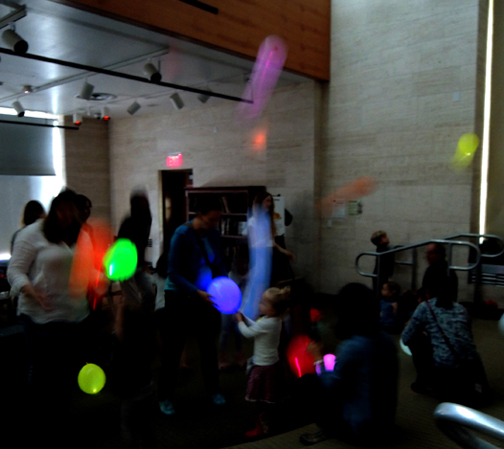
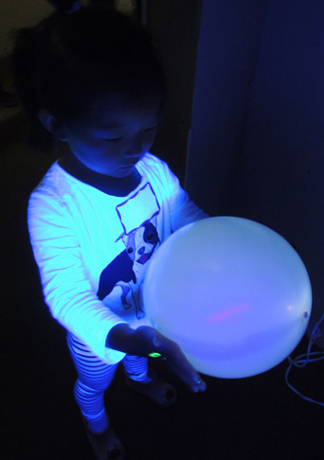
 While the kids’ projects were drying on the tables, we decided to capture the spirit of the book by having lots of fun in the dark. We blew up a bunch of LED balloons (which you first encountered in this post), turned out the lights, blasted some Enya, and had a big, glowing balloon bounce party.
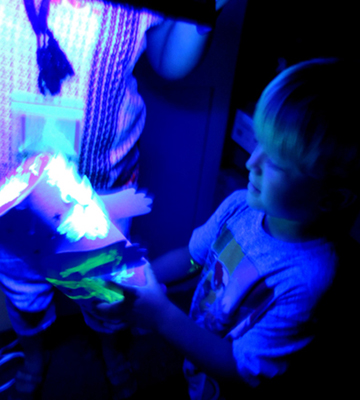
 We also had a little black light closet set up, so kids could get a preview of what their creations would look like later than night.
 Some of the balloon revelers ended up in the black light closet too. Because why not?

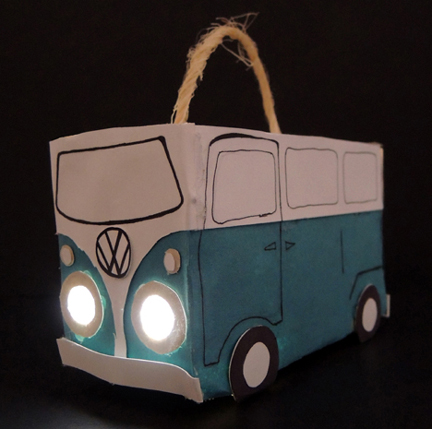
 We used a submersible LED to light Marissa’s van. You can find them in the floral section of Michaels craft store – 9 cost $21, but I always use a 40% off coupon.
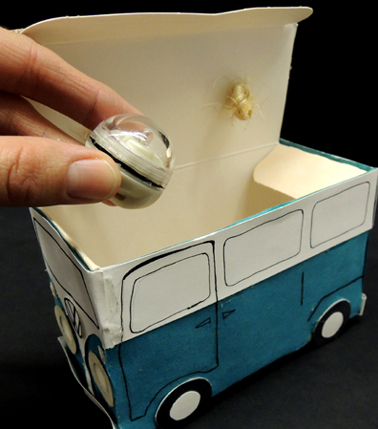 If the LEDs are too pricey, a glow stick will do the trick. Drop the illumination of your choice in the vehicle box, close the lid, and you’re done. Vroom vroom vroom!