
 Storms can be very scary, but this story time project lets YOU be in charge of the clouds, rain, and lightning!
We read Stormy Night by Salina Yoon (Bloomsbury, 2015). A storm is booming, and Bear can’t sleep – and neither can his stuffed bunny Floppy, his Mama, or his Papa! But a sweet song, kiss on the nose, a tickle on the ear, and good book can do wonders, and the family rides the storm out together.
You’ll need:
- 2 corrugated cardboard rectangles
- A box cutter
- 2 strips of poster board
- 2 paper towel tubes
- Construction paper
- 1 small box
- 4 jumbo craft sticks
- Scissors, tape and glue for construction
- Markers for decorating
- Hot glue
This theater is divided into two pieces: the back and the front, which are later hot glued together to create a free-standing theater. Here’s the back piece…
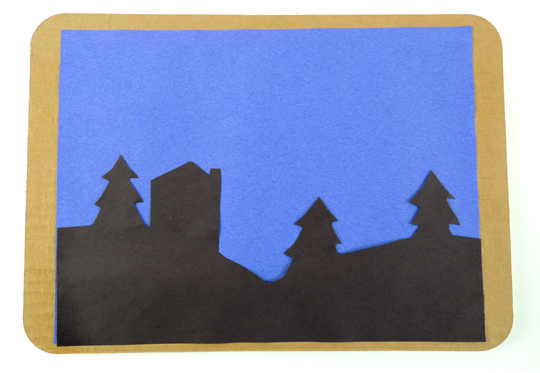 First, glue a piece of blue construction paper to a corrugated cardboard rectangle (we used 9.75″ x 13.75″ cake pads). Next, cut a silhouettes from black construction paper and glue it down as well. Definitely make sure to glue these down tight, so the edges don’t snag on your puppets later. Here’s the front piece…
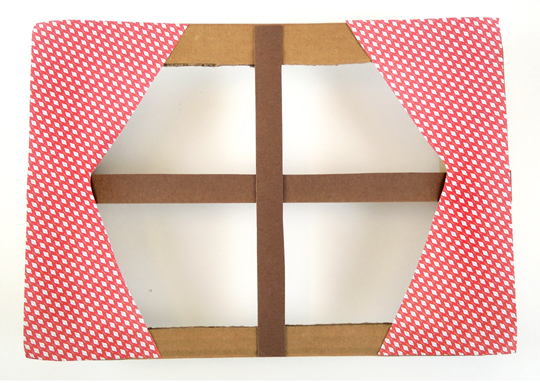 Use a box cutter to cake a window in the second corrugated cardboard rectangle. Then glue or tape 2 strips of poster board to the front of the window (definitely use poster board, construction paper is a little too saggy). Add a pair of optional window curtains. Then flip the front piece over…
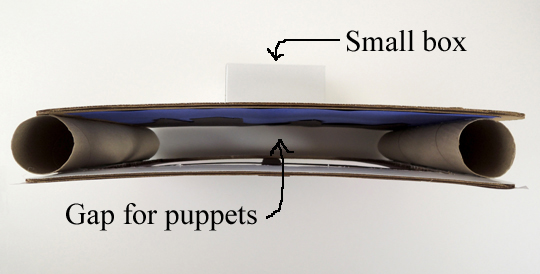
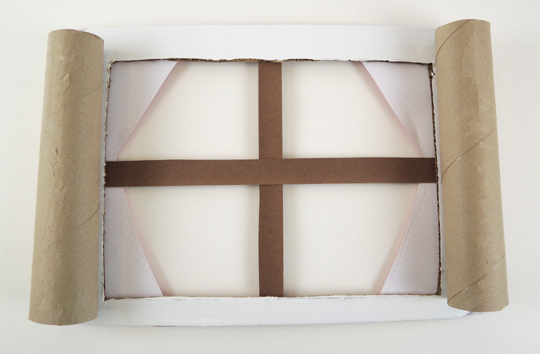 Shorten 2 paper towel tubes so they fit inside the sides of the window, then hot glue them firmly in place (we reinforced the connection with tape as well). Hot glue the tubes to the back piece of the theater. Now there is a gap between the front and back of the theater. This is where you drop your stick puppets! We also hot glued a small box to the very back of the theater to keep it more steady (our box was white, sorry, it’s a little hard to see in the photo!).
 To make the stick puppets, cut a lightning bolt, fringe of rain, crescent moon, and storm cloud from construction paper, then glue or tape them to the bottom of a jumbo craft stick (ours were 8″ long).
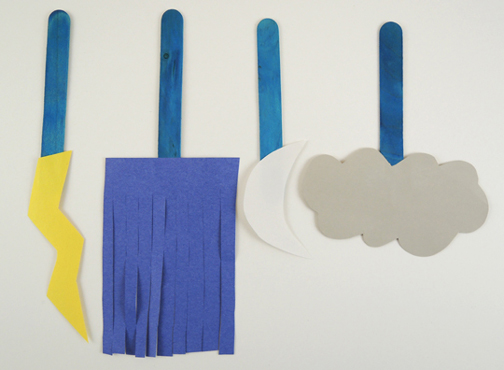 To operate the theater, simply drop the puppets into the gap and narrate the story as storm clouds move in, rain comes, lightning strikes, and the skies finally clear to reveal the moon!
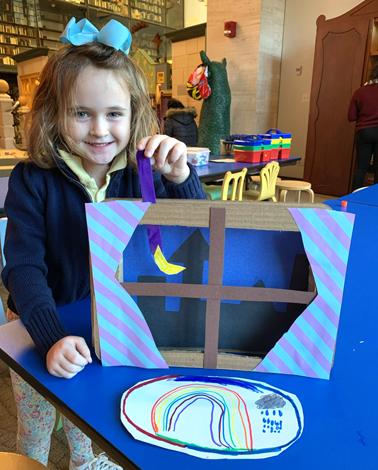
We also gave kids the option of creating cozy rugs with markers and ovals of white construction paper. Love the rainbow and storm cloud in the one above!
 A mysterious phone call, a revealed trapdoor, a suspicious red envelope, a missing portrait. This is the world of “The Mystery Mansion,” a storytelling card game by Magical Myrioramas ($20).
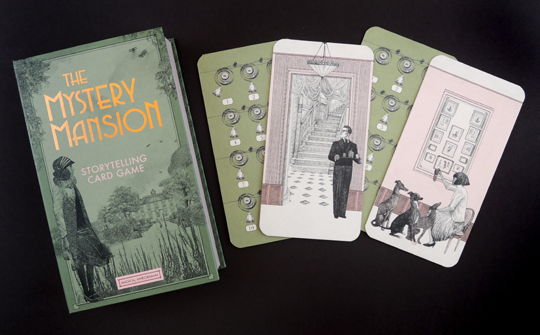 The set comes in a neat-o box that opens like a book, with the cards and 2 sets of instructions nestled inside. One set of instructions give short, enticing descriptions of the cards. Example: “He should be a loyal member of the household, but his face belies a bitter grudge…” The second set of instructions repeats the same card descriptions from the first set (which is rather redundant), but it also gives suggestions for various game play.
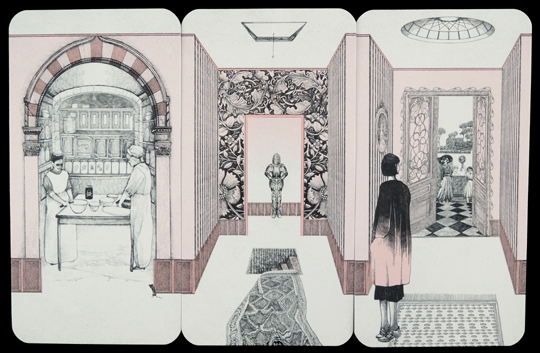
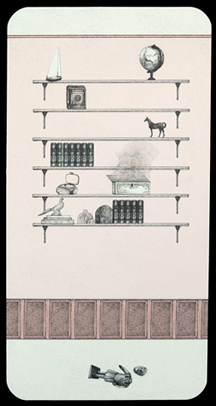 There is no suggested age range listed for this product, but my 7 and 9 year-olds played with it quite happily. The dominant color is light pink, but that didn’t seem to bother my son one bit. The theme IS murder, so it might not be an appropriate topic for all kids. But in my opinion, the imagery isn’t too terribly disturbing. Here, in fact, are the 3 most intense cards.
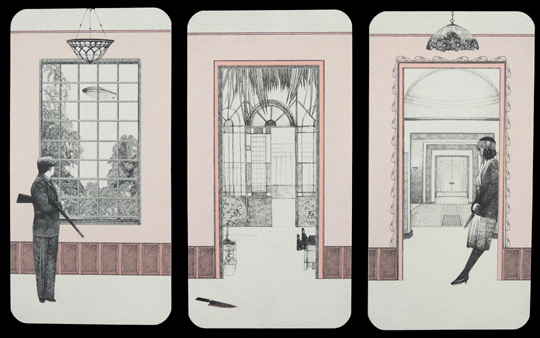 Magical Miroramas also has “The Hollow Woods,” which is very Brothers Grimm and graphically speaking, lot more sinister. They are also releasing “The Shadow World” this August, and that looks very cool – all sci-fi and steampunk!
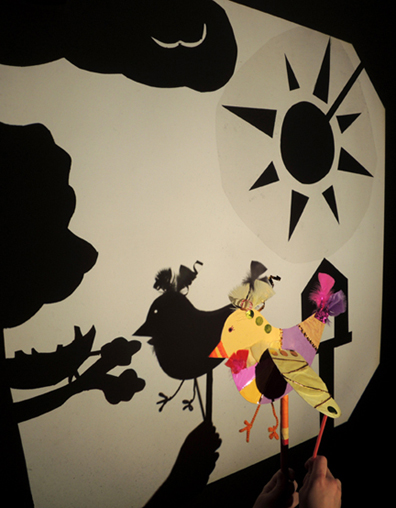 Make a shadow puppet bird, then fly through a story as your narrative appears on the big screen!
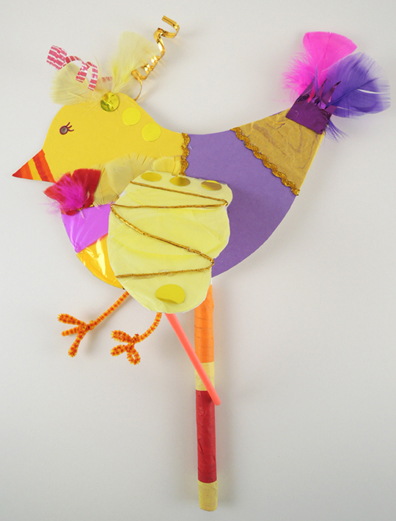
 Use packing tape to attach a 12″ piece of PVC pipe to the back of the bird (regular tape isn’t quite strong enough). We wrapped our PVC pipes with color masking tape, but that’s definitely optional. Your bird is done!
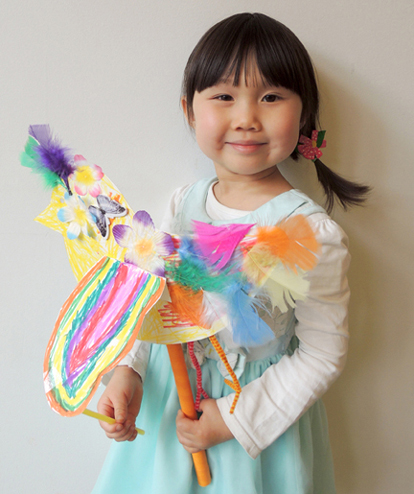 All we need now is a shadow puppet show set! We made our set on an old overhead projector. Oh how do I love thee overhead projector? Let me
 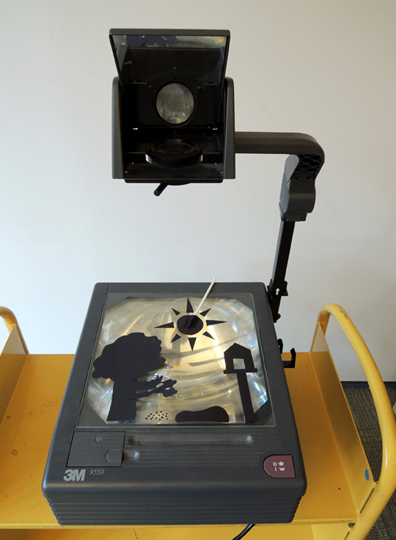 To build the set, Marissa cut a tree, a nest, a lake, and a birdhouse out of black poster board. Making the sun was a little more challenging – our initial attempts looked like a giant spider or a vicious super nova. Marissa solved the problem by hot gluing sun rays to a piece of
 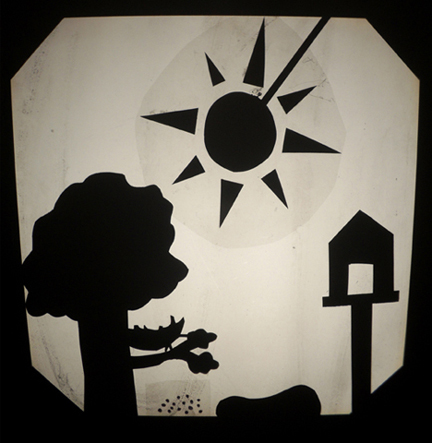 During the shadow puppet story, a storm rolls in, so Marissa also made a cloud, mylar rain, and a thunderbolt.
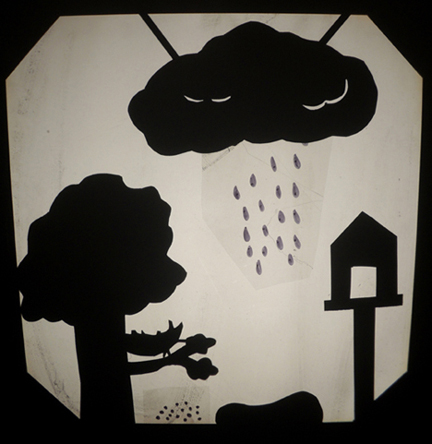 She mounted all the moving set pieces on bits of balloon stick (pencils work too).
 At story time, we lowered the shades, turned out the lights, and fired up the projector! One by one, kids stepped up to the screen. Then, as I narrated, they flew their birds through the story! Hmmm…we might have made that birdhouse a little too tall…
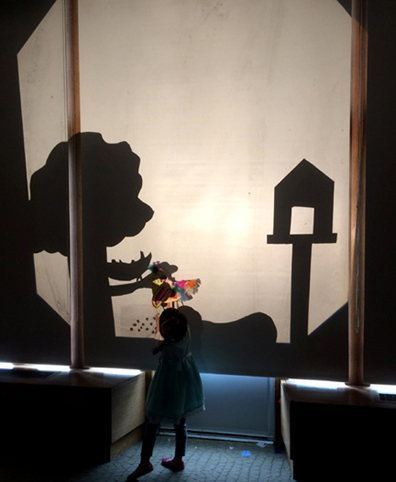 Here’s our lovely puppeteer in action! Ready for a show?