From the Desk of Mr. Sherlock Holmes

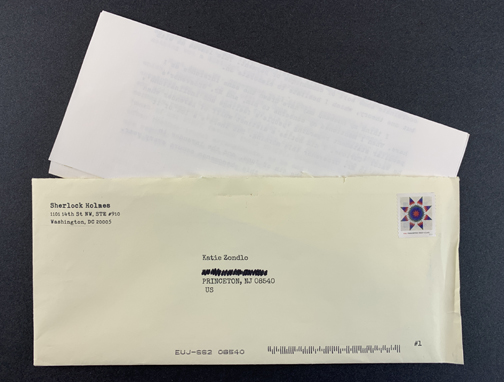
In the age of electronic communication – texts, emails, Slack, Zoom – there’s something magical about receiving an old fashioned letter in your mailbox. It’s even more thrilling when the return address says the correspondence is from Sherlock Holmes!

Our library has worked with Detective Holmes on multiple occasions. We helped him solve the mystery of a missing tiger (virtual escape room) and also track down an antidote to poison that had been released in the Princeton water system (in person escape room). And younger detectives can try rebus puzzles here. Yes, we believe our crime solving skills are top-notch and we needed a new task. So when Katie discovered a mystery-solving mailing game, she decided to give it a test drive! Take it away, Katie!


“Dear Holmes” is a monthly subscription that mails mysterious letters addressed to Sherlock Holmes directly to your mailbox. You receive five letters every month: four letters with clues and one letter with the answer. The challenge is to solve the case before the master literary detective himself sends his solution. When you sign up, you select one of three levels of membership spanning a year: we subscribed for three months for $60. There’s a gift option for sending letters to those who enjoy figuring out whodunit, and you can pause or renew your subscription at any time.

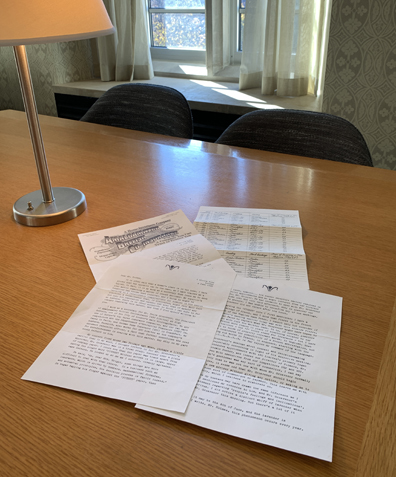
My first letter arrived in early June and I had my magnifying glass at the ready. I wasn’t entirely sure what to do, so as I read I would make mental notes of strange coincidences, interesting conversations, and odd happenings that were shared by the writer of the letter. When the solution message from Holmes arrived at the end of the month, I found myself saying “oh yeah!” and “I knew it!” as I was reading his explanation. When I received the next letters, I paid close attention to all of the critical details shared in the document. I highlighted passages and wrote notes in the margins, all while asking my own questions and making comments about who may be behind the crime. And I was right! I didn’t figure out every piece of the puzzle, but I had pinned the correct person behind the dastardly deed.

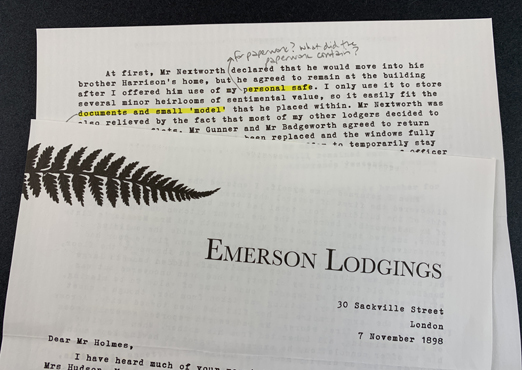
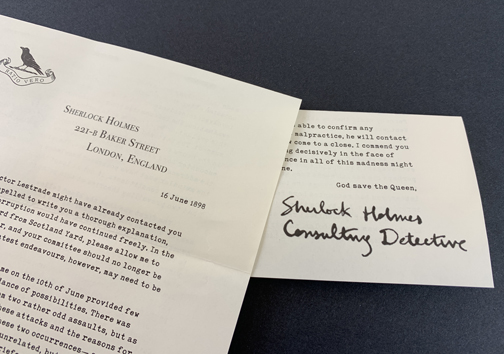
The attention to detail within the letters is really remarkable. The behind the scenes authors who write the story lines provide every minute detail to make you believe you are communicating with a person living in Victorian London. The paper and envelope are extremely high quality, and the font that is used is somewhat reminiscent of the era.

“Dear Holmes” a fun activity for your entire friend or family group, whether you are living close together or are on different sides of the country. It’s a mystery that isn’t solved immediately, so there’s time to debate and discuss before the next letter arrives. It’s also something you can do entirely on your own. There’s no provided age range, but I would suggest 12+. I recommend “Dear Holmes” wholeheartedly!

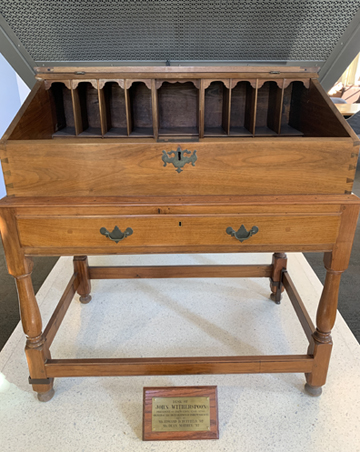
A historical note about the intro photo, which was taken in the William Elfers ’41 Reading Room on the third floor of Firestone Library. Discreetly tucked under a staircase is the personal secretary desk of John Witherspoon, who was President of Princeton University from 1768-1794 and is a signer of the Declaration of Independence. One can only imagine Sherlock Holmes scribbling his own letters using a similar style desk!

Puppy Post!

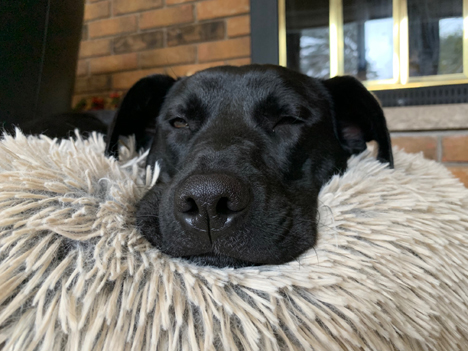
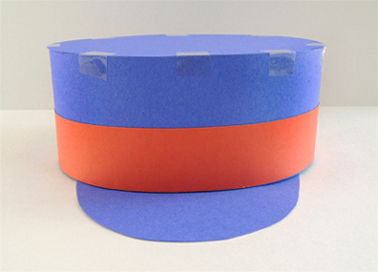
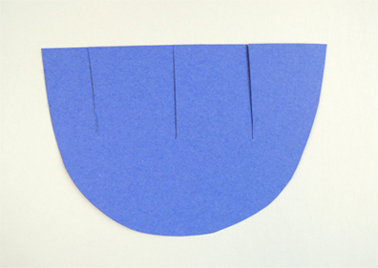
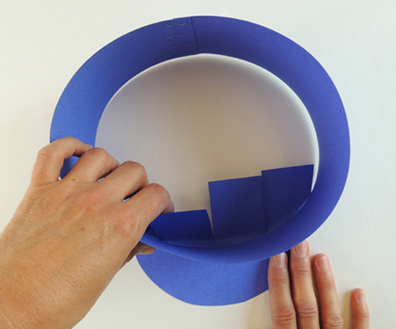
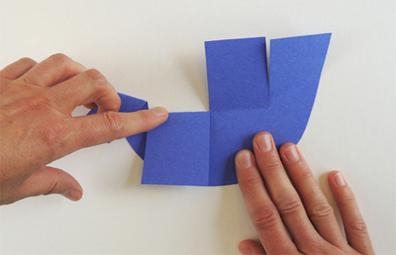
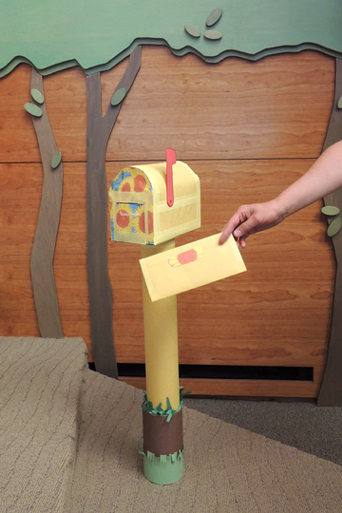
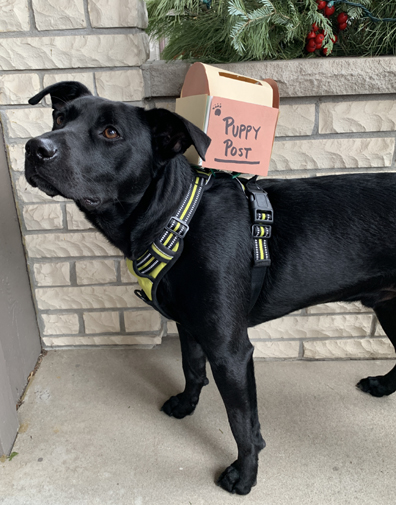
Dogs truly are a person’s best friend. But what happens when a dog desperately needs a new person to love and call their own? Why not say it with this postbox and letter set, designed by Katie, and delivered by a very special addition to her family!

We recommend reading Can I Be Your Dog?, written and illustrated by Troy Cummings (Random House, 2018 – read here by Read Aloud Book Family). Arfy is a homeless dog searching for a new family to love. He sends charming letters to several families living on Butternut Street, but he always gets turned down and sent away. Until one day, Arfy gets his own piece of mail from someone who was looking for a dog, just like him!

You’ll need:

  • 1 small tissue box
  • Construction paper
  • A box cutter
  • Ribbon (or string)
  • Scissor and tape for construction
  • Markers for decorating

Katie followed the same design concept for the mailbox we created for this storytime project, with some minor modifications. Cut approximately 1″ off the top of a small tissue box, as well as a door in one side. Next, use construction paper to cover the box and add a rounded top with a mail slot. Use additional pieces of construction paper to create letters for the box!

In order to make this project puppy post-friendly, Katie omitted the door handle and foam bead feet. Instead, she cut 4 small slits on the the bottom of the box and thread the ends of 2 pieces of ribbon (each approximately 20″ long) through the slits like so:

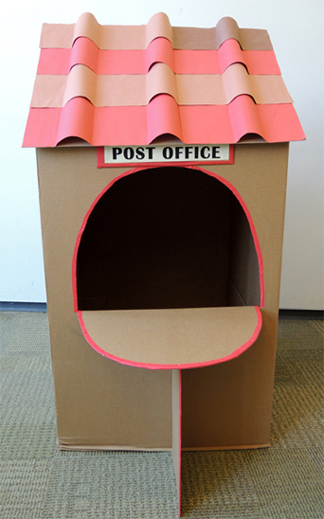
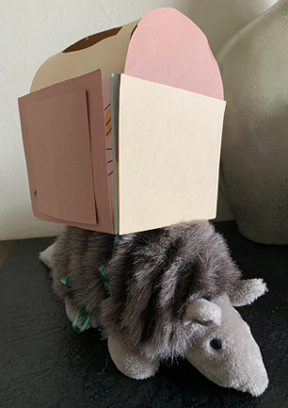
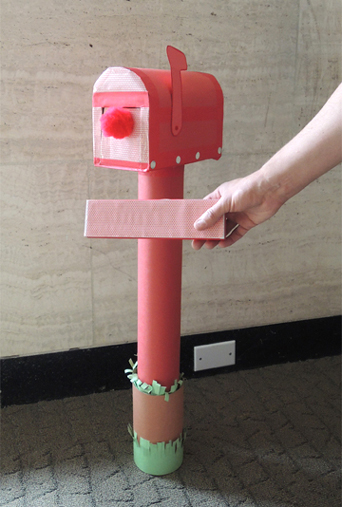
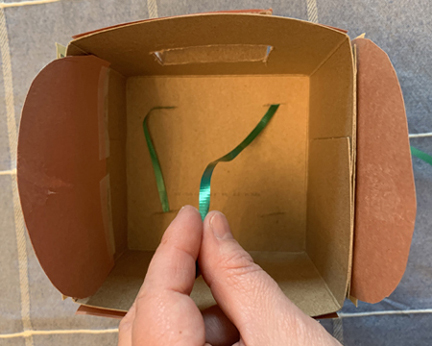
Now, four loose ends of ribbon will be sticking out of the bottom of the box. Tie those ends around your dog’s harness (or around their body) and trim off the extra.

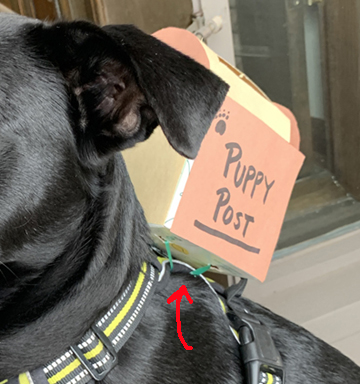
Drop a letter into the mailbox, and send them off to deliver the special note!


The handsome pooch starring in this post is Katie’s new furry friend, Finley! Finley is a rescue dog from the great state of Texas. He’s settled in comfortably into his new house in New Jersey with Katie and her family. He has a “ruff” life, that’s for sure.

If you don’t have a dog in your house who is willing to wear a Puppy Post mailbox, that’s totally okay! You can simply enlist a favorite stuffed animal to deliver the letters… announcing the inaugural ARMADILLO AIRMAIL!

You’ve Got Mail

you've got mailWaiting for that special letter from a special pal? Wait no more! We made hats and mailbags, and then headed to the post office to collect and deliver. When the job was finished, there was a lovely letter (and Seuss stamps) at the counter, just for you!

letter and stampsWe read A Letter for Leo by Sergio Ruzzier (Clarion Books, 2014). Leo the mailman (or technically speaking, the mailanimal) is always busy delivering boxes, letters and packages to the friendly citizens of his town. Sadly, however, Leo has never received a letter himself! One day, he rescues a lost baby bird named Cheep. As time passes, the two friends become a little family. But when spring arrives, Cheep needs to rejoin to his flock. They bid each other a tearful farewell, and Cheep flies away. Leo returns to his regular rounds, but life doesn’t feel the same anymore. Then, one day, Leo receives a letter from…guess who? A little birdie with a big heart! This is a warm and beautiful book, and, if you really want to choke up, check out the final illustration!

You’ll need:

  • 1 strip of blue poster board (approximately 3.25″ x 22″)
  • 1 rectangle of blue poster board for hat brim (approximately 4.5″ x 7″)
  • 1 hat brim template, printed on 8.5″ x 11″ white card stock
  • 1 rectangle of blue poster board (approximately 7″ x 9″ )
  • 1 strip of red poster board (approximately 1″ x 22″)
  • 1 manila folder
  • A selection of color masking tape
  • Hole punch
  • 1 piece of ribbon (approximately 41″)
  • 1 small envelope (mine was 4.75″ x 6.5″)
  • 1 letter template, printed on 8.5″ x 11″ white printer paper
  • 1 strip of stickers to use as “stamps” (optional)
  • 1 post office and post office game (more on that later!)
  • Pencil, scissors, stapler, and tape for construction
  • Markers for decorating

finished mail hatBegin with the hat! Circle a 3″ x 22″ strip of blue poster board around your head, and staple it closed. Print and cut the hat brim template, then trace the template onto a square of blue poster board. You’ll notice that there are three dotted lines on the template. Keeping the template on top of the poster board, cut along the dotted lines. You now have 4 tabs in the hat brim like so:

hat brim step 1Set the hat circle on top of the brim. The edge of the hat circle should just cover the bottom of the hat brim tabs. Soft-fold fold the tabs upwards, creating a soft crease on each tab.

hat brim step 2Remove the brim from the hat circle, and hard-fold the tabs along the creases.

hat brim step 3Return the brim to the underside of the hat circle, and fold and tape the tabs inside the hat.This will bend the hat circle into more of an oval, but that’s totally OK! I found that it was easier to tape the brim with the hat flipped upside down like this:

hat brim step 4Now place the top of the hat circle on a rectangle of blue poster board. Use a pencil to trace its perimeter onto the poster board.

top of hatCut out the oval, and tape it to the top of the hat. Finish by taping a red poster board strip around the hat as a hat band!

finished mail hatTo make the mailbag, cut a manila folder until it is approximately 8.5″ x 10.5″ Staple the sides together (but not the top of course) and used color masking tape to cover the staples. Decorate with markers if desired. Punch a set of holes at the top, and knot a ribbon through each hole to create the strap. You’re ready for your rounds!

mailbagWe had a huge cardboard box just begging to be made into a post office. Katie took the lead on this one and I must say, she totally surpassed herself. Look at that sturdy counter! The fancy tiled roof! The red border!

post officeWe also made 5 mailboxes with 5 matching letters or packages. Mainly, we used wrapping paper tubes, oatmeal containers, craft boxes, patterned paper, construction paper, and some items from the Bling Bin.

green mailboxyellow mailboxorange mailboxred mailboxblue mailboxThen we whipped up some mail route cards. Each card was labeled “Deliver” or “Collect”  and color-coded to a particular mailbox and piece of mail. The game began with a Deliver card. A kid came to the post office, picked up a Deliver card, and put the 5 pieces of mail in his/her mailbag. Then, following the color-coding on the card, he/she delivered the mail to the correct mailboxes.

delivery card and mailboxWhen the job was done, he/she returned to the post office to find that a letter had arrived for him/her, as well as a set of “stamps” (i.e. spare stickers I had in the art cabinet)! The letter replicates the sweet message Cheep wrote to Leo (such a wonderful book). Ten bonus points if you noticed that I put the letters in purple envelopes, completing the rainbow created by the 5 mailboxes. Heh heh.

letter and stampsAnd thus, the mail was delivered. Next, another kid came to the post office and received a Collect card. He/She had to travel to all the boxes, collect the mail in his/her bag, and return it to the post office. Then the whole process started again with another kid and a Deliver card.

Color matching? Logic? Sequential thinking? It sounds awesome doesn’t it?

Well, I’ve promised to report the good, the bad, and the ugly on this blog, and therefore I must report that we had a complete activity fail. There were 2 dozen kids at story time that day. They loved the activity, but it…took…way…too…long. In the beginning, blazing with optimism, I positioned the 5 mailboxes around the gallery so kids could walk to them.

trip to red mailboxWell, walking took some time. So did figuring out the color coding. So did opening the little mailbox doors and adding or removing the mail. So did stuffing the mail in the mailbag. So did removing the mail from the mailbag.

As the clock ticked waaaay past the end of story time, I had to make some on-the-fly adjustments. I squished all the mailboxes together. I asked the kids to leave their mail bags at the post office and carry the mail in their hands. I opened the doors of the mailboxes to allow for quicker stuffing and removal. It still took ages.

lined up boxesIf I was to do this over again, I would still have 5 mailboxes and 5 matching pieces of mail. But I would have each kid deliver or collect just 1 piece of matching mail, not all 5. That way, you could have 5 kids out on route at a time, which would move things right along. Ah well. The good news is that everyone (finally) got a turn, everyone got some stamps, and everyone received a lovely letter.

cute mail bagBy the way, you don’t have to make a fancy post office or mailboxes to play the mail game. A tabletop will do just as nicely as a post office. A couple of shoe boxes wrapped in color paper make great mailboxes. You can even skip the mail boxes and deliver the mail directly to your favorite stuffed animal friends!