
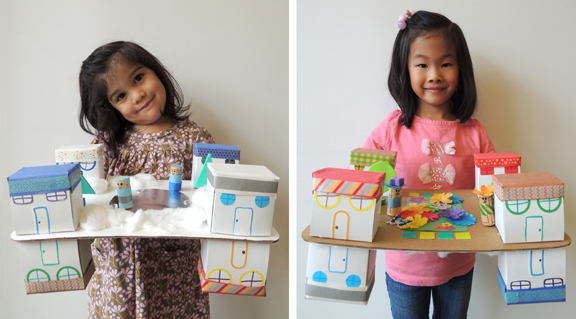
 It’s flip-a-riffic! This sweet little set flips over to display two landscapes that look very different, but are definitely part of the same big, beautiful world.
We read Up Above and Down Below by Paloma Valdivia (Owlkids Books, 2011). There are different kinds of people in the world, different kinds of weather, different seasons, and different ways of doing things. But everyone dreams, loves, and celebrates, regardless of where they are and what direction they’re facing. Bonus – flip this book upside down while reading, and your story time kids can enjoy a second set of illustrations!
You’ll need:
- 8 small boxes, all the same height
- 1 corrugated cardboard base (I used a 9.75″ x 13.75″ cake pad)
- House and landscape decorating supplies (more on those below!)
- A box cutter
- 2 craft sticks (ours were 4.5″)
- 4 foam beads
- 8 pieces of green self-adhesive foam
- 4 wine corks
- Scissors, tape, and glue for construction
- Markers for decorating
- Hot glue
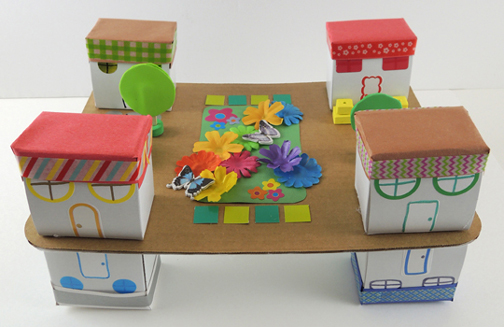
First, decorate 8 small boxes like houses (we used construction paper, patterned tape, old address labels, and dot stickers, but markers work too!). The most important thing is to keep the roofs flat. Otherwise, your project will wobble. Hot glue the houses to both side of a corrugated cardboard base, then fill in your landscapes! The summer landscape had fabric blossoms, flower and butterfly stickers, and construction paper pieces.
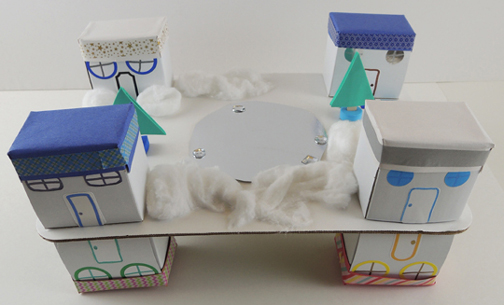
The winter landscape had a frozen lake made out of a silver mirror board with a few flat glass marbles hot glued to the edges. Finish the look with fluffy drifts of cotton ball snow.
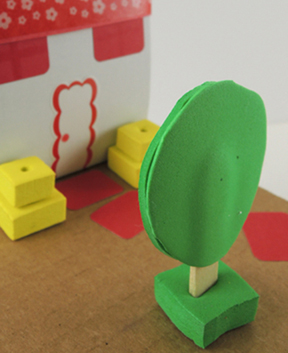
 Want to add some trees? Use a box cutter to make a slit in the cardboard base, then insert a craft stick halfway into the slit. Push a foam bead down the craft stick to keep it steady, then press 2 triangular pieces of self-adhesive foam together to make an evergreen tree.

Flip the project over, slide a second foam bead down the stick, and press two circular pieces of self-adhesive foam together to create a leafy summer tree.
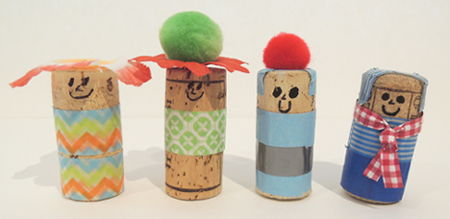
The final touch? People! We used wine corks, patterned tape, and some craft odds and ends to make 4 cheerful members of the general populace. Here’s the gang, so happy together:
OK…all together now…1…2…3…
IT’S A SMALL WORLD AFTER ALL! IT’S A SMALL WORLD AFTER ALL! IT’S A SMALL WORLD AFTER ALL! IT’S A SMALL, SMALL, WOOOOOOORLD!
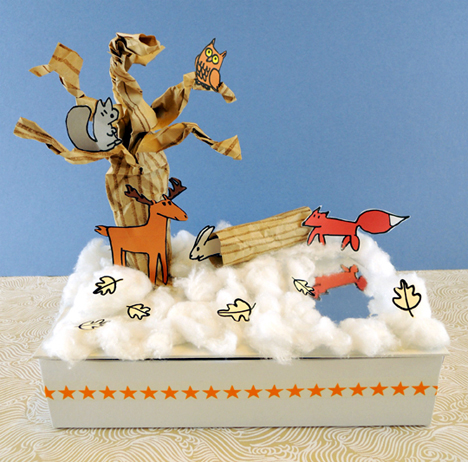 It’s a diorama, a keepsake box, a mini exhibit, AND a lesson in ecology! Open the lid of this winter landscape and you’ll find the creatures that hibernate, burrow underground, and tunnel underneath the snow, complete with an information card!
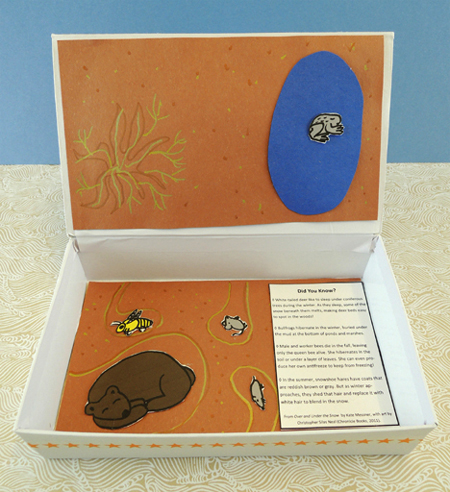 We read Over and Under the Snow, written by Kate Messner, and illustrated by Christopher Silas Neal (Chronicle Books, 2011). A father and child ski over the deep snow in the woods. Even though it’s a world of white, signs of life are everywhere – squirrel, owl, deer, snowshoe hare, and fox. But under the snow is yet another world. Shrews and voles run in tunnels. Bullfrogs burrow in the mud, bears hibernate, and a queen bee sleeps, waiting for the first signs of spring. The book ends with the child in a cozy bed, dreaming of nature. An absolutely beautiful book, with gorgeous, bold illustrations set against snowy white.
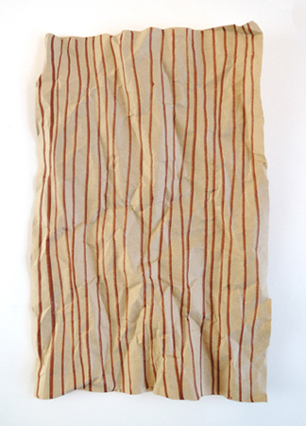 Roll the paper into a tube and secure it with tape. Cut 4 tabs in the bottom of the tube (each tab should be about 1.5″ long). Fold the tabs outwards. Later, you’ll use these tabs to attach the tree to the box lid:
 Cut 5-6 tabs in the opposite end of the tube (these tabs are much longer, about 5″). Fold them out gently, then twist them to create the branches of your tree.
 Hot glue (or tape) the tree to the lid of the box. If you’d like to add a log to your landscape, use a brown marker to draw horizontal lines on a 3.75″ x 4.5″ rectangle of brown wrapping paper. Crinkle the paper, then roll the paper into a tube and secure it with tape. The final length of the log should be 3.75″. Set the finished log aside for a moment.
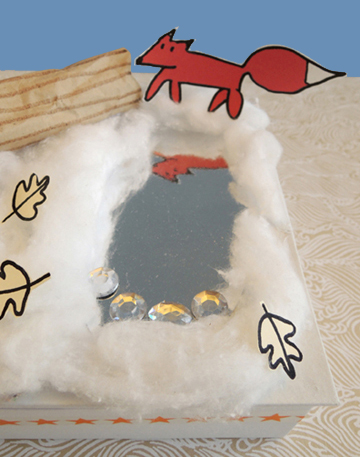 Your winter landscape is complete! Well, maybe not quite complete…
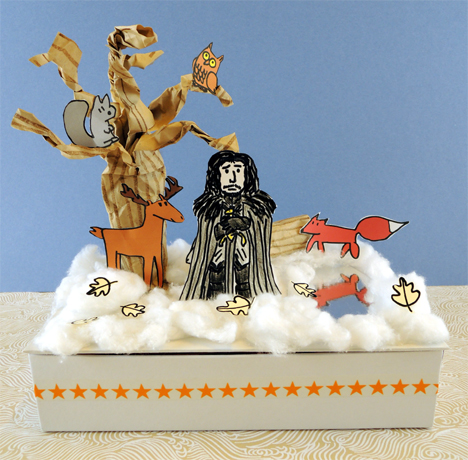 Bet you a