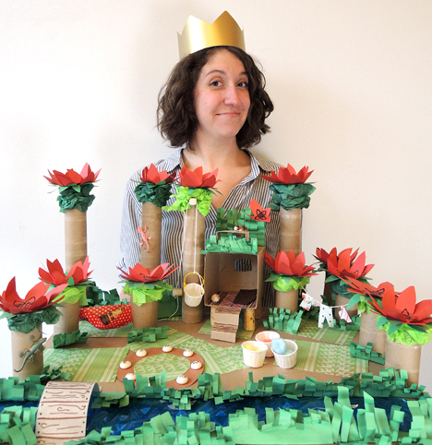
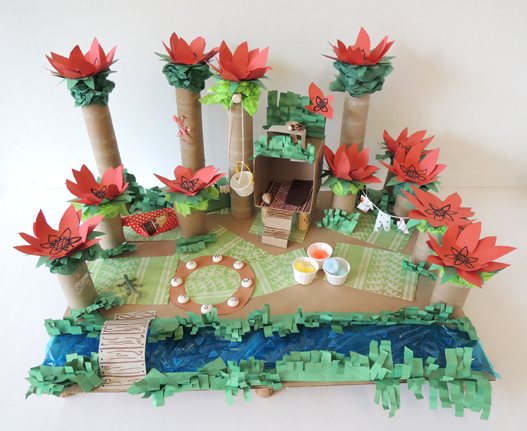
 Create your perfect paradise, complete with a picturesque bridge, comfortable hammock, airy hut with a platform room, supply bucket on a pulley, convenient clothesline, and a stupendous sun clock. Do those towering red flowers remind you of anything? If you answered “swist,” you know exactly where we’re going with this!
We read Weslandia, written by Paul Fleischman, and illustrated by Kevin Hawkes (Candlewick Press, 1999). Wesley, an inquisitive dreamer and inventor, is different from the other kids at school. These differences worry his parents and attract bullies. Undaunted, Wesley launches an ambitious summer project – he’s going to grow his own crop and found his own civilization. Magically, his idea is planted in the ground, where an unusual plant begins to grow. The plant (which he names “swist”) shoots skywards and quickly becomes the foundation of “Weslandia.” Wesley eats the fruit from the plants, weaves clothing from its fibers, invents a time-keeping system based on its petals, and records his civilization’s history with ink pressed from its oil. Scornful at first, the other kids quickly become intrigued. Soon, they join Wesley in enjoying and exploring Westlandia. When school resumes in the fall, Wesley no longer has to worry about friends!
You’ll need:
- 1 courrugated cardboard base
- 4-6 champagne corks (optional)
- 5 wine corks
- A permanent markers
- At least 4 toilet paper tubes
- A rectangle of fabric (approximately 3.5″ x 5.5″)
- Extra fabric (or patterned paper), if desired
- 2 pieces of string (one is 9″, the other is 30″)
- 1 small box (mine was 4″ x 4″ x 4″ but a small tissue box works too)
- At least 1 paper towel tube
- 1 small wooden spool
- 1 small wooden bead
- 4 small paper sample cups
- Brown, green, and red construction paper
- A long strip of blue cellophane
- 1 rectangle of tagboard (approximately 6.5″ x 2.5″)
- 8 flat glass marbles
- 1 petals and sepal template, printed on 8.5″ x 11″ white card stock
- Glue, scissors, tape for construction
- Markers for decorating
- Hot glue
At story time, we had each kid make the same 8 elements (cork person, hammock, clothesline, hut, pulley bucket, river, bridge, and sun clock). Then we invited the kids to arrange, design, and decorate their worlds however they liked!
 The first step is optional: hot glue legs to the bottom of your corrugated cardboard base. Champagne corks work beautifully for this purpose. Our bases were big (18″ x 24″) so we used 6 champagne corks per base. If you do use champagne corks, make sure you glue the flat part of the cork to the base (not the wider, rounded part):
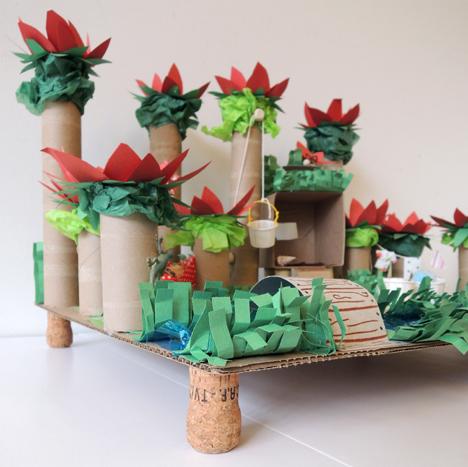
You can, of course, skip this step and keep the base flat. But we really liked the way it looked AND we still have an insane number of corks left over from this floating island project.
CORK PERSON
Use a permanant marker to draw a face on a wine cork. Then wrap the cork with paper and/or fabric. We just made one cork per kid at story time, but feel free to populate your world with as many cork characters as you like!

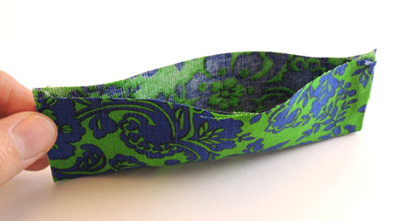
HAMMOCK
Hot glue the short ends of a 3.5″ x 5.5″ piece of fabric together, forming a long, shallow pocket.
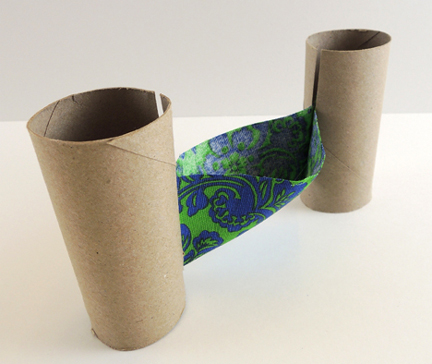
 Next, cut matching 3″ slits down the sides of 2 toilet paper tubes. Slide the ends of the fabric pocket into the slits. Close the slits with tape. Hot glue the tubes to the base.
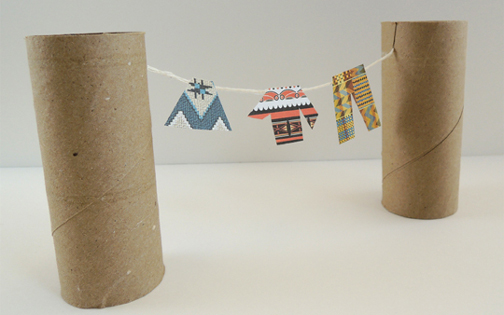
CLOTHESLINE
Cut matching 0.5″ slits into the tops of 2 toilet paper tubes. Slide a 9″ (or shorter) piece of string into the slits. Tape paper clothes to the clothesline. Hot glue the tubes to the base.
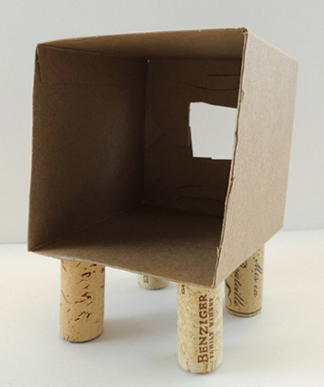
HUT
The hut is basically a box that is open on one side with a little window cut in the back. I used a 4″ x 4″ x 4″ craft box, but you could totally do this with a small tissue box. Hot glue four wine cork legs on the bottom of the box…
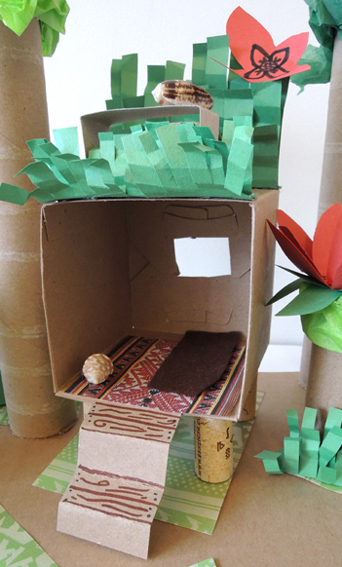
 Then add some tagboard (or construction paper) stairs! We also added a patterned paper rug and a felt sleeping pad. The hut has a platform roof as well (we added green construction paper grass and a little tagboard writing desk to it). When the hut is finished, hot glue its legs to the base.
PULLEY BUCKET
We used little paper sample cups with twisteez wire handles for “buckets.” To make the pulley, hot glue a wooden bead to the top of a paper towel tube, and a small wooden spool to the bottom of the tube. Tie a 30″ (or shorter) piece of string to the bucket handle, thread the string through the wooden bead, and then wrap the free end of the string around the wooden spool. Hot glue the tube to the base.

RIVER & BRIDGE
Our “river” was a long strip of blue cellophane taped to the base. To make the bridge, tab the ends of a piece of tagboard, then attach the tabs to the base with tape or hot glue.
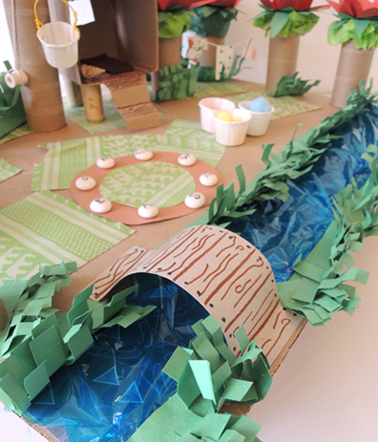
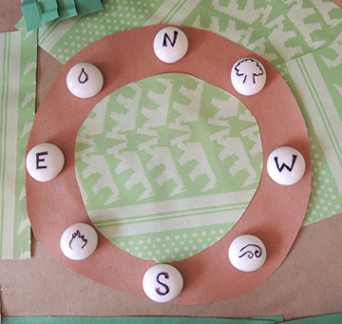
SUN CLOCK
Cut a circle of brown paper (ours was 5″ in diameter). Use a permanent markers to draw symbols on 8 flat glass marbles. Hot glue the flat marbles to the circle, then attach the circle to the base with hot glue or tape.
When all 8 elements were finished, kids went wild decorating. We had extra tubes, patterned paper, green tissue paper squares, and fringes of green construction paper grass. We also gave each kid a choice of 2 plastic lizards, 2 shells, and 3 paper sample cups loaded with mini pom-pom fruit.
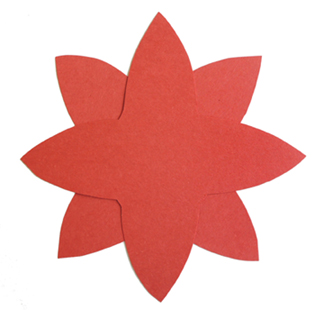
Additionally, we cut a ton of red paper flower petals and green sepals (i.e. those little green thingees you see under flower petals). Here’s the template for both of those items. In the book, the swist plant has 8 petals. To re-create this, take 2 of the petal templates and stagger them on top of one another.
 Glue the staggered petals together, then gently fold the petals upwards. Glue the flower on top of a sepal, then tape (or hot glue) the complete flower to the tops of the toilet paper and paper towel tubes. Marissa also used black marker to draw some details in the centers of the flowers and added some tissue paper underneath the sepals, but that’s totally optional! Here’s that overhead view again…
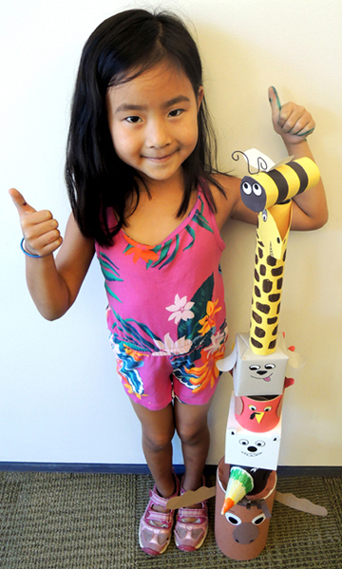
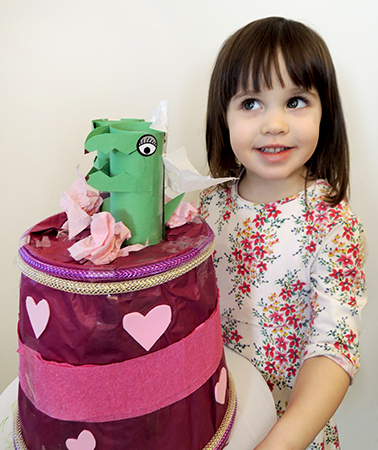
And here’s Marissa again! The final piece of this project was to name your civilization and be awarded with a gold poster board crown. Thus, may we present…MISSLANDIA!

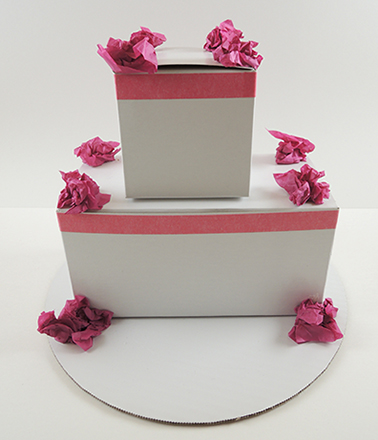
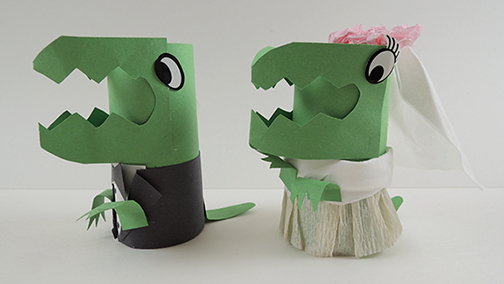
 It’s not June, but we’re already rolling out the fancy wedding cakes for romantic reptiles! This simple project was met with incredible enthusiasm with the story time kids, both with cake decorating, and well-dressed dinosaurs.