The open highway beckons, so top off the tank, jump in the truck, crank the tunes, and let the cows do the driving. Wait a minute…COWS?
We read Sakes Alive! A Cattle Drive, written by Karma Wilson, and illustrated by Karla Firehammer (Little, Brown, 2005). When two inquisitive cows lift the truck keys from Farmer’s pocket, they quickly learn (as does the rest of the town) that cows can’t drive. But they can inspire a bit of a parade!
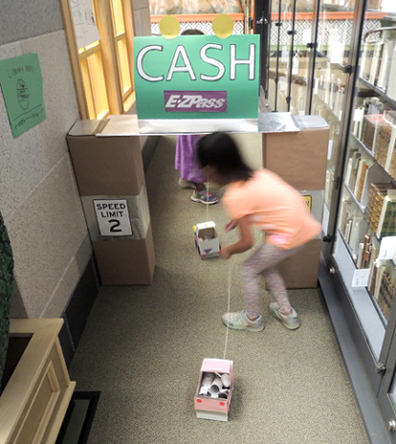
We crafted a pull string truck and put two toilet paper tube cows in the front seat. Then the story time kids drove across scenic New Jersey, complete with billboards, pit stops, and of course…tolls.
You’ll need:
- 1 small tissue box
- 1 pickup truck template printed on 8.5″ x 11″ card stock
- 4 circles of black construction paper (approximately 2.5″ in diameter)
- A piece of string (approximately 24″ long)
- 1 mini craft stick
- 3 toilet paper tubes
- 1 rectangle of poster board (approximately 4.5″ x 5″)
- 1 open highway (more on this below!)
- Hot glue
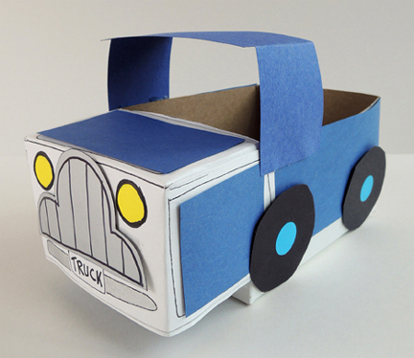 The truck for this project is a duplicate from our “Ultimate Road Trip” post (you’ll find the instructions here) with one exception: we added a front seat for our cows to sit in.
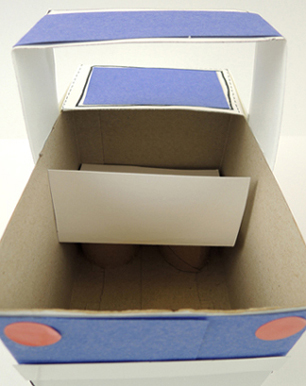
 To make the seat, cut a toilet paper tube in half. Fold a rectangle of poster board in two, then hot glue the toilet paper tube “legs” to the bottom of the poster board seat. Secure the completed seat to the inside of your truck with hot glue. Here’s a shot of the front seat from the back of the truck:
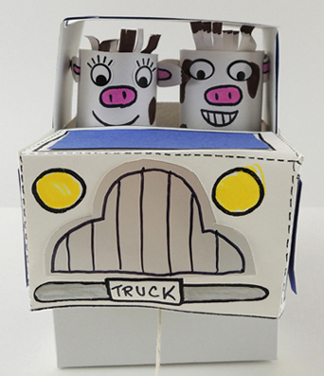
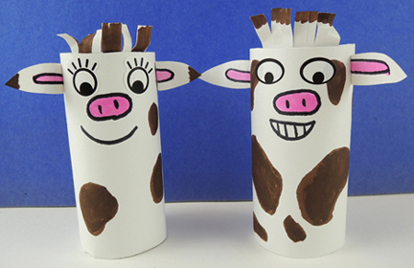
 The cows are simply toilet paper tubes, wrapped in white construction paper, with construction paper ears and hair tufts. Decorate with markers. We used eye stickers, but you can draw the eyes on with markers too.
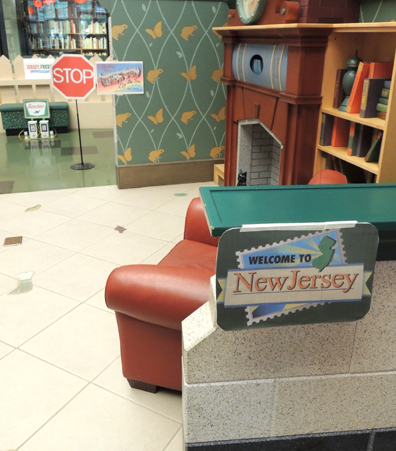
 Once the truck and cows are done, it’s time to hit the road! We crafted a New Jersey road adventure, which we will share below. A simplified version of this could be print outs of buildings, billboards, and road signs. Or heck, just draw some directional arrows on Post It notes! Our journey begins at the “Welcome to New Jersey” sign…
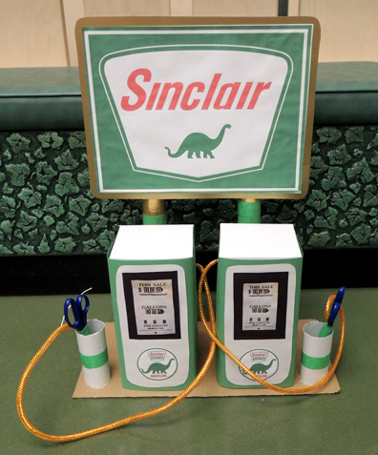
 See that cute little gas station in the background? Here’s a close up of it. Katie crafted the nozzles out of mesh tubing and kiddie scissors. The pointy end of the scissors are shoved into a bit of PVC pipe.
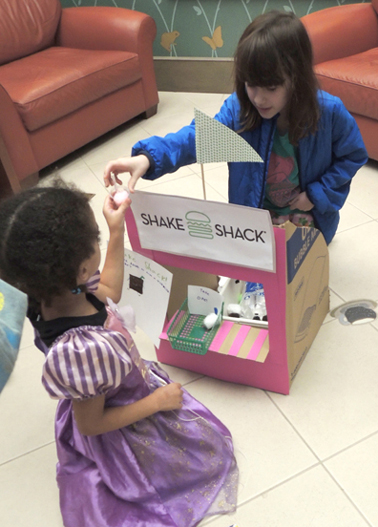
 You might also want to stop at Shake Shack for a little treat. These were cotton ball shakes in little sample cups served with a snippet of paper straw. The stand was run by a volunteer older kid.
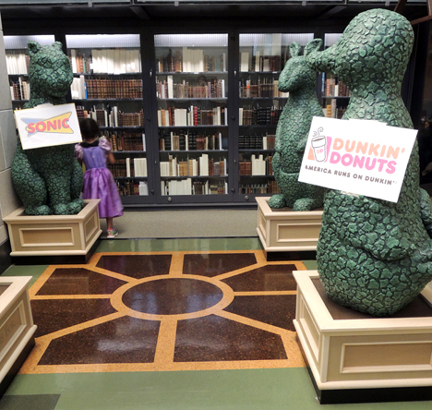
 Round the corner, more billboards…
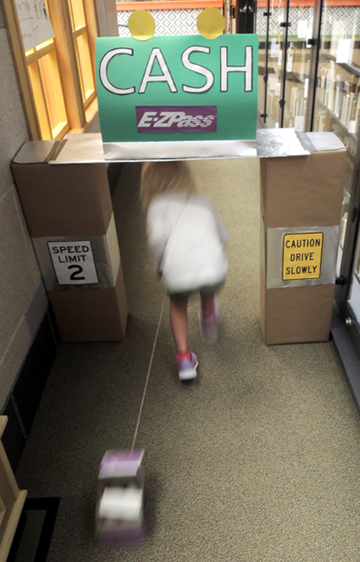
 And one more turn takes you to Katie’s amazingly crafted EZ Pass toll booth!
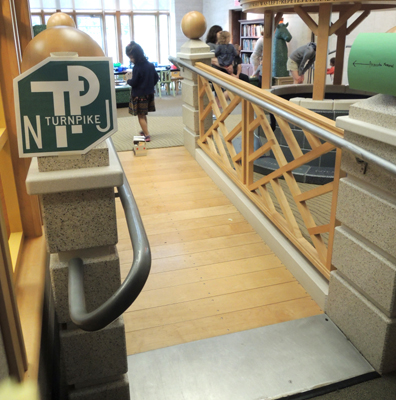
 Then it’s just a quick jump onto the NJ Turnpike to begin the loop anew!
 But keep an eye on your speedometer, because there was a cop on the premises to catch cows over the speed limit! This was another older kid volunteer. We had a police hat ready, some ready-to-fill speeding tickets, and a siren sound effect on my phone.
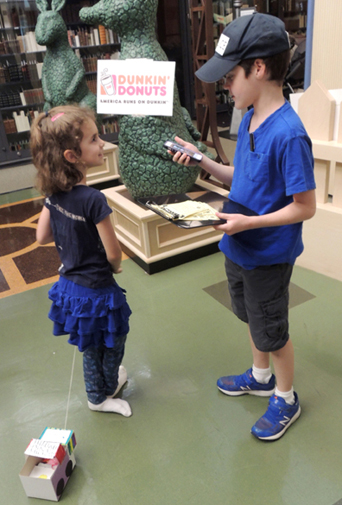 This kid played his part to the hilt, and his speeding tickets were hilarious! There was one speeding ticket for $9,000. And some double tickets. I must admit, I gave out a couple tickets too.
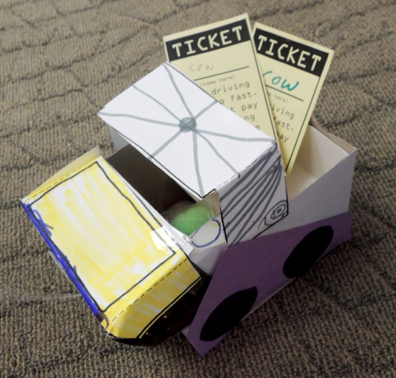 By the way…Katie you still owe me $1000 for your story time speeding ticket. Just sayin’.

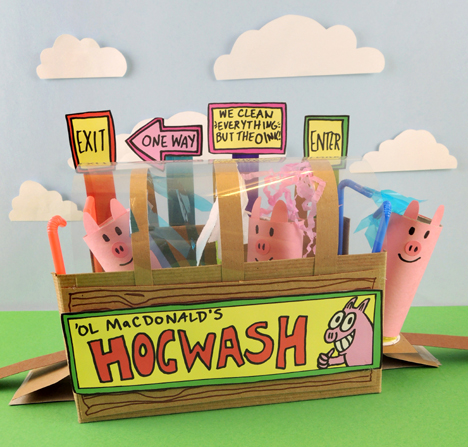 Messy muddy piggy problems? No worries. Just send the gang through the Hogwash! Our patented conveyor belt technology will carry your pigs through a soaking, soaping, scrubbing, rinsing, and drying. We clean everything but the oink!
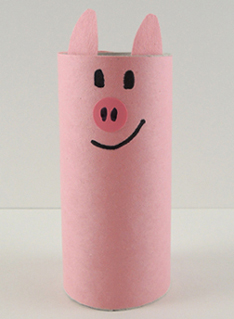 The conveyor belt is a long, narrow strip of poster board with 3 “seats” attached to it. First, hot glue 3 paper sample cups to the centers of 3 squares of poster board or
 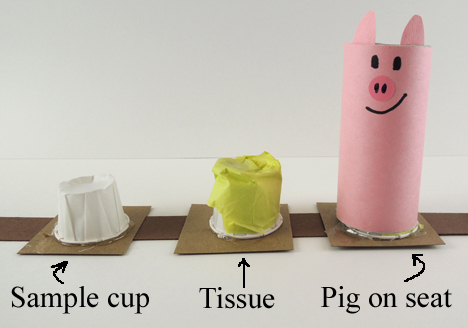 Tape or hot glue each seat to a 1.25″ x 28″ strip of poster board. Note the placement of the seats on the strip. The first seat is placed 12.5″ from the front. Why? You need to be able to load the pigs on the seats, then pull them through the Hogwash smoothly without having to repeatedly reach inside the machine. The long strip allows you to do this (trust me, we tested it!). Here’s what the finished conveyor belt looks like:
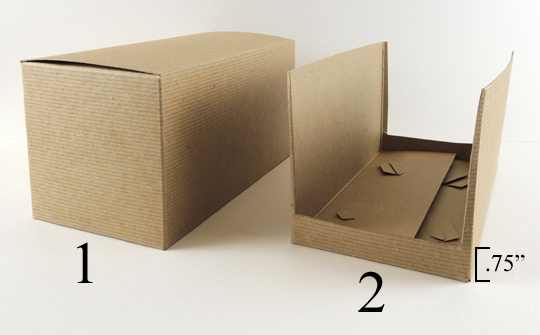
 Set the pigs and the conveyor belt aside for a moment, it’s time to make the Hogwash! Cut the top and short sides off a large box. Leave .75″ of space at the bottom of the box for the Hogwash’s ramp.
 Cut a paper towel tube in half, trim the halves to fit inside the box, then push the halves together and tape them in place. There should be no gap between them.
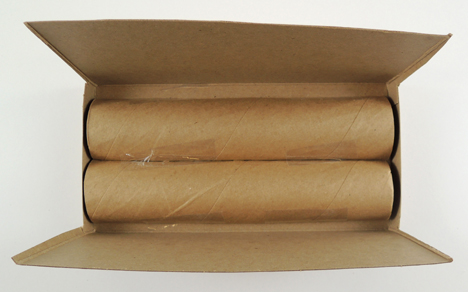 Slide a strip of poster board or tagboard under the box (our box was 9″ long, so our strip was 2.5″ x 14″).
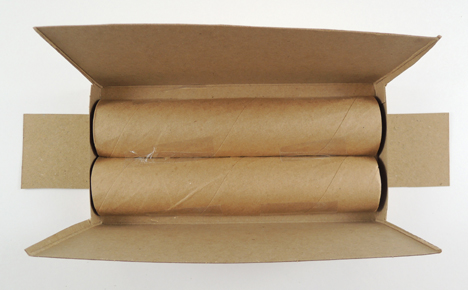 Lay a matching strip over top of the tubes and tape the ends of the two strips together. This creates the “ramp” for your Hogwash.
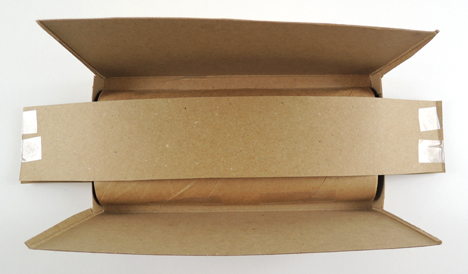 Here’s a different angle, You can see the ramp a little more clearly:
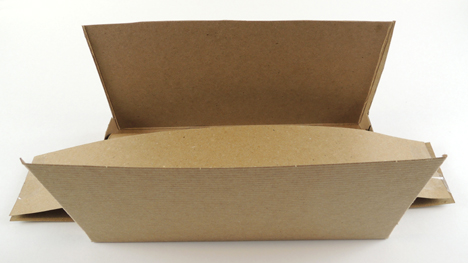 Next, arch 3 short strips of poster board or tagboard over the box (our strips were .75″ x 11.5″). Tape them in place. Important! Make sure the arches are high enough for your pigs to easily pass under. Our arches, for example, were 3.25″ above the top of the box.
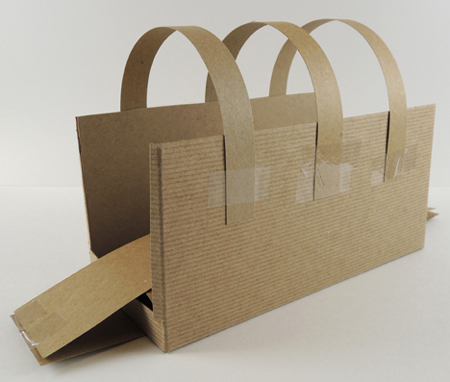 Next are the 5 cleaning components of the Hogwash: Spray, Soap, Scrub, Rinse, and Dry. In the below image you can see them in order from right to left.
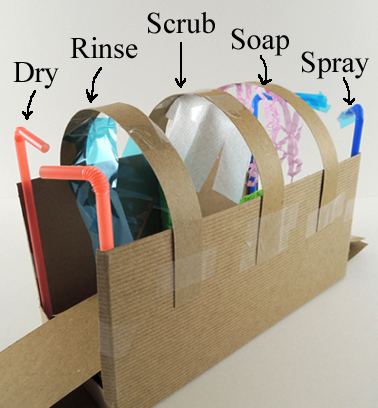
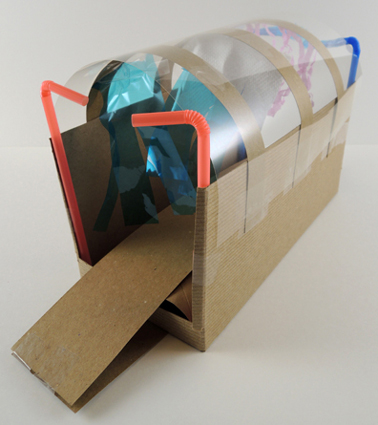 Finish by cutting, coloring, and attaching the different signs from the
 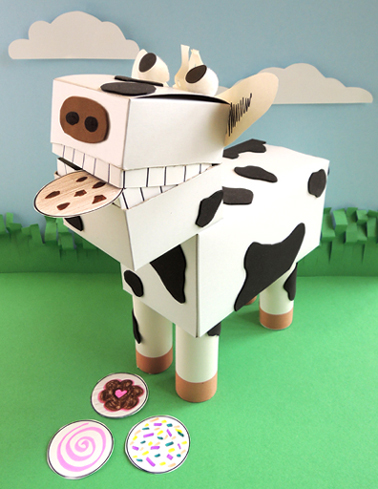 Do cows and cookies go together? You bet. Especially in this matching and sequencing game we created, complete with a grinning, cookie-eating cow!
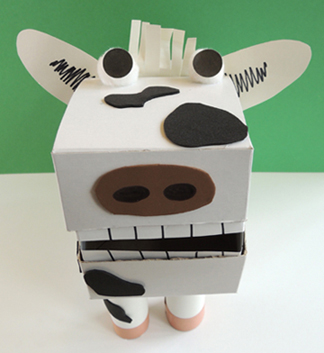
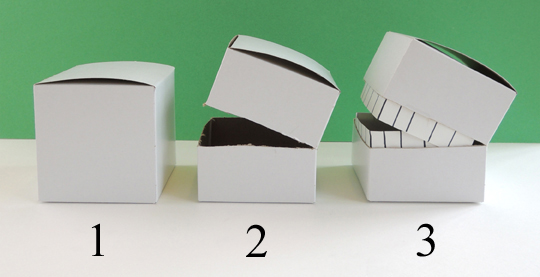 Stick a brown oval nose on the front of the box (we used self-adhesive foam, but construction paper works too). Hot glue a pair of pom-pom eyes to the top of the box, and use black dot stickers (or circles of black construction paper) to create pupils. Use white construction paper to add ears and a fringed forelock.
 Wrap 4 toilet paper tubes with white construction paper, then hot glue them to the bottom of a large box. Hot glue the cow’s head to the edge of the box as well. Add an udder, a tail, and 4 brown construction paper hooves.
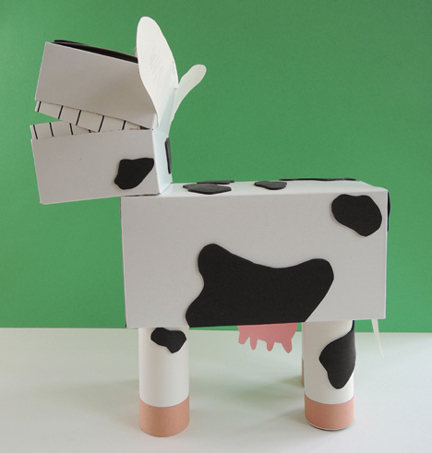 The final step is to cover your cow with spots. We used sheets of self-adhesive foam that the kids cut into customized spots, but construction paper is also an option. I definitely recommend offering a rainbow of spot colors – the results are fantastic. Check out this pink and white cow with the heart spot on her flank!
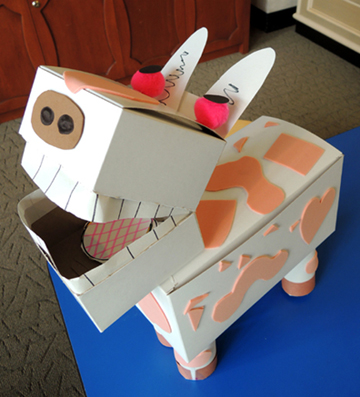 The cow is finished, now for the cookie matching and sequencing game! Here’s how it works. Cut 4 white circles from the template, then use markers to decorate each circle like a cookie. All the cookies needs to be different.
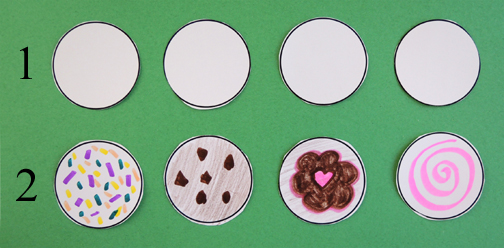 Cut the rest of the template into 5 strips, making sure that each strip contains 4 cookie circles. Decorate the strips with different cookie sequences. All the strips should be different (and it’s totally OK if you don’t decorate all 5 strips).
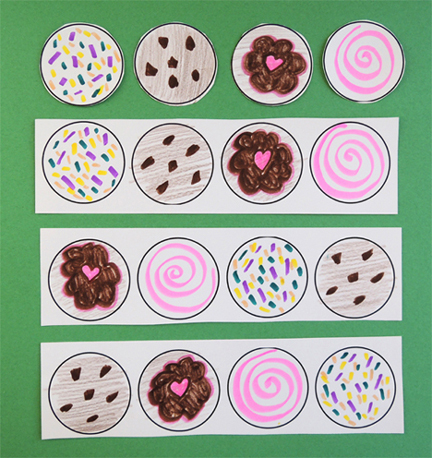 To play the game, randomly select a cookie strip. Match your cookie circles to the sequence on the strip, and then feed the cookies to the cow in that order. When done, remove the cookies from your cow’s mouth, select a different strip, and play again! You can play the game at your own pace, or have a countdown from 10 to make it more challenging. Another option – place the cow on the other side of the room, so you have to run back and forth from the cookies to the cow!