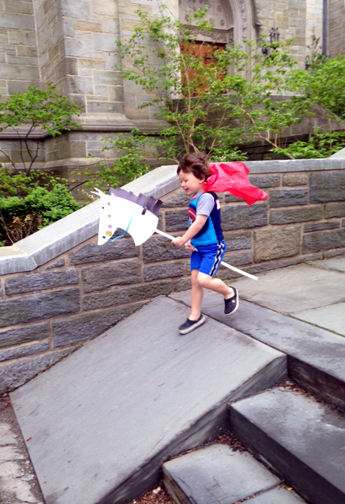
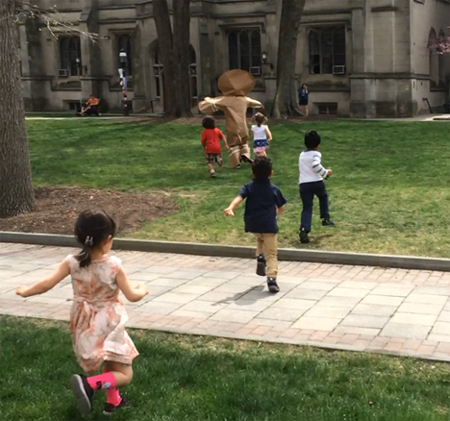
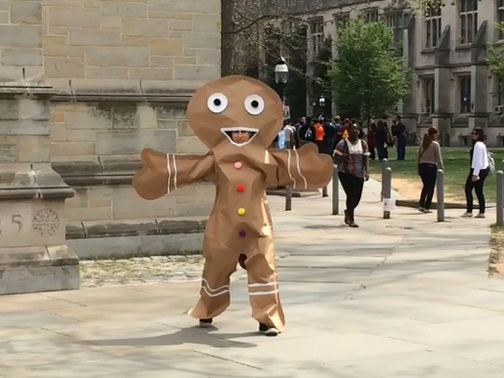
 Yes, that’s me. Dressed as a giant gingerbread cookie, on the run from some extremely determined children. We made adorable (and non-edible) gingerbread houses with a surprise inside. Pull the peppermint loop on the roof, and up pops a gingerbread person! However, in order to get one of those little gingerbread persons, you have to catch the BIG one first (scroll to the bottom of the post for the video)!
 We read The Gingerbread Baby by Jan Brett (G.P. Putnam’s Sons, 1999). On a cold, snowy day, Matti and his mother decide to make gingerbread. The cookbook instructs them to bake the cookie for eight minutes without peeking, but Matti can’t resist. He opens the oven and out leaps a feisty Gingerbread Baby, who promptly bolts out the door. A merry chase ensues involving Matti’s parents, the cat, the dog, the goats, two girls, a pig, a fox, a milk & cheese man, and assorted villagers. But clever Matti has his own plan. He builds an enticing gingerbread house, leaves it in the woods, and the Gingerbread Baby dashes inside. Home sweet home!
You’ll need:
- 1 small box (I used a 4″ x 4″ x 4″ box, a small tissue box works too)
- 1 rectangle of tagboard for the roof (mine was 4″ x 9.5″)
- 1 square of tagboard for the door (mine was 3.25″ x 3.35″)
- 2 pipe cleaners (1 white & 1 red)
- Gingerbread house decorating supplies (full list in the post)
- Brown wrapping paper or packing paper
- Tape, glue, and scissors for construction
- Markers for decorating
- Hot glue
- Optional gingerbread person costume (more on that later!)
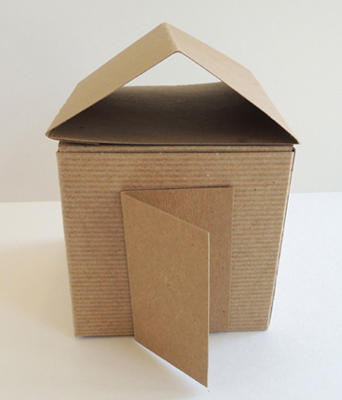
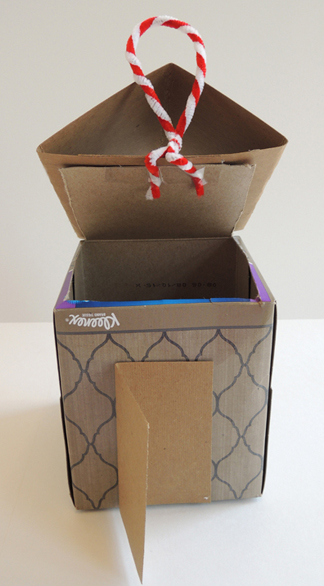
You’ll definitely need a box with a lid for this project. I’ll demonstrate with the box we used first, and then I’ll show you how to build the project using a small tissue box. First, fold a rectangle of tagboard into thirds to create a roof. Hot glue the roof to the lid of your box. Fold a square of tagboard in half, then hot glue it to the front of the box to create your house’s front door.
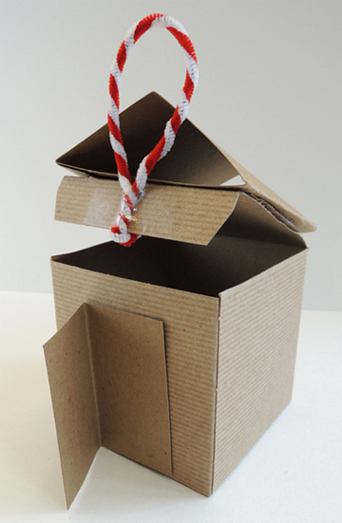
 Twist a red and a white pipe cleaner together. Circle the pipe cleaners into a loop, and twist them together tightly at the bottom. Tape the peppermint loop to the lid of your box, bending any excess pipe cleaner underneath the lid.
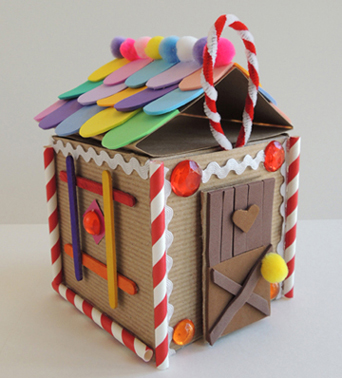
 If you don’t have a box like mine, no problem! Just use a small tissue box. Flip the tissue box over (so the bottom is facing up) and use a box cutter to cut a square lid. Then follow the same steps for the roof, door, and peppermint loop. Here’s what a tissue box version of the house looks like:
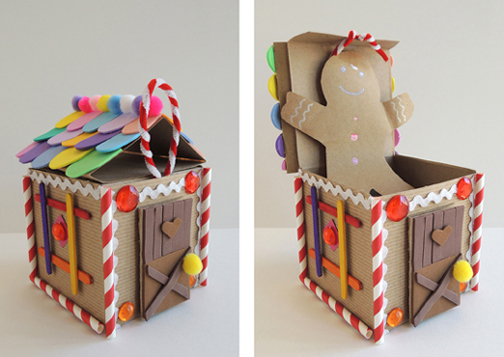
 When the basic house is done, all you have to do is decorate! We offered self-adhesive foam pieces (which I used to shingle my roof), white pipe cleaners, mini craft sticks, little squares of colorful paper, large gemstones, mini pom-poms, rickrack ribbon, construction paper we had cut into icing scallops, and striped paper straws.
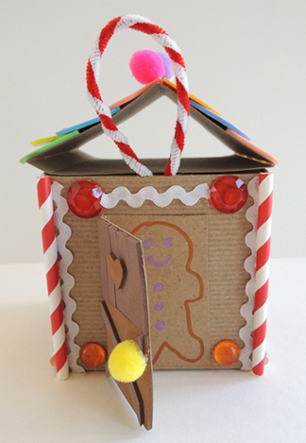
 Markers can also be used, especially if you want to draw a gingerbread person peeking out of the front door! We found that metallic markers worked best on the brown tagboard.
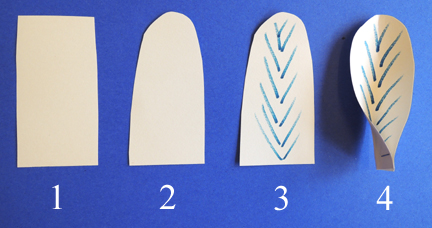
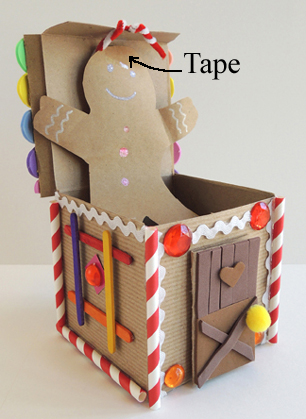
 Finally, the gingerbread person that pops up when you tug the peppermint loop! Marissa and I prepped the gingerbread people in advance (we cut them out of brown packing paper and colored them with metallic markers). My only tip is to make sure the cookie fits neatly inside your house. In our early attempts, the cookie’s arms were too long. They jutted out past the roof, which, when closed, looked rather torturous for the cookie.
 Attach your gingerbread person to the underside of the lid with tape. Done!
 You could stop there and be finished with the project. But we decided to take it one step further. In order to get that little gingerbread cookie, you had to catch the BIG one first!
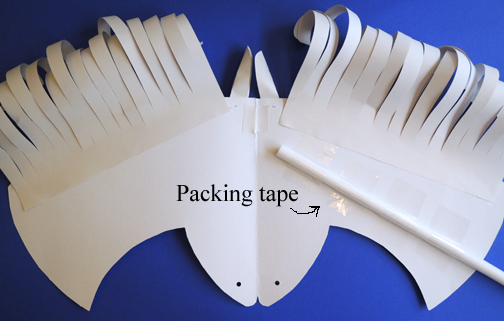
 I used brown packing paper to create this stupendous costume (the thicker the paper, the better). The paper roll wasn’t wide enough to cover my full arm span, so we taped 2 long pieces of the paper together, reinforcing the seam with extra-wide masking tape. I didn’t photograph the step with the big taped pieces of paper, but here is a shot of a tape seam on one of the finished costume pieces:
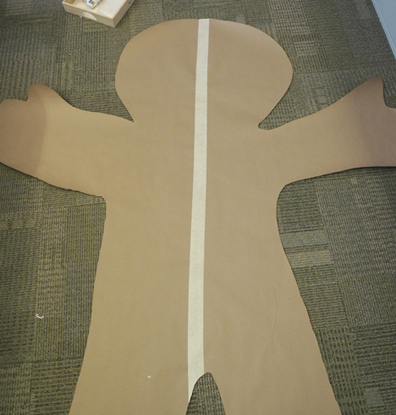 Since you want the masking tape seams on the inside of the costume, flip one of the taped pieces of paper over. The taped seams should now face each other. Then lay down on the paper and have someone trace your body in the shape of a cookie. A couple things to keep in mind while doing this:
- Leave LOTS of room around your body while tracing. Otherwise, the costume is going to be too tight and rip very quickly.
- The paper isn’t very flexible, so your arms will have to be stuck straight out while wearing (and running in) this costume.
- Your feet will need to stick out the bottom of the costume. You don’t want to trip while running around in it!
- You’ll need a tall, round head to complete the look.
I’m 5’6″, so my costume was 81.5″ tall, and 68″ wide. Here’s the finished shape:
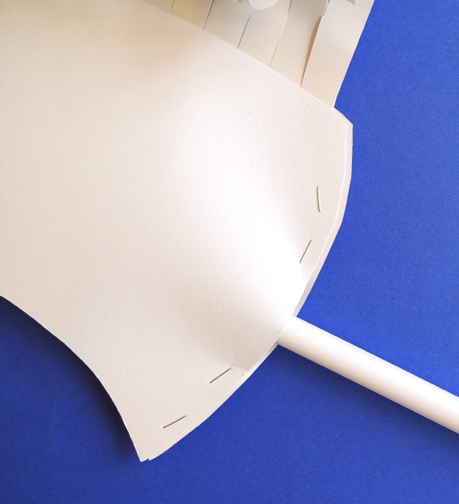
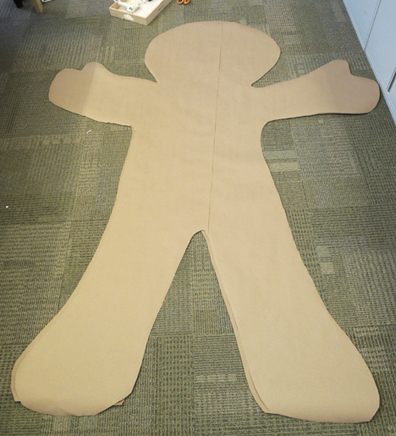 To “stitch” the pieces together, we made a double seam of hot glue and staples. The hot glue goes first, and should be about 1″ from the edge of the paper. Really goop it on! The staple seam should be about 0.5″ from the edge of the paper. Each staple should be no more than 0.75″ apart.
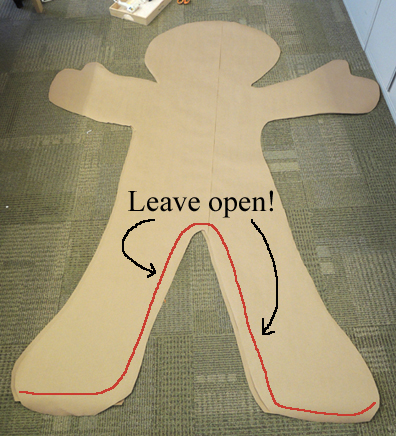
IMPORTANT! While gluing and stapling the seams, you DO NOT want to close the area under the feet or inside the legs (outlined in red below). You need this part open so you can put the costume on.
 Once the seams are done, have the person who will be wearing the costume slide it over his/her head. You will definitely need help with this step! Marissa stood on a stool and gently lowered the costume while I shimmied my arms into place. Then we marked where my mouth was and trimmed the excess paper from around my feet.
Then Marissa, back up on the stool, slowly pulled the costume off. Using the mark we had made by my mouth, we cut an opening for my face, and added paper plate eyes with pom-pom pupils, masking tape icing, and pom-pom buttons.
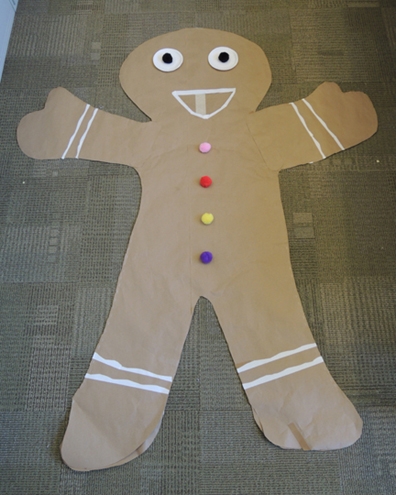 They’re hard to see in the above photo, but there are additional paper patches hot glued along the cookie’s armpits. When I tried the costume on the first time, the armpits ripped right away, so we added the patches to reinforce those areas.
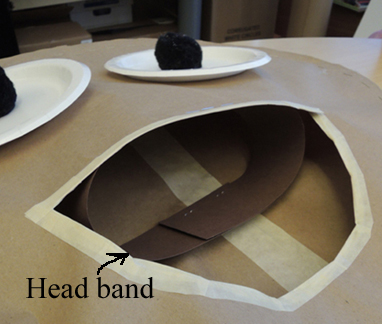
We also figured the head of the costume was going to blow off while I was running, so we stapled a poster board head band to the front of the costume (right above the mouth). It worked, but only for a little while. The main problem was that once the head band slipped off, I couldn’t put it back on (my hand was encased in a paper mitten!).
 When it was time for the cookie chase, Marissa and I ducked out of the library with the costume, a stapler, and the cookie prizes. We hid behind a building, and, using some stairs to get some height, Marissa slid the costume over my head. Then she used the stapler to quickly close the seams along the insides of my legs.
When the kids were gathered outside the library, I walked out where they could spot me…and the chase was on!
The costume starting ripping right away, but the kids did not care. All they saw was a cookie in need of pursuit. It was like Lord of the Flies meets Candy Land! When the chase was over, all the kids were awarded a cookie and a high five.

Has this post made you hungry for some real gingerbread? Check out this truly astounding Strega Nona gingerbread cottage! Mmmmm…