You’ve donned the cap and gown, walked the stage, and received your diploma. Your bright and beautiful future awaits! Only one question remains…who will you be when you grow up?
We read Owliver, written by Robert Kraus, and illustrated by Jose Aruego and Ariane Dewey (Simon & Schuster, 1987). Young Owliver the owl like to act. He can become a hummingbird, a flamingo, even a bat! While Mother Owl is definitely up for an actor or playwright in the family, Father Owl thinks Owliver would make an excellent doctor or lawyer. When Father gives his son doctor and lawyers toys, Mother gives him acting and tap dancing lessons. Both are completely convinced that they’ve successfully nurtured Owliver’s future career. Time passes and Owliver grows up. Is he an actor, a playwright, a doctor, or a lawyer? Turns out he’s none of the above. Owliver’s a fireman!
We made oatmeal container owls, then filled an owl-sized briefcase with the tools said owl would need to follow his/her chosen profession. Then our owls walked the graduation stage for caps and diplomas!
 You’ll need:
- 1 large oatmeal container
- White construction paper
- 1 owl parts template, printed on 8.5 x 11 white card stock
- A rectangle of tagboard (mine was 4.25″ x 6″)
- Brown construction paper
- 2 circles of yellow construction paper (approximately 1.75″ in diameter)
- 2 black dot stickers
- A small triangle of orange self-adhesive foam
- A selection of natural feathers
- 1 manilla file folder
- 2 small squares of tagboard (approximately 1.75″)
- 1 strip of black poster board (approximately 1.5″ x 8″)
- 1 square of black poster board (approximately 3.75″)
- 1 small strip of yellow construction paper (approximately 0.25″ x 3.25″)
- 1 diploma template, printed on 8.5 x 11 white paper
- A scrap of ribbon to tie the diploma
- Scissors, tape, white glue, and stapler for construction
- Markers for decorating
- Hot glue
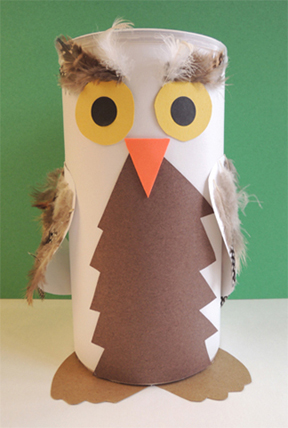
The owl is first! Wrap an oatmeal container with white construction paper. Add a circle of construction paper to the top of the container’s lid if you like.
Cut the owl parts from the template, then use the individual pieces to trace a pair of feet onto tagboard (or poster board), the “tummy feathers” onto brown construction paper, and a pair of wings on white construction paper. Hot glue the feet to the bottom of the container, and glue or tape the tummy feathers to the front. Add a pair of yellow construction paper eyes with black dot sticker pupils (or just draw the pupils in with markers). Use a triangle of orange self-adhesive foam (or orange construction paper) for a beak.
Use white glue (or tape) to attach feathers to the wings, then hot glue the wings to the oatmeal container. Add some feather eyebrows, and you’re done!
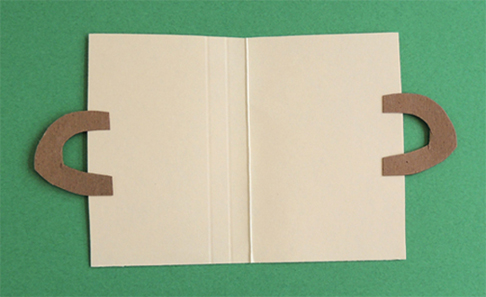
 Next is the briefcase! I cut a 3″ x 4.5″ piece from the folded bottom of a manilla file folder. Unfold the piece and lay it flat (the unfolded piece will measure 4.5″ x 6″). Cut a pair of “briefcase handles” from 2 small squares of tagboard, and hot glue (or tape) the handles to the sides of the paper like so:
 Use markers to draw the tools your owl will need in his/her future profession. Here’s mine:
 Some paper, books, a pencil, a pen, and a laptop. Yup, my owl wants to be a writer! Here’s a sampling of some other briefcases…
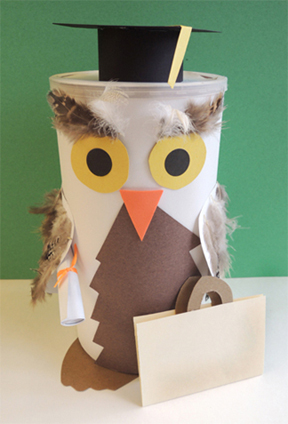
Finally, the graduation cap and diploma! To make the cap, circle and staple a strip of black construction paper (my circle was 2.25″ in diameter). Hot glue (or tape) a square of black poster board to the top of the circle.
For the tassel, hot glue (or tape) one end of a small strip of yellow construction paper to the center of the square.Fold the strip over the edge of the hat, then fringe the free end. You can cover the top of the tassel with a small square of black post board (as seen below), but that step is purely optional.
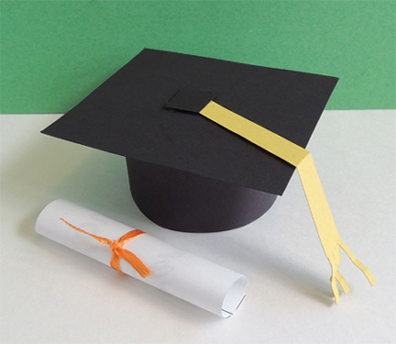 Cut a diploma from the template, roll it, and tie it with a ribbon. The diplomas on my template say “Congratulations! You Rock!” but you can customize your diploma however you like.
We prepped the caps and diplomas in advance. And, with “Pomp and Circumstance” playing on my iPhone, the owls marched across the graduation stage (i.e., a piece of white poster board with gold embossed foil seal “footlights”) and received a cap and diploma.
Way to go, class of 2015!