
 Hungry? We invite you to peruse the contents of this adorable dim sum cart. In addition to being stocked with deliciously delectable dishes, the cart is a bilingual matching game with an additional story time social twist!
 We read Dim Sum for Everyone! by Grace Lin (Alfred A. Knopf, 2001). Follow a family as they sample the many little dishes served at a dim sum restaurant. Pork buns, fried shrimp, egg tarts…the carts have something for everyone! The book concludes with an excellent essay about dim sum – it’s history, traditions, and social aspects. Fantastic book!
You’ll need:
- 1 large box (ours was 4.5” X 4.5” x 9” – a large tissue box works too)
- 1 box cutter
- 1 wheel assembly
- 1 dim sum dishes template, printed on 8.5″ x 11″ card stock
- A selection of construction paper
- 1 dim sum menu template, printed on 8.5″ x 11″ card stock
- 1 teapot template, printed on 8.5: x 11″ card stock
- 1 dim sum restaurant place mats, printed on 8.5″ x 11″ card stock
- Scissors, tape, and glue for construction
- Color pencils for decorating
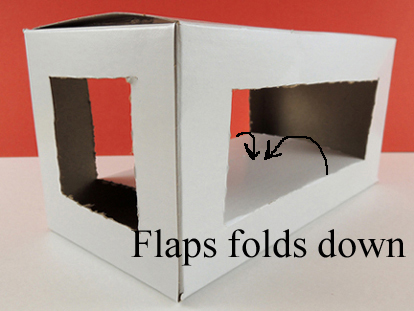
First, the cart! Use a box cutter to create a square in one of the short sides of a box (leave the other short side intact). Next, cut hinged rectangular flaps in the long sides of the box. Fold the flaps down to create the lower “shelf” of the cart. Secure the flaps in place with tape or hot glue.
 Add a wheel assembly to the bottom of the box (you’ll find instructions and alternative wheel suggestions here). Use leftover box cardboard to make a cart handle. We also added gold mirror board and patterned tape to make the cart extra fancy.
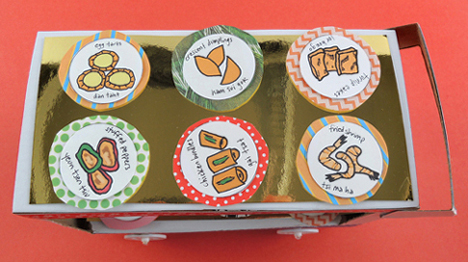
Time for the food! Color and cut the dim sum dishes from the template, then glue them on top of construction paper (or patterned paper) circles. Thanks to Lin’s awesome illustrations on the front and end papers of the book, the dishes are labeled with their English and Chinese names.
 Would you also like to serve tea? The tea cups are leftover bits of card stock circled into miniature cylinders. To make the teapot, circle and tape the rectangular part of the template to create the teapot’s body. Then add a handle, spout, and bead knob on top! The circular part of the template becomes the teapot’s hinged lid:
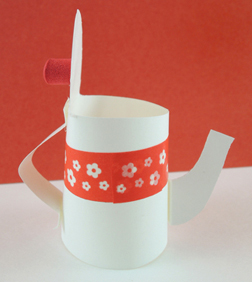
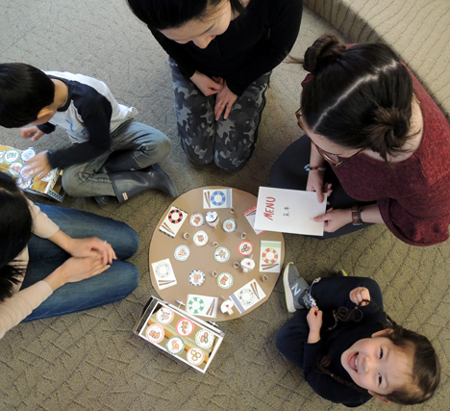
The book mentions that an open teapot means you are requesting a fresh pot – something we really wanted to replicate for this project. When the carts were finished, it was time for the matching game. Each cart came with a menu (the template is here):
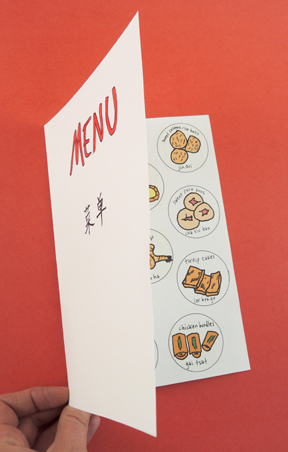
To play the game, kids rolled the carts up to their customers. The customers would point to a menu item, and the kids had to locate it on their carts! Oh, and we also included a cute place setting for your customers (template here).
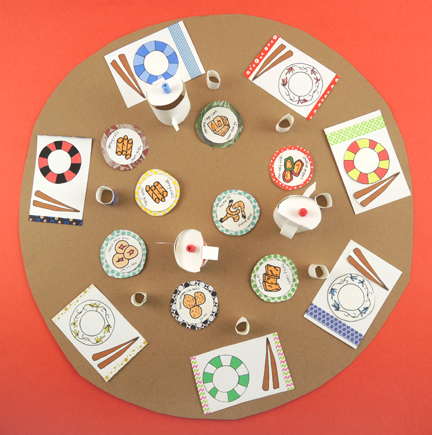 The book mentions how social dim sum dining is, so we made a couple tables (i.e. brown poster board circles) and asked the story time grown ups to sit around them. Kids traveled to ALL the tables, playing the matching game with everyone’s grown up! If you decided to add this social aspect to your story time, just make sure the kids write their names on the backs of each of their dishes so they can be returned to the proper cart.
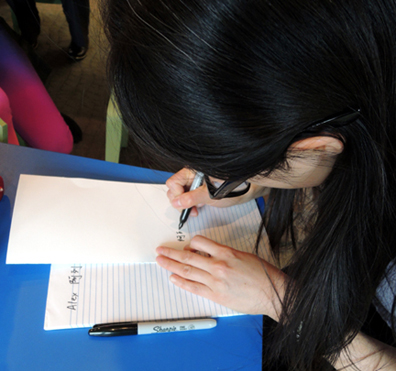
 The final touch on this awesome project? Our colleague, Dr. Minjie Chen, stopped by to write the kids’ names on their menus in Chinese characters. The absolutely loved it. Thanks Minjie!
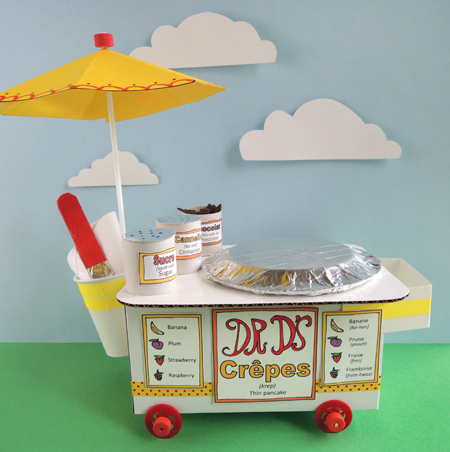 Make delicious crêpes to order with this fantastic crêpe cart! Pour the fabric batter onto the griddle, add a number of felt toppings, sprinkle on a bit of sucre from your counter top shaker, then use your spatula to fold the crêpe at just the right time. The cart’s signs are printed in both English and French (with helpful pronunciation guides), so your customers can order like Parisian pros! C’est Magnifique!
 Two important things about the cart’s counter top! 1) Make sure it’s wide enough to fit your small paper plate (our counter tops were 7.5″ x 9.75″); 2) It’s a little hard to tell in the above photo, but make sure the paper cup end of the counter top is flush against the side of the box. Otherwise, your umbrella won’t attach correctly. And speaking of paper cups, notice how ours is taped towards the back of the cart? That’s so you won’t keep bumping into the umbrella while reaching for your crêpe supplies.
 The umbrella comes next! Cut the umbrella octagon from the template (we printed ours on yellow card stock). Decorate it with markers, then use scissors to cut a slit from one of the points of the octagon to its center.
 Carefully mountain fold the octagon along its remaining points.
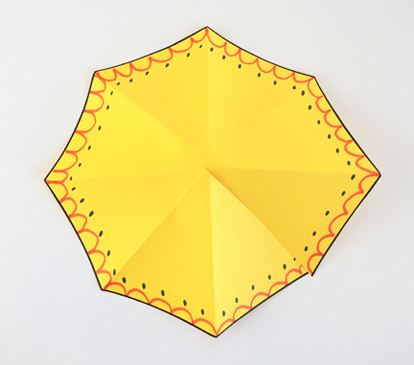 Cut a small slice in the top (this is where your umbrella pole will poke through). Next, slide one of the octagon’s triangle folds under another, then tape the octagon closed.
 This results in a seven-sided umbrella canopy with a hole in the top.
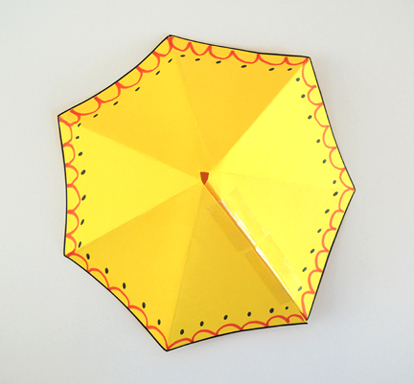 Now stick a foam bead on the end of a balloon stick.
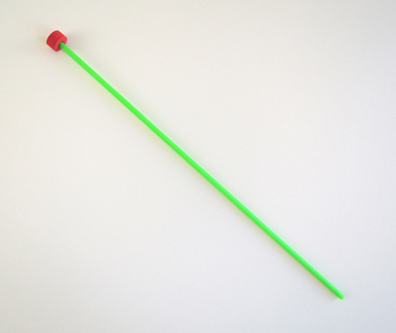 Slide the umbrella canopy up the stick to meet the foam bead.
 Slide a second foam bead up the stick to secure the umbrella’s canopy in place. In the below photo, you can see the umbrella canopy wedged between a red bead and an orange bead.
 Tape the umbrella to the stand. If the balloon stick extends past the bottom of the cart, use scissors to clip off the excess.
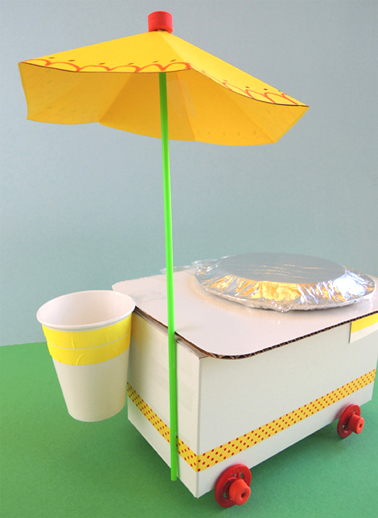 Now it’s time to stock your cart! Cut and decorate the signs from the crêpe cart template, and glue (or tape) them to the front of the cart. The crêpe batter and spatula go into the paper cup. Our “batter” was an old fabric tablecloth (thank you
 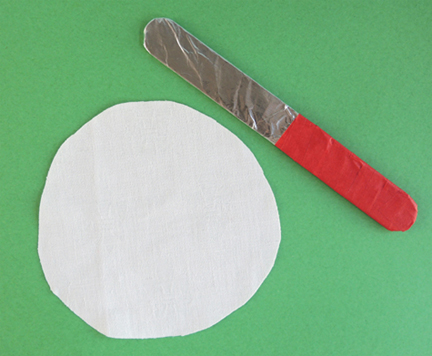 Sitting on top of the cart are your sugar, cinnamon, and chocolate canisters. Each canister was 1/2 of a toilet paper tube with a template label affixed to it. The sugar and cinnamon had little circles of silver mirror board hot glued to the tops (we used Sharpie to draw little holes in the tops too). The chocolate canister’s circle is hot glued to the bottom of the tube. Then it gets stuffed with bits of brown felt.
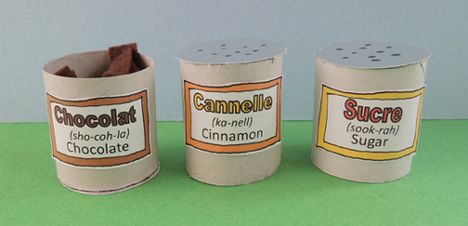 The little plastic cups on the back of the cart are also filled with bits of felt. Pink for strawberry, red for raspberry, yellow for banana, and purple for plum.
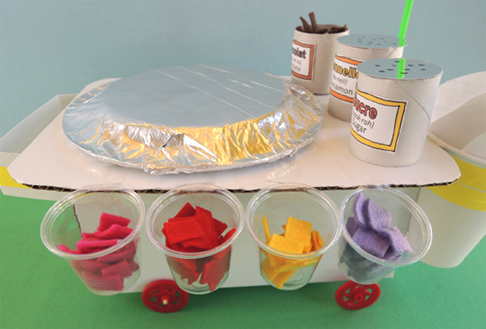 Voilà! Your cart is finished! So, how exactly do you make a crêpe? You put the circle of batter on the griddle, add some felt ingredients, fold the crêpe in half with the spatula, fold the crêpe in half again, then serve it to your customer.
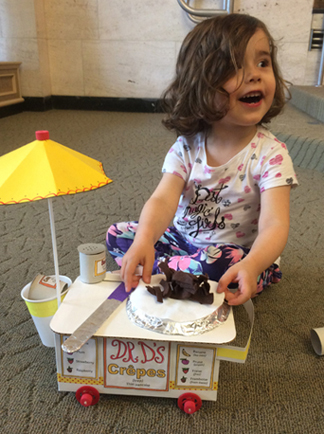 Or maybe it would just be easier to show you…in French no less
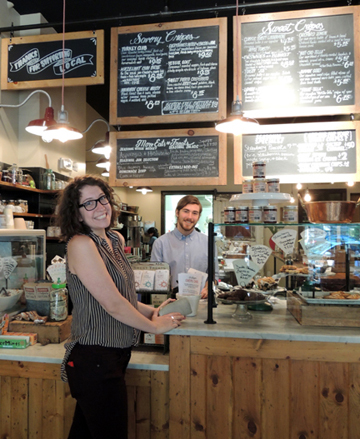 Here’s a griddle at work. You can just see the special spatula on the white cutting board…
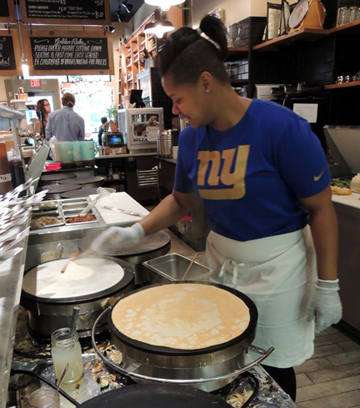 The crepe arrives at your table in a beautiful, warm wedge of deliciousness. I’m trying to work my way through the restaurant’s generous menu of sweet and savory crêpes, but I keep getting stalled on their hammin’ cheese melty with seasonal pickles and mustard aioli. Mmmmmm…
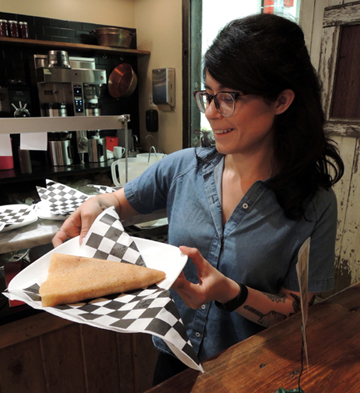 Jammin’ Crêpes LOVED the little crêpe cart! It received their official stamp of approval.
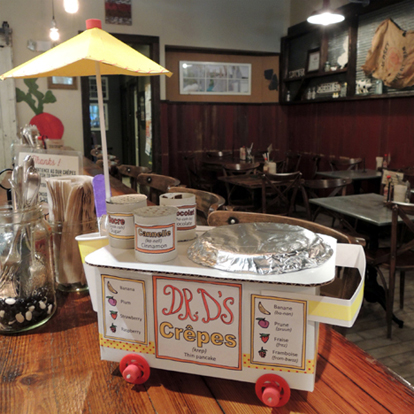 Did I – heh heh – mention Jammin’ Crêpes makes their own nutella spread with hazelnuts, almonds, and chocolate? I think…I need to do some more crêpe research. Right. NOW.