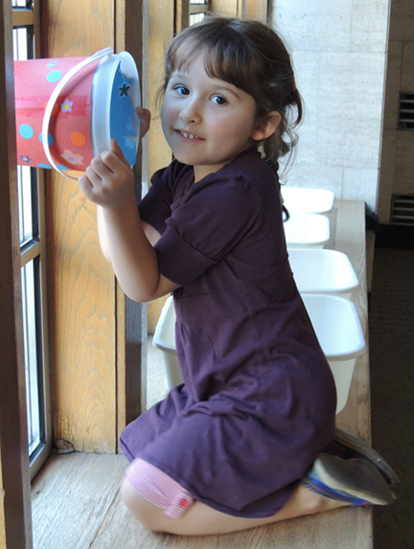
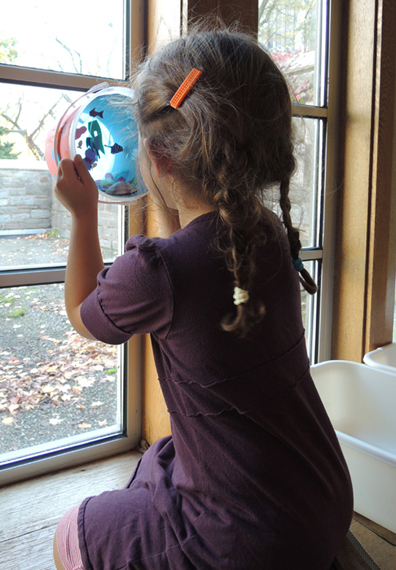
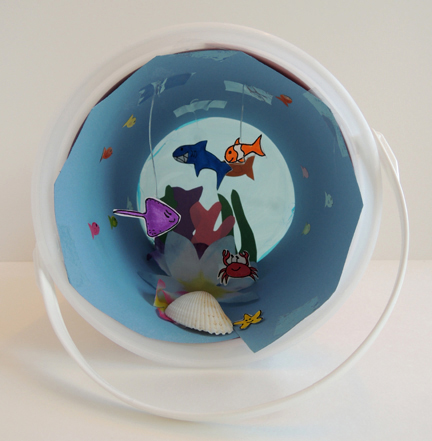
 A bucket is a very useful thing…but is it entrancing? This bucket is! Hold it up to the light and you will discover it holds an ocean ecosystem full of fun, including fish, coral, a manta ray, a shark, a starfish, and more!
 We read Billy’s Bucket, written by Kes Gray and illustrated by Garry Parsons (Candlewick, 2003). Billy doesn’t want a bike, sneakers, or a computer game for his birthday. He wants a bucket. Yes, a bucket. At Buckets R’ Us, Billy spots a special bucket (“19 shelves up and 78 across from the top”), fills it with water, and begins to report the most astounding things. He sees shrimp, a shark, a sting ray, sea lions, dolphins, divers, and possibly a mermaid! His parents chuckle at their son’s active imagination. Jokingly, they ask if they can use the bucket for some household chores. But Billy warns them that they must never EVER borrow his bucket. The next day, Dad doesn’t heed Billy’s warning and sets off the wash the family car. He quickly discovers that Billy was right. There is something special about the bucket! Now how are they going to get that whale back in the bucket?
You’ll need:
- A 2.5 quart clear plastic bucket (more on this below)
- Construction paper
- A selection of patterned tape
- A selection of dot stickers and/or other stickers for decoration
- 1 circle of blue cellophane (approximately 9.5″ in diameter)
- 1 rectangle of blue poster board (approximately 5.5″ x 18″)
- 1 sea creatures template, printed on 8.5″ x 11″ white card stock
- 3 pieces of clear elastic beading cord (no more than 4″ each)
- A selection of fabric flowers (optional)
- 1 small seashell (optional)
- Fish stickers (optional)
- Scissors and tape for construction
- Markers for decorating
- Hot glue
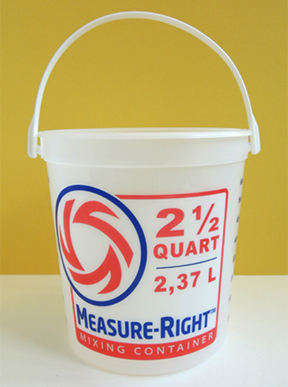
A word about buckets. Size is not important. The most important thing is that the bucket has a clear plastic bottom to allow light through. I found this little 2.5 quart mixing bucket in the paint section of Lowe’s (for other fantastic hardware finds, click here and here). It was perfect.
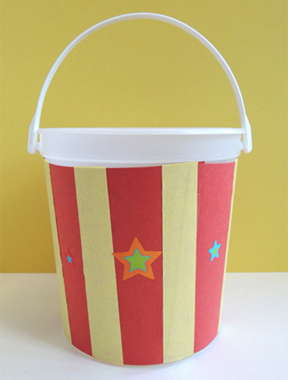
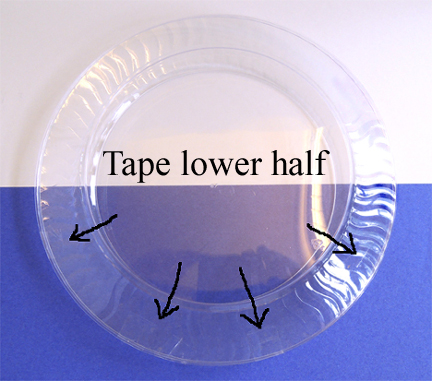
 First, wrap the outside of the bucket with construction paper. One long piece of construction paper resulted in ugly gaps at the top and bottom. So we decided to use three, 5.25″ x 7.5″ rectangles of construction paper. It worked great. You can cover your bucket with a single color, or mix it up (we offered orange, red, green, and yellow paper). Once covered, decorate the outside of the bucket with colored masking tape and stickers (or just use markers).
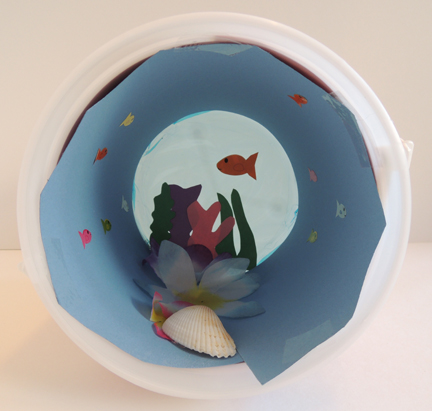
 Now for the ocean inside your bucket! Here’s what a finished interior looks like:
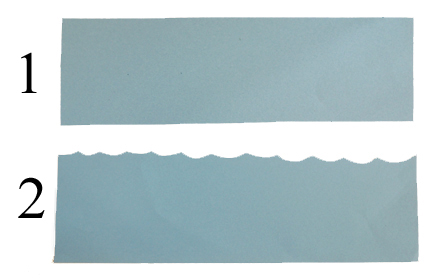
 Begin by cutting wave shapes on top of a rectangle of blue poster board. Set the poster board aside for a moment.
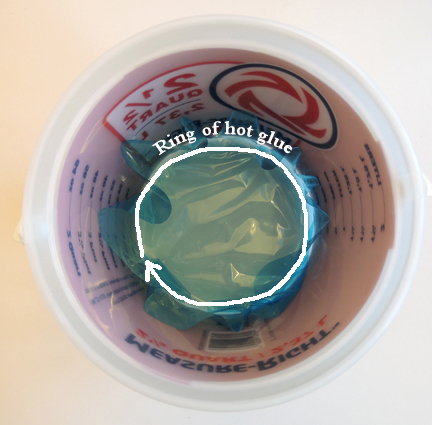
 Squeeze a ring of hot glue around the bottom of the bucket (right at the edge, where the bottom meets the sides). White glue or a glue stick works too – it just might take a long time to dry and not dry completely clear. Press a circle of blue cellophane onto the glue.
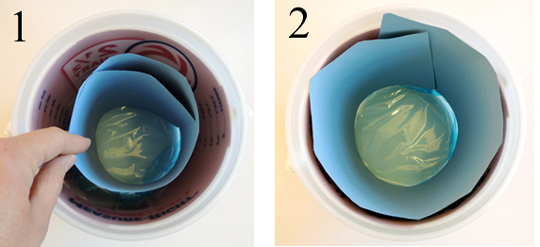
 Loosely curl your poster board and place it inside the bucket. Once it touches the bottom, uncurl it and push it against the sides of the bucket. You want the poster board to trap the edges of the cellophane, leaving a relatively smooth circle of cellophane at the bottom of the bucket.
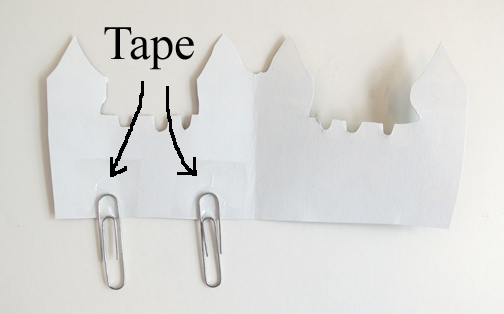
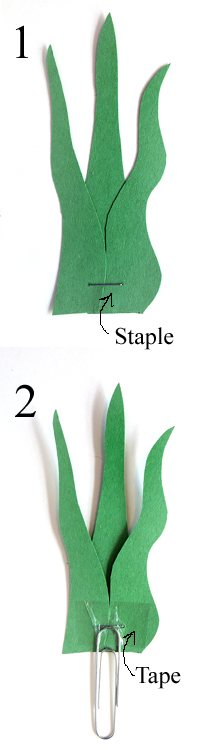
 Use several pieces of tape to secure the poster board to the interior perimeter of the bucket, right at the top. To add a little background texture, we prepped some coral and sea grass shapes out of construction paper. During the program, kids taped 4 pieces to the blue cellophane.
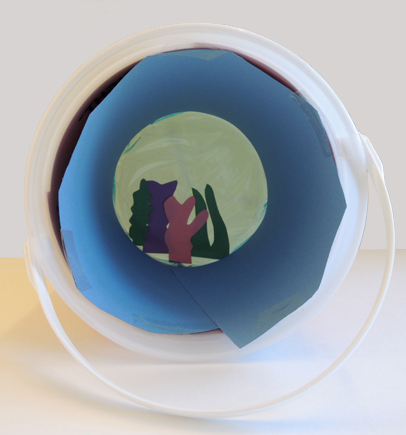 Then we hot glued 3 fabric flowers (more “coral”) and a small shell to create the “floor” of the ocean. I offered fish stickers as well (but you can skip this option, or have kids draw fish using markers. Just make sure they do it before they attach the poster board to the interior of the bucket!). I stuck a fish sticker on the cellophane as well.
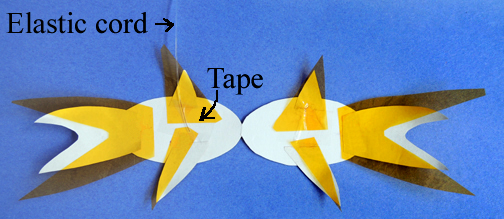
 Color and cut the sea creatures from the template (I gave the kids the option of a shark or a dolphin, but you can do both if you like). Tape a piece of elastic beading cord to the back of the fish, the manta ray, and the shark (and/or dolphin). Adjust for height, then tape the other end of the cord to the “roof” of the bucket. The starfish and the crab get taped (or hot glued) to the ocean floor.
For best results, hold your bucket up to a window with plenty of light. Enjoy!
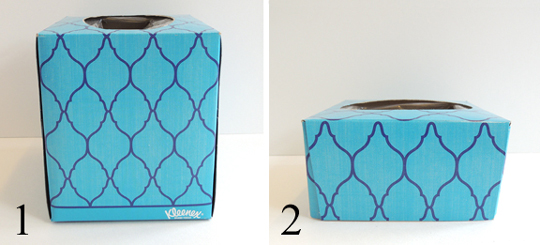
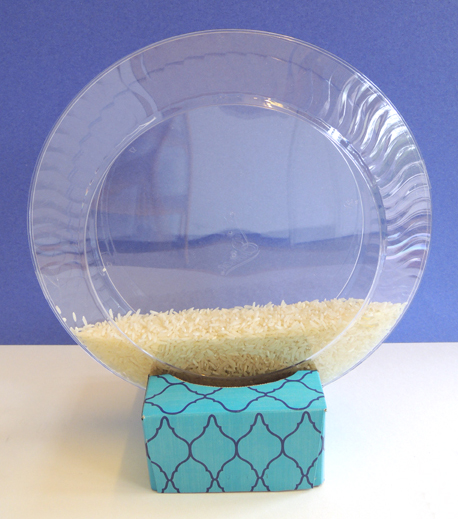
 Now for the base. Cut a small tissue box in half. Recycle the bottom half. You now have a 2.5″ base with an opening at the top.