
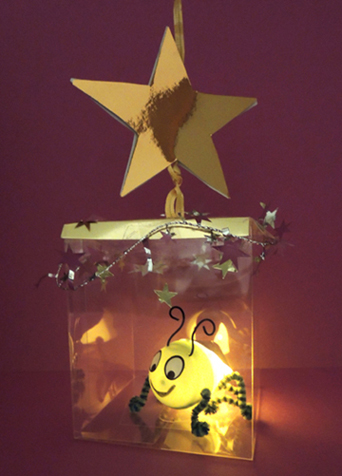
 Twinkle twinkle little bug! Light up the night with these glowing firefly bug lanterns. Or at the very least, discover a new way to use those leftover plastic Easter eggs!
We read The Little Squeegy Bug, written by Bill Martin Jr., Michael Sampson, and illustrated by Patrick Corrigan (Winslow Press, 2001). Once there was a little squeegee bug who admired the power and strength of Buzzer the Bumblebee. Hoping to gain his own wings and stinger, the little bug embarks on a quest. His travels lead him to the door of Hauncy the Spider, who weaves a pair of silver wings for him, but refuses the scary stinger. Instead, the wise Spider plucks the brightest star from the sky and hangs it on the squeegee bug’s tail to shine like a beacon for everyone. A firefly is born!
 You’ll need:
- 1 clear plastic favor box (more on this below!)
- A box cutter
- 2 craft ties
- A selection of metallic dot stickers
- A selection of foil star stickers
- 1 balloon stick or wooden dowel
- 2 sparkle stems (optional)
- 1 star template, printed on 8.5″ x 11″ white card stock
- 2 squares of mirror board or poster board (approximately 5.25″ x 5.25″)
- 1 plastic egg
- A thumbtack, large screw, and screwdriver for making holes in the egg
- A 4.75″ piece of twisteez wire
- 3 pieces pipe cleaner (each approximately 6″ in length)
- A rectangle of silver wrapping paper (approximately 2.25″ x 2.5″)
- A selection of eye stickers (optional)
- A permanent black marker
- 1 LED votive
- Scissors and tape for construction
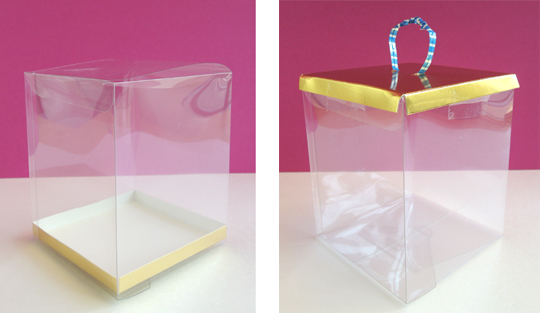
Lantern first, then firefly! The clear plastic box is the most important part of this project. I bought 4″ x 4″ x 4.5″ clear party favor boxes with gold cardboard bases from Nashville Wraps (a dozen cost about $10). I’ve seen similar boxes on Amazon (24 boxes for $15.00 plus $8.50 shipping) and quick check at Oriental Trading Company revealed 24 large clear favor boxes (4″ x 4″ x 4″) for $7.99. The ones from Oriental Trading Company don’t come with a base, which means you’ll have to rig one out of cardboard or poster board.
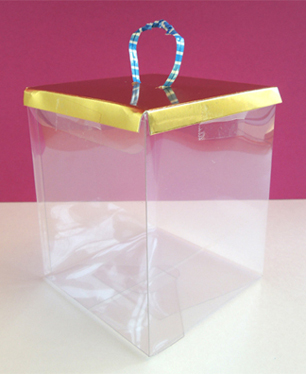
My boxes came with bases, and I actually used them as the “lid” for the firefly lantern. In the below image, you can see the regular box on the right, and the box with the modified base “lid” on the left.
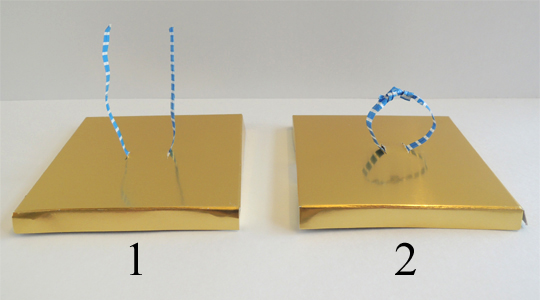
 To make the lid, remove the base from the box, flip it over, and use a box cutter make two small slits. If you don’t have a box with a base, cut one out of cardboard or poster board, then add the slits.
 Slide the ends of a 6″ piece of craft tie upwards through the slits, then twist together them together form a “lantern ring.”
 Tape the clear plastic lid of your lantern closed, then tape the lantern lid on top. Make sure both lids are taped tightly and securely. Don’t, however, tape the bottom of the box closed. You’ll need to be able to add and remove your firefly from the lantern later.
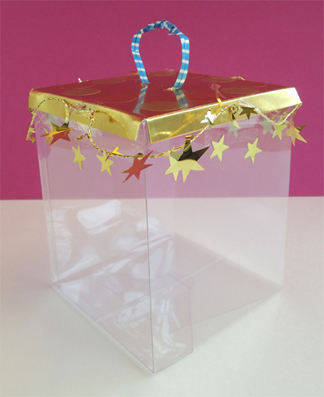
 Next, we decorated each box with metallic dot stickers, foil star stickers, and a 20″ piece of wired metallic star garland (in silver or gold).
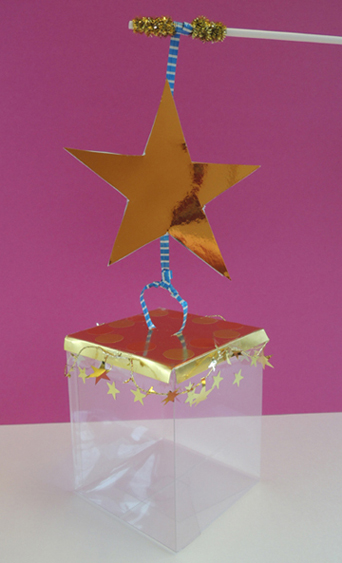
 Attach a craft tie to the lantern ring, then wrap the other end around a balloon stick (or wooden dowel). You can secure the craft tie to the stick with tape, but we decided to wrap sparkle stems around either side of the craft tie. Because it never hurts to have some extra bling, amiright?
 Finally, cut and trace the stars from the template onto mirror board (or poster board), and tape the stars back-to-back on the craft tie. You could also skip the mirror board and poster board and simply use markers to decorate the stars on the template.
 Set the lantern aside, it’s time for the firefly! I did not come up with the idea for this amazing little bug. Katie spotted it on Pinterest. I immediately pinned it with a oh-so-solemn vow to make it someday. Here it it, slightly modified from the original.
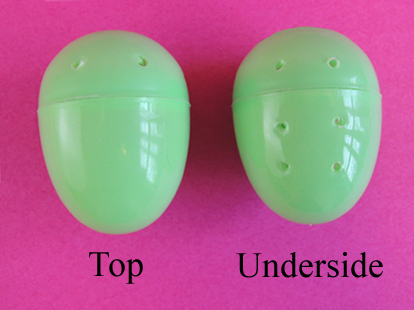
 Before we begin, a quick word about the plastic eggs. Test the LED in them first! We discovered that, with our particular set of eggs, the green ones looked best (yellow was way too light, blue was way too dark). Once you have your egg, drill 8 holes into it – 2 holes in the top of the egg for the antennae, and 6 holes on the underside for legs.
 The original instructions said to make the holes with a thumbtack. But we found that it was really difficult to slide pipe cleaners through thumbtack holes. So we used thumbtacks to make the initial holes, and then enlarged them using a big screw and a screwdriver.
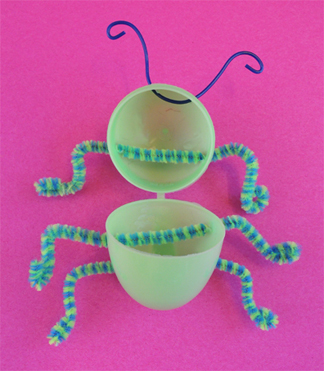
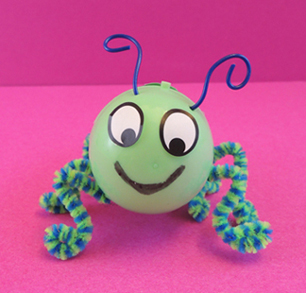
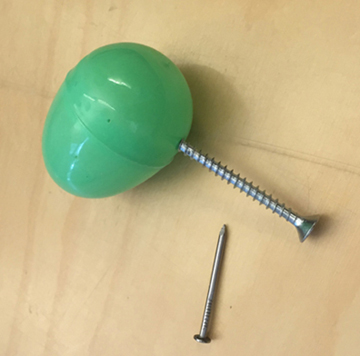 I also tried using a nail. Totally didn’t work. Use a big screw and a screwdriver. And prep all the eggs in advance of course. Once the holes are made, open the egg and thread a 4.75″ piece of Twisteez wire through the antennae holes. Curl the ends. Next, thread three, 6″ pieces of pipe cleaner through the leg holes. Curl the ends into little feet.
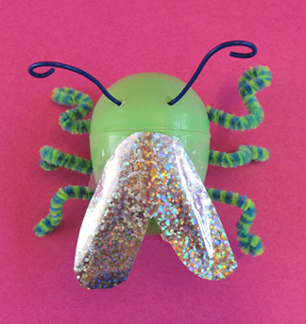
 Cut wings out of silver paper (we used silver holographic wrapping paper from Party City) and tape them to the top of the egg. IMPORTANT! Attach the wings below where your egg opens and closes. Otherwise, they’ll just get in the way when you are opening and closing the egg to access the LED votive.
 Use a black permanant marker to add eyes and a smile (or use dot stickers for the eyes like we did).
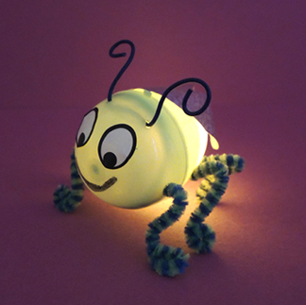
 Finally, insert a LED votive into the egg (remember, the “flame” should be pointing at the bug’s rear end). Admittedly, LED votives can get a little pricey if you’re buying for a classroom or story time crowd. Sometimes you can snag them cheap from discount retailers like Marshall’s and T.J. Maxx. More often, I use 40% off coupons from Michaels Craft store.
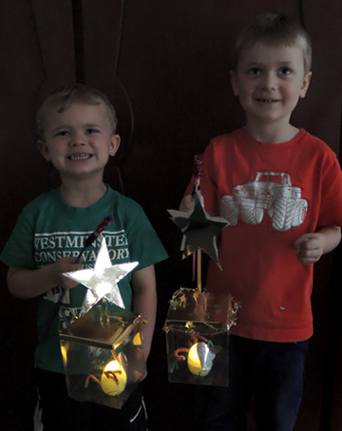
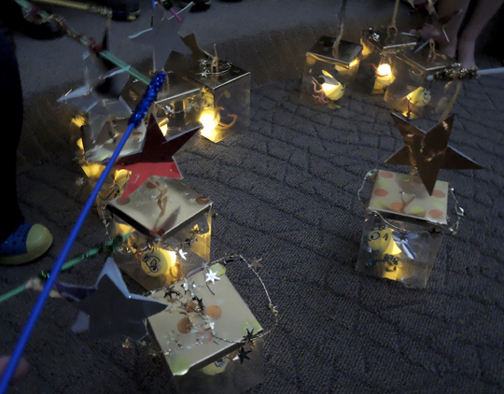
Your firefly is illuminated. Grab your lantern, open the bottom of the box, and gently place the firefly inside. Close the box and you’re good to go! I closed all the shades in the gallery and turned off the overhead lights. We went on a lantern walk around the gallery and then settled down to admire our lanterns. For a few minutes at our wild and crazy story time was calm, hushed and very, very peaceful. Ahhhhh…
 If you don’t like the concept of fireflies trapped in lanterns, just do the firefly project as a standalone. It makes for a friendly, fantastic, and flickering friend!
 More bug projects you say? This post is one of my all time favorites. And who can resist these sweet little honey bees?