 Boldly go where no mouse has gone before. We created a rad rodent rocket, then flew it across the library on a mission to the moon! If you are ever looking for an excuse to bust out a pair of walkie-talkies at story time, this project is for you.
We read Mousetronaut, written by real-life astronaut Mark Kelly, and illustrated by C.F. Payne (Simon & Schuster, 2012). Meteor is smaller than the rest of the mice training at NASA. Imagine his surprise when he is selected for the next mission! From floating in zero gravity to gazing at Earth in the distance, Meteor loves everything about his journey. But when the key to the control panel is stuck between the monitors, the mission is in peril. Luckily, undersized Meteor can squeeze in and save the day. When the crew returns to earth, Meteor is given a hero’s welcome and a new title…Mousetronaut! Aspiring astronauts should definitely check out Mark’s essay in the back of the book. I especially enjoyed the bit about space bathrooms (including space showers, air toilets, foamless soap, and dry shampoo!).
You’ll need:
- 1 toilet paper tube
- Grey construction paper
- 1 mouse spacesuit template, printed on 8.5″ x 11″ paper
- 3 piece of string for whiskers (mine were 1.75″ long)
- 1 mini pom-pom
- 1 box (I used a 4 ½” X 4 ½” x 9” box, a large tissue box works too!)
- A box cutter
- 1 cone water cup
- A 5oz cup
- A 9oz plastic cocktail cup
- 1 rocket wings template, printed on 8.5″ x 11″ card stock
- A selection of color masking tape
- Red and yellow squares of cellophane (approximately 5″ x 5″)
- A selection of metallic dot stickers
- 1 Moon Mission game (more on this below!)
- A selection of foil star stickers
- Scissors, and tape for construction
- Markers for decorating
- Hot glue
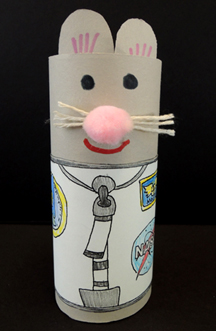
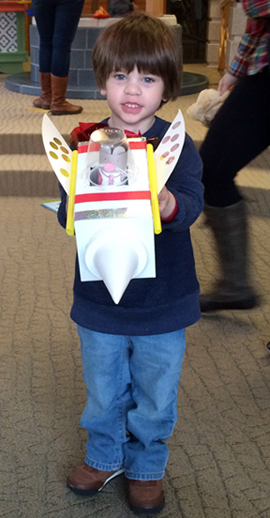
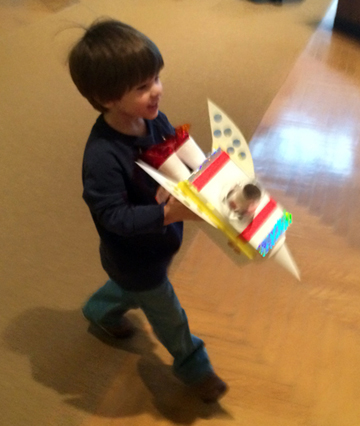
First, the mouse! Wrap a toilet paper tube with grey construction paper. Use extra bits of the paper to fashion some ears. The uniform from the template gets colored in, then wrapped around the tube as well. Draw the eyes and mouth with markers. If you’d like whiskers, tape 3 pieces of 1.75″ string to the tube. Then hot glue a pom-pom nose on top (you can also just draw the nose and whiskers with markers).
 Set the mouse aside for a moment. It’s time for the rocket!
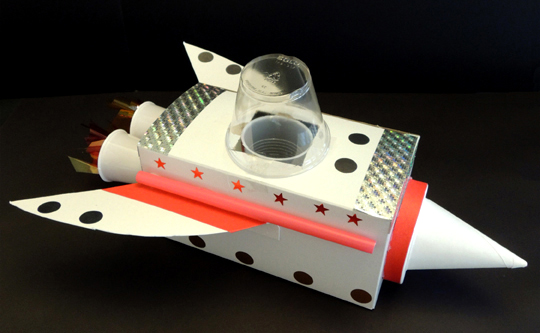 The trickiest part of constructing this rocket? Finding the right plastic cups for the “seat” and “cockpit.” The seat cup needs to hold mouse snugly, while still allowing it plenty of head room. I found some 5oz plastic cups that were just perfect.
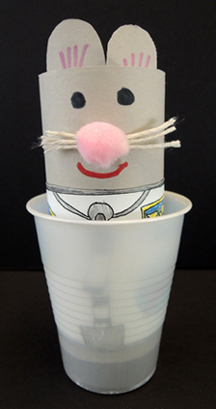 Use a box cutter to cut a square hole in the lid of your box (if you’re using a tissue box, flip the box over and cut the square in the bottom). You want the hole to be big enough to slide the cup into, but not so big that the cup is in danger of dropping through (mine was 2.5″ x 2.5″). Slide the cup into the hole, then secure it to the box with tape. Place your mouse in the cup.
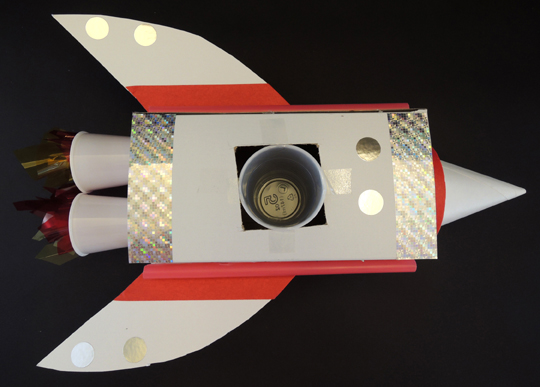 The cockpit cup needs to be wide enough to cover the hole, yet tall enough for your mouse’s ears. This 9oz clear plastic cocktail cup did the job very nicely.
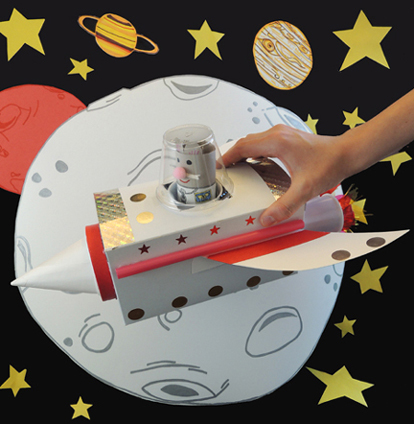
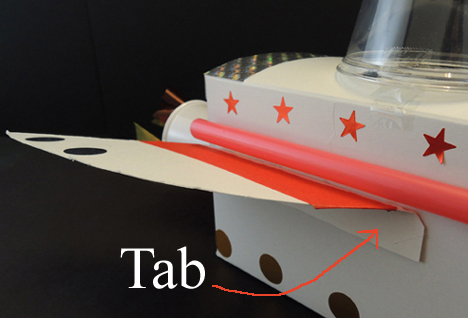
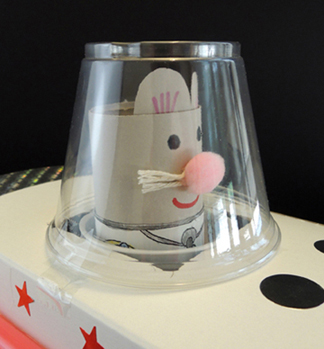 In the image above, you’ll notice that the cockpit cup is attached to the box with a single piece of tape. This is so you can open and close the hatch of the rocket. If you’d prefer your mouse to be sealed in, add more tape. Next, print and cut the wings template, fold along the dotted lines to create a tab, and attach the tab to the side of the box with tape or hot glue.
 To make the rocket’s boosters, twist squares of yellow and red cellophane together, then tape the twists inside a pair of plastic cups (I used white, 3oz plastic cups). Hot glue the cups to the back of the ship.
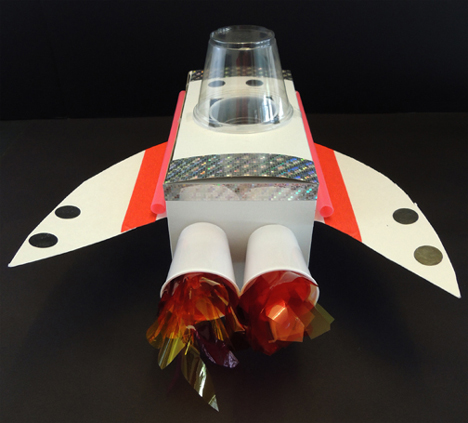 The nose of the rocket is a cone water cup. We hot glued our cones to unused, 3.5″ paper lids (the kind you get when you buy hot soup). But you can just go with the cone if you’d like.
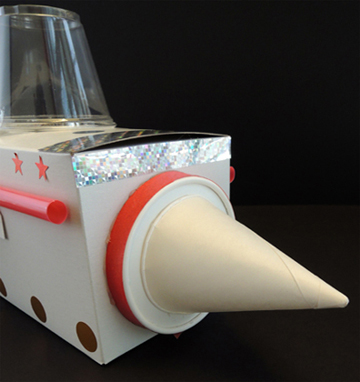 Decorate the ship with metallic dot stickers, color masking tape, and whatever else strikes your fancy (we flashed things up with silver holographic tape). Also, did you notice the awesome bubble tea straw pipes down the side of the rocket?
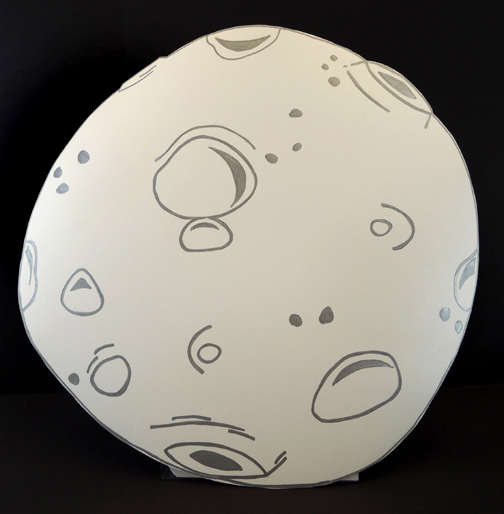
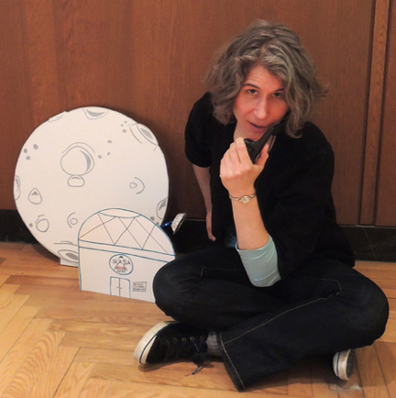
But wait, what about those red foil star stickers along the top of the rocket? Ahhhh! The star stickers were the prize for playing our Moon Mission game! Here’s how the game worked. Marissa made a big moon (22″ in diameter) out of poster board and a silver metallic marker (to make sure it stayed upright, I taped it to a plastic display stand – a book end might work too).
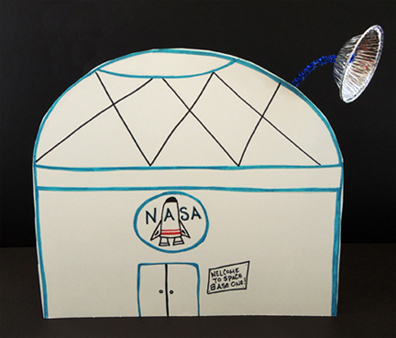
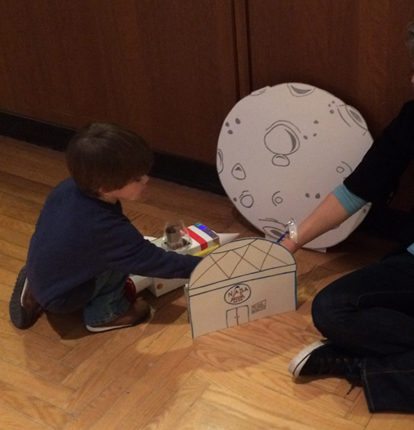
 Marissa also crafted this awesome Moon Base out of a tissue box, poster board, a sparkle stem, and a mini tin foil pie plate. Stashed inside the moon base were strips of foil star stickers, waiting to be claimed.
 Marissa and I equipped ourselves with a couple of walkie-talkies. Marissa was Mission Control, stationed in the story time area…
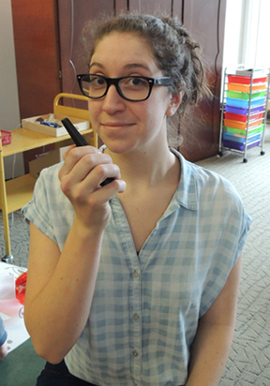 And I was at Moon Base, waaaaay across the library’s cavernous lobby. Marissa and I couldn’t see each other and definitely couldn’t hear each other without using walkie-talkies. This was intentional. We wanted the kids to feel like they were traveling far away.
The astronauts (and mousetronauts) lined up at Mission Control.
 One-by-one, they were treated to some “walkie-talkie space banter:”
Moon Base, do you read? This is Mission Control. Over.
Moon Base here, roger that Mission Control. Over.
Astronaut (kid’s name) is ready for take-off. Over.
Roger that. Good luck (kid’s name). See you on the moon! Over.
There would be a countdown and then the rocket would blast off out of the gallery, exit our library’s front door and enter the vast regions of outer space (i.e. the main library’s lobby)…
 The rocket would navigate the long journey across space…
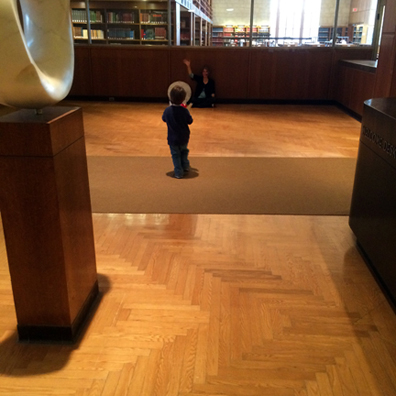 And successfully touchdown at Moon Base! The pilot could then could select some star stickers to further decorate his/her rocket. I radioed back that the mission had been a success, and requested that the next astronaut prepare for launch.
 Of course, while waiting for my next rocket to arrive, I couldn’t help treating Marissa to a few songs through the walkie-talkie: This is Ground Control to Major Tom…You’ve really made the graaade!
Because you know the folks at NASA sing in their headsets like that. And are Bowie fans.

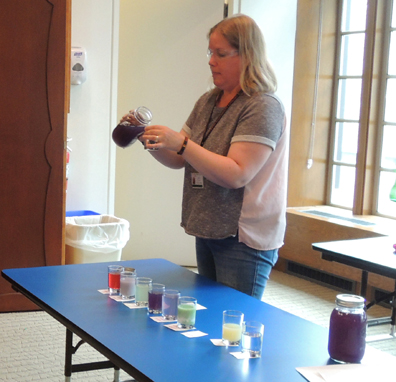 The red cabbage indicator demo is simple, inexpensive, but impactful. The experiment involves adding red cabbage juice to various household acid and bases, and then observing how the acids and bases change color according to their pH level. Katie used these instructions from ZLIFE Education’s website, and lectured about pH, acidity, and anthocyanin. Then, she upped the science magic with liquid nitrogen.
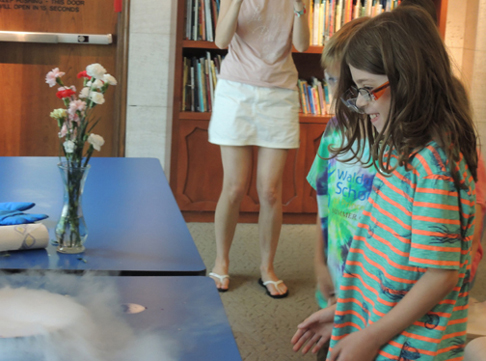
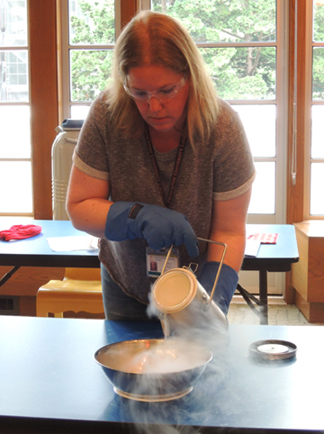 Wearing gloves, wielding protective eye gear, and armed with her knowledge of nitrogen-infused particles, Katie froze balloons, carnation flowers, and made clouds. It was AWESOME.
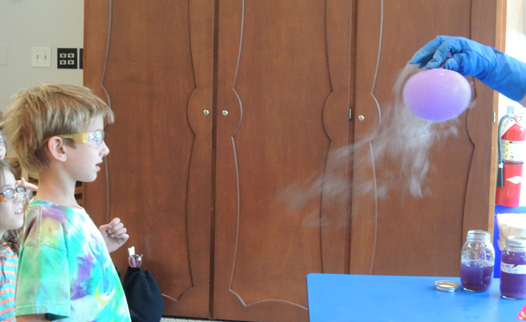
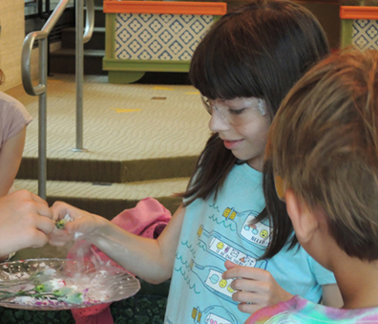
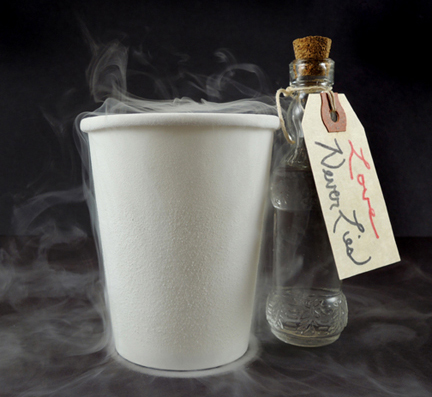
 The grand finale was mixing your very own bottle of “Love-Never-Lies” potion to take home. Katie purchased some 5″ vintage replica bottles with corks from Amazon (10 bottles cost $20). These are the same bottles we used with much success for our Sherlock Holmes escape room.
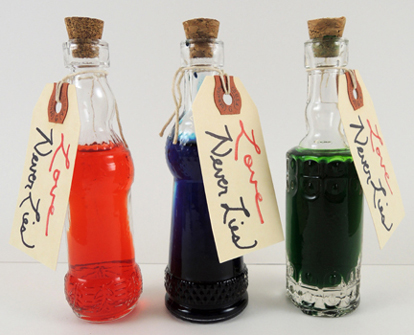 Katie filled the bottles with water, and then kids came forward to choose the color and amount of food dye for Katie to drip into the bottle. As the colors mixed, the kids predicted the final color of the potion.
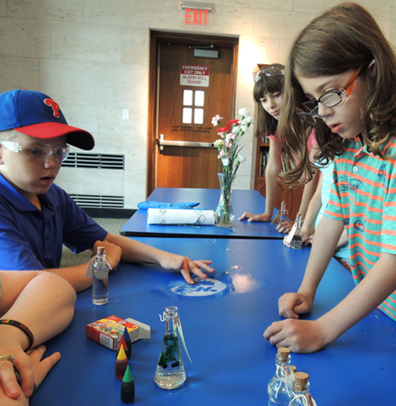 Cressida Cowell is also the author of the How to Train Your Dragon series. If you’d like to see what we did with that book, you’ll find the post here. And holy clouds, if you haven’t seen the trailer for How to Train Your Dragon 3, get thee to the internet!