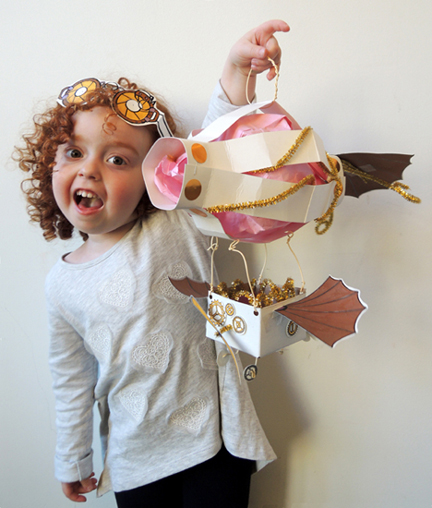
 It’s sky-high adventure at a our steampunk story time! These amazing airships with matching goggles are a cinch, thanks to our ready-made templates and a few sparkly extras!
We read Zephyr Takes Flight by Steve Light (Candlewick Press, 2012). Zephyr loves airplanes. She draws them, plays with them, and aims to fly one someday. But when an exuberant triple loop-de-loop spectacular ends with a crash in the living room, she is grounded in her room. That’s when Zephyr discovers a door behind her dresser that leads to the most wondrous place she’s ever seen. A hangar filled with paper, pens, plans, and amazing flying machines! She takes a test flight, but is forced to crash land in mountains inhabited by flying pigs. There she meets Rumbus, a little pig who can’t fly. Clever Zephyr builds Rumbus some wings, and in exchange, Rumbus and his family help her fly back home. She arrives just in time to hear her parents calling her for a triple-hug, triple-pancake, spectacular.
You’ll need:
- 1 rectangle of white poster board (approximately 8.5″ x 11″)
- 1 paper bag
- 1 small box (mine was 2″ x 3″ x 3″)
- 4 pieces of twisteez wire for the airship’s basket (approximately 5.5″ long)
- 1 piece of twisteez wire for the airship’s carrying loop (approximately 9″ long)
- 1 piece of twisteez wire for goggle strap (approximately 17″ long)
- Templates, printed on 8.5″ x 11″ white card stock (more on these later!)
- A selection of sparkle stems
- A selection of metallic dot stickers
- Hole punch, scissors, tape, stapler, glue for construction
- Metallic markers for decorating
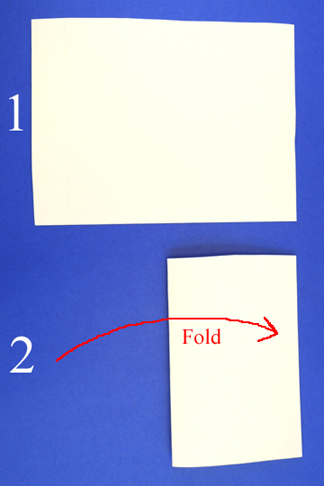
We’ll begin with the poster board framework that houses your airship’s balloon! Start with an 8.5″ x 11″ piece of poster board in landscape orientation. Fold the poster board from left to right.
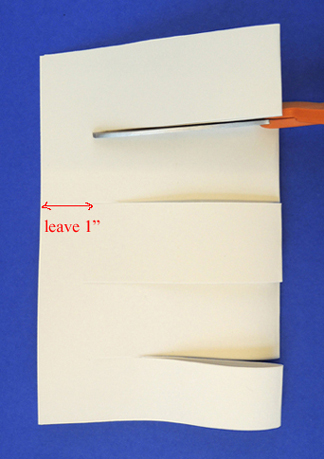
 Starting from the folded end, make four, 4.25″ long cuts. Each cut should end about an inch from the end of the paper. These will form the “struts” of your airship’s framework.
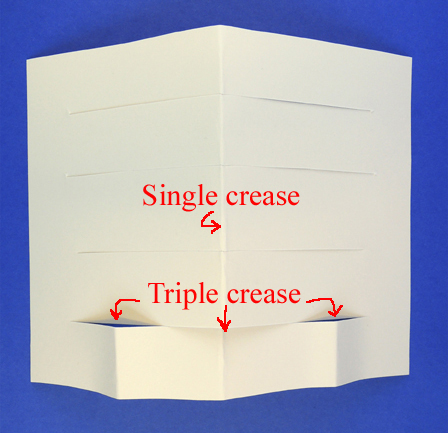
 Unfold the poster board and flip it over. Currently, your struts have 1 central crease. You’re going to need to add 2 more creases on each strut (one on either side of the central crease). The new creases should be about 2.5″ away from the central crease.
Below you can see the poster board with 1 central crease. The strut at the very bottom, however, has 3 creases.
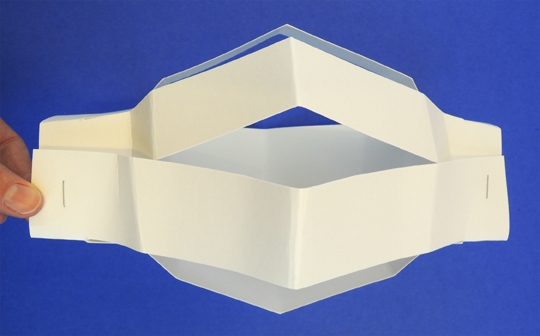
 Crease all the struts, then circle the poster board and staple both ends. Your airship framework should now look like this:
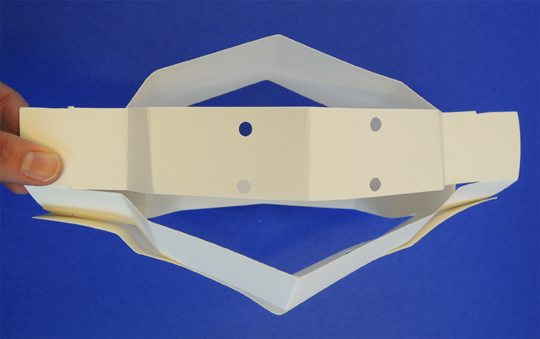
 Punch four holes in one of the struts. This is where your airship’s basket will attach later.
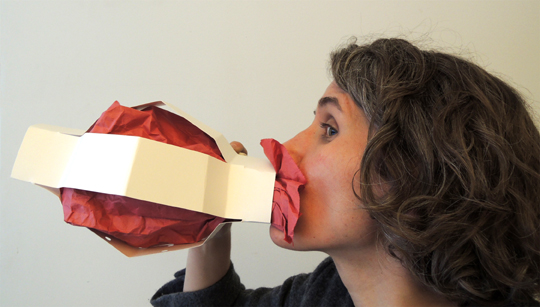
 Now for the balloon! Open, then crumble, a paper bag. The more wrinkly the bag, the better it looks! Keeping the bag crumpled, slip it between the struts. Gently fluff the bag to fill out the framework.
Originally, I asked the kids to pull the bag apart with their fingers. But one mom came up with this clever maneuver. She pulled the opening of the bag through one end of the framework and briskly blew into the bag to inflate it. Genius!
 I have to say, that’s got to be the weirdest blog photo yet. And that’s saying a lot. Come to think of it, doesn’t it look a bit like a steampunk asthma inhaler?
Time to attach the basket! If necessary, cut the lid and tabs off a small box, then punch a hole in each corner. Secure four, 5.5″ pieces of twisteez wire to the holes. Attach the other ends to the holes in the strut.
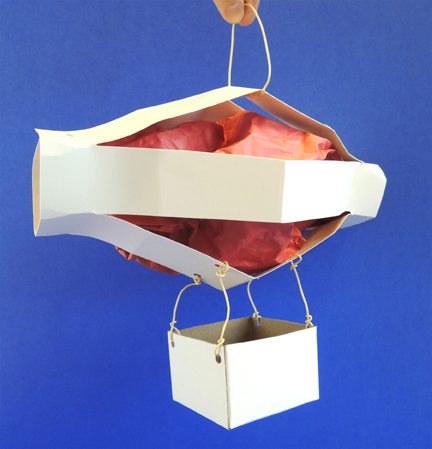 You’ll notice that the airship in the above photo has a hanging loop at the top. That’s a 9″ piece of twisteez wire circled around the top strut. Secure the loop to the underside of the strut with tape.
At this point, your ship is done and it’s time to decorate! There are tons of things to choose from in the templates below:
Bird wings, butterflies, gears template
Gears, little wings template
Big wings, little wings template
Medium wings and rudders template
Goggle template
Assorted propellers
Originally, the templates were created by artist Aliisa Lee for a steampunk hat craft (except the assorted propellers, airship wing and rudders – I, ahem, drew those chunky little things). We reused the templates for this miraculous mechanism. Now we’re using them for airships. It just goes to show the elegance and versatility that is steampunk.
To allow kids lots of creative time, we prepped the airship frameworks in advance. We also cut out various items from the templates and stuck them in individual buckets and baskets for easy browsing.
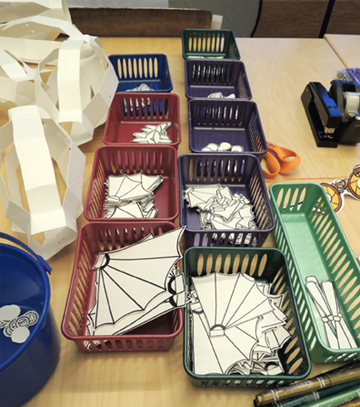 If you’re using a bucket, it helps to stick a little picture of the item on the front, for kids who are too short to lean over and peer inside.
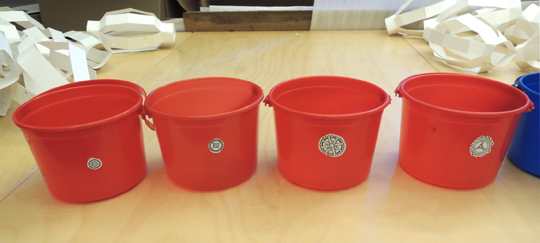 These buckets are great for organizing art supplies. I found them in the bulk candy section of Party City when I was researching red buckets for this Kate Wetherall project. As Kate has proven time and time again, they are super handy! We also offered sparkle stems, metallic markers, extra twisteez wire, and metallic dot stickers for a little bling.
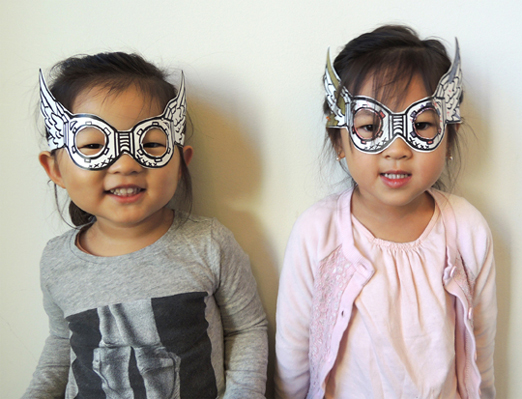
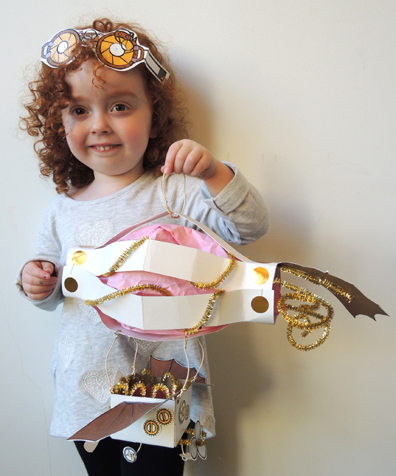 To make goggles, simply color a pair from the template, punch holes on the ends, and knot a 17″ piece of twisteez wire through both holes. Adjust for size, and perch the goggles on top of your head like a headband. Some kids, however, cut holes in their goggle’s eye pieces, which were incredibly adorable. Look at this duo!